
Level 273
HARDHow to solve Sand Loop level 273? Get instant solution for Sand Loop 273 with our step by step solution & video walkthrough. Sand Loop 273 tips and guide.
Play Sand Loop Now
Experience the puzzle challenge firsthand
Game Screenshots
Sand Loop Level Guides
Level 273 Overview: The Orange Bear Strategy
Level 273, commonly referred to as "The Orange Bear," presents a deceptive challenge that shifts the gameplay focus from mere reflexes to logistical management. While the target image—a pixelated orange bear sitting in a field—appears cute and simple, the underlying tray mechanics are designed to test your inventory management skills. Unlike previous levels where you could rely on rapid tapping, this stage requires a cadenced approach to handle the specific "bottlenecks" created by the supply tray.
The primary difficulty in this stage stems from the "Horizontal Rope Bond" mechanic coupled with a central column of Mystery blocks. These elements work together to restrict your available conveyor belt slots, creating frequent traffic jams that can stall your progress. The level is not about speed; it is about maintaining a rhythm. If you treat this like a standard tapping game, you will fail. You must treat it like a puzzle where every move has a reaction.
The statistical breakdown of the level is asymmetrical. The Green background and Orange body constitute approximately 70% of the total sand volume, but the cups required to fill these areas are the easiest to access. The remaining 30%—the Red details (ears, snout, feet) and White/Yellow flower accents—are buried under layers of ropes and mystery blocks. Successfully navigating Level 273 depends entirely on your ability to prioritize this difficult 30% without letting the easy 70% clog your machine.
The Pixel Art Target
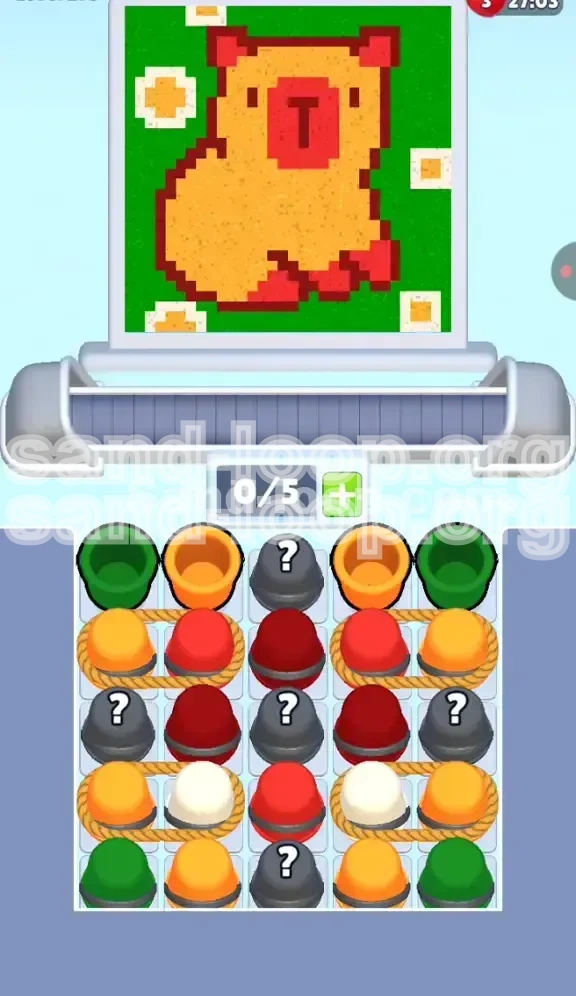
Your objective is to fill a large, pixelated Bear (resembling a hamster) sitting on a grassy field.
The image is composed of large, contiguous blocks of color, which is helpful. You don't need to worry about intricate details or thin lines that might overflow.
The Bear's body is a single large Orange shape. The Grass is a massive Green background. The complexity lies entirely in the small features: the ears, the snout, the feet, and the four corner flowers.
Because the main shapes are so large, you can fill them gradually over time. Your mental focus should be on the small Red and White areas, as these are the "checkpoints" that determine if you win or lose.
The Inventory Constraint
The most critical mechanic in this level is the Conveyor Belt Capacity limit, which is capped at 5 slots.
In most levels, 5 slots feel spacious. In Level 273, the effective capacity is often reduced to 3 or 4 slots due to the "Roped Pairs."
A Roped Pair (two cups tied together horizontally) acts as a single heavy object that takes up 2 slots instantly upon release.
If you attempt to grab a Roped Pair when your belt has 4 items, the game will block you, or worse, trigger an overflow state that wastes precious seconds. You must constantly maintain "Open Slots" (ideally 2 empty slots) to accommodate these paired items.
The Mystery Block Risk
Running down the center of the tray is a vertical column of Mystery Blocks (marked with a question mark).
These blocks are wildcards. They can dispense essential colors (like Red for the nose) or nuisance colors (like Green when the grass is already full).
The danger of the Mystery Block is unpredictability. Tapping it releases a cup that immediately occupies a slot. If you aren't ready for the color it produces, it becomes "dead weight" on the belt, occupying space that you needed for a Roped Pair.
You must have a contingency plan for every Mystery Block tap. Ask yourself: "If this turns out to be White, do I have room for it?"
The Rope Mechanic Explained
The ropes bind two specific colors together. In this level, the ropes bind Yellow to Red and White to Red.
This is a strategic trap. You cannot simply take the Red sand you need for the bear's ears; you must also accept the Yellow sand for the flowers simultaneously.
This forces you to work on two different parts of the painting at once. You cannot focus solely on the bear; you must be ready to fill the flowers the moment the Yellow cup arrives.
Understanding this symbiosis is key. Don't view the Yellow cup as an obstacle; view it as the "key" that unlocks the Red cup you actually want.
Winning Conditions
To complete the level, you must reach 100% fill accuracy on the canvas.
There is no time limit to worry about in the traditional sense, but every second of delay counts toward your overall rating.
The "Game Over" state usually triggers when the conveyor belt becomes completely backed up, preventing you from accessing the cups you need at the bottom of the tray.
Therefore, your win condition is not just "filling the bear," but "keeping the belt moving." A moving belt is a winning belt. A stopped belt is a losing belt.
Primary Objectives for Level 273
Before you even tap the first cup, you need a clear battle plan. Level 273 is a war of attrition. If you start tapping randomly, you will hit a wall within 30 seconds. The following objectives outline the path to victory. By adhering to these goals, you ensure that your resources (belt space) are always available when the critical moments arrive.
Objective 1: Clear the Top Row Immediately
The first row of the tray contains your most accessible resources: Green, Orange, and a central Mystery Cup.
Your first goal is to completely eliminate this row. Do not leave a single Green cup sitting there.
Why? Because as long as the top row exists, it blocks the "Roped Rows" beneath it from sliding forward. You need to expose the Roped Pairs as early as possible to start processing them.
Think of the top row as the "lid" on a jar. You must pry it open to get to the good stuff inside.
Objective 2: Manage Belt Capacity Aggressively
This is your most important ongoing objective. You must maintain a "Safe Zone" on your belt.
Never let your belt fill up past 3/5 slots if you can help it. Ideally, keep it at 2/5 or lower.
Why? Because when the Roped Pairs arrive, they will demand 2 slots instantly. If you are sitting at 4/5 capacity, you are frozen. You cannot act.
Make "Emptying the Belt" a constant priority. If you see a cup moving toward the canvas, watch it until it disappears, rather than immediately looking for the next tap.
Objective 3: Unlock the Red Sand
The Red sand is the bottleneck of this level. It is required for the Bear's Snout, Ears, and Feet.
However, the Red sand is trapped behind the Roped Pairs and the Mystery Blocks.
Your objective is to maneuver the tray to free these Red cups. This means tapping the Roped Pairs (Yellow+Red) even if you don't strictly need the Yellow yet, just to get the Red into the system.
You are essentially "over-collecting" Yellow to mine for Red. Accept that your flower corners might get overfilled temporarily in exchange for freeing up the critical Red sand.
Objective 4: Process the Mystery Column
The central column of Mystery Cups is a ticking time bomb. You cannot ignore it.
Your goal is to systematically drain this column. You need to tap the Mystery cups to clear the physical space in the tray, but you need to time the taps so that the resulting sand color doesn't clog your belt.
Strategy: Tap the Mystery cup only when you have a specific target open on the canvas. For example, if the Bear's body is partially empty, and you tap a Mystery cup hoping for Orange, that's a calculated risk. If it turns out to be Orange, great. If it's Green, you still have space for it.
Objective 5: Finish the Flowers Last
The four corners of the image contain small White and Yellow flowers.
These are the lowest priority items. They are small, they require few grains, and the cups for them (White) are buried at the very bottom of the tray (Row 4).
Do not actively try to fill the flowers until the Bear is 90% done. If you try to fill them early, you will waste precious belt space on White cups that could have waited.
Let the White and Yellow cups ride the belt as "buffer" items, but prioritize pouring Orange and Red first.
Step-by-Step Walkthrough
This section provides the exact sequence of moves required to beat Level 273. Follow these steps in order. Do not skip ahead. The logic here builds upon itself—each action prepares the tray for the next.
Phase 1: The Initial Break (0-10 Seconds)
The game begins with the tray fully loaded. Your opening moves are mechanical and precise.
Step 1: Locate the Green cups on the far left and right edges of the top row. Tap them immediately. These start filling the vast grass background.
Step 2: Locate the Orange cups in the top row, usually positioned just inside the Green cups. Tap these next. This begins the Bear's body.
Step 3: Tap the central Mystery Cup in the top row. Since your belt is mostly empty, whatever color comes out (likely Green or Orange) will find a home easily.
Step 4: Pause. Wait for these first 4-5 cups to move down the belt and pour onto the canvas. Do not tap anything else until you see slots opening up.
Phase 2: The First Rope Layer (10-25 Seconds)
Once the top row clears, the second row slides into place. Here you will see the first obstacle.
Step 1: Observe the new row. You will see a Yellow/Red Roped Pair on the left and a Red/Yellow Roped Pair on the right. In the center, there is likely a single Red cup or a Mystery cup.
Step 2: Check your belt capacity. Ensure you have at least 2 empty slots. If your belt is full, wait for a cup to pour.
Step 3: Tap the Left Yellow/Red Pair. Do not tap the right side yet.
Step 4: Watch the belt carefully. The Yellow cup will likely go to the flowers (if available) or queue. The Red cup will move toward the Bear's ear. Ensure the Red finds its mark. If it gets stuck, you may need to temporarily tap a Green cup to clear a path.
Phase 3: The Mystery Core (25-45 Seconds)
With the first ropes cleared, the central column of Mystery Blocks becomes your focus. This is the most dangerous part of the level.
Step 1: Look at the center of the tray. You will see a stack of Mystery cups.
Step 2: Assess your canvas. Is the Bear's body (Orange) mostly full? Is the Grass (Green) mostly full? If yes, you have limited landing spots.
Step 3: Tap the Mystery Cup at the bottom of the center stack. Do this only when you have 1 or 2 empty slots.
Step 4: React to the result. If it reveals Red, celebrate and guide it to the nose/feet. If it reveals White, you are now in "Hold Mode." You must carry that White cup until a flower spot opens up. Do not let it clog the belt.
Phase 4: Digging for the Details (45-60 Seconds)
At this stage, the main canvas areas (Grass and Body) are likely 80% complete. You are hunting for the final 20%.
Step 1: Look for the Solitary Red Cups that may have been hiding behind the Mystery blocks. Tap these whenever possible to finish the Bear's ears and snout.
Step 2: You will likely have a backlog of cups on the belt—perhaps some Greens, Oranges, and Yellows. You need to clear these to make room for the final difficult items.
Step 3: Tap the Right Yellow/Red Pair (from the second row) if you haven't already. Treat it the same as the first pair: ensure 2 slots are free before tapping.
Step 4: Focus exclusively on getting the Red sand onto the canvas. If a flower spot opens up, use the Yellow sand to fill it. This clears the Yellow cup from the belt.
Phase 5: The Final Cleanup (60+ Seconds)
The tray is now shallow, but the bottom row contains the final White/Red roped pairs.
Step 1: Identify the White/Red Roped Pairs in the bottom row (Row 4). These are your final obstacles.
Step 2: Clear your belt as much as possible. You want a nearly empty belt for this.
Step 3: Tap the White/Red Pair. The White will go to the final flower spots; the Red will finish the Bear's feet.
Step 4: If you get a "Traffic Jam" where the belt is full but the sand isn't pouring, stop tapping entirely. Wait 5-10 seconds for the physics engine to catch up and pour the sand. Once the belt moves, tap the final remaining cups.
Color Processing Order
Understanding the hierarchy of colors is vital for Level 273. Not all colors are created equal. Some colors are "bulk fillers" while others are "precision tools." If you process the colors in the wrong order (e.g., trying to finish the flowers before the bear), you will run out of belt space and lose. Below is the strict priority order you should follow.
Tier 1: The Bulk Fillers (Green & Orange)
Green (Background): This is the lowest priority in terms of difficulty, but the highest volume. The Green cups are abundant and accessible.
Orange (Bear Body): Similar to Green, this is a bulk filler. It occupies a large area of the canvas.
Strategy: Process these colors first and whenever you have a spare slot. They are your "bread and butter." They fill the canvas quickly, which opens up more landing spots for the tricky colors later. Don't shy away from tapping Green or Orange even if the canvas is mostly full; the overflow is manageable compared to a clogged belt.
Tier 2: The Critical Bottleneck (Red)
Red (Features): This is the most important color in the level. It controls the Bear's identity.
Why it's hard: Red is scarce. It is tied up in ropes and hidden in mystery blocks. You cannot get Red easily.
Strategy: When you see a Red cup, it becomes your #1 priority. Drop whatever you are doing. If you have a Yellow cup on the belt, let it wait. If you have a White cup, let it wait. Ensure the Red cup has a clear path to the Bear's nose, ears, or feet. You must aggressively mine for Red by tapping the Roped Pairs.
Tier 3: The Symbiotic Color (Yellow)
Yellow (Flowers): This color is a "package deal." It comes attached to Red.
Why it's tricky: You don't need a lot of Yellow, but you get forced to take it.
Strategy: Treat Yellow as "change"—you keep it because you need it for small purchases, but you don't want a pocket full of it. Pour Yellow into the flower corners only when you have a spare moment or when you need to clear a belt slot. Do not prioritize Yellow over Red, but do not ignore it, or it will clog your belt.
Tier 4: The Final Polish (White)
White (Flowers): The rarest and least needed color.
Why it's last: It is buried at the bottom of the tray (Row 4). You physically cannot access it until you have cleared the upper rows.
Strategy: Ignore White until the very end. The flower corners can accept Yellow sand in the meantime, so they aren't "empty." Only when the Bear is fully finished and the belt is under control should you tap the White/Red roped pairs to release the White sand for the final flower details.
Key Tips & Common Mistakes
Even with a strategy, small errors can compound into a loss. This section highlights the specific pitfalls that trap players in Level 273. By memorizing these "Do's and Don'ts," you can navigate the level with confidence.
Common Mistake: The "Full Belt" Tap
The Error: Players see a cup they want (like a Red cup) and tap it immediately, regardless of their current belt status.
The Consequence: If your belt has 4 cups and you tap a Roped Pair (which takes 2 slots), the game often glitches or stalls. The new cups hover above the belt, or the game prevents the tap entirely, leaving you frustrated while the timer ticks.
The Fix: Adopt the "Count to Five" rule. Before every tap, quickly count the items on your belt. If the number is 4 or 5, stop. Wait for a pour. Only tap when you are at 3/5 or lower.
Key Tip: Pre-Planning Your Landing Zones
The Concept: Sand doesn't teleport; it travels. If you tap a Red cup but the Bear's ears are already "mostly" full, the Red sand might travel to the ear, realize it's full, and then bounce around looking for another red spot (like the feet).
The Strategy: Before tapping a high-value cup, look at the canvas. Is the target area (e.g., the snout) completely empty? Or is it 90% full?
If it's 90% full, the sand will take longer to settle. It's better to fill a completely empty area first to clear the cup off the belt faster. Prioritize the "emptiest" zones of the matching color.
Common Mistake: Ignoring the Mystery Blocks
The Error: Players get comfortable tapping the known Green and Orange cups and leave the central Mystery column alone.
The Consequence: The Mystery cups act as a physical plug. If you don't clear them, the rows below them (containing the White/Red pairs) cannot slide up. You will eventually run out of moves on the top rows and be stuck with a belt full of useless colors while the winning Red sand remains trapped under the Mystery blocks.
The Fix: You must tap the Mystery blocks to cycle the tray. Treat them as a mandatory toll fee to pay to progress to the next row.
Key Tip: Using "Dead Time" Wisely
The Situation: Sometimes, you have no good taps available. The top row is empty, the Roped Pair needs 2 slots (but you only have 1), and the Mystery cup is risky.
The Strategy: Use this "Dead Time" to analyze the canvas. Look for spots where you might have overfilled (spilled sand). Look for small pixels you missed.
Do not tap a "safe" cup (like Green) just to be doing something. It's better to wait 5 seconds for a slot to open up for the Roped Pair than to clutter your belt with a Green cup you didn't need. Patience wins levels.
Stuck Solutions & Speed Run Tips
So, what happens if the worst occurs? Your belt is jammed, the Bear is only half-finished, and the tray isn't giving you what you need. This section covers emergency procedures to salvage a run, as well as advanced techniques for players aiming for a 3-Star speed run.
Stuck Solution: The Emergency Belt Flush
The Scenario: Your belt is at 5/5 capacity. It is locked. Nothing is moving. The sand isn't pouring.
The Diagnosis: You likely have a "traffic jam" where cups are waiting for specific spots on the canvas that are already full, or they are blocked by other cups.
The Fix: STOP TAPPING. Put your mouse/finger down. Watch the belt.
Wait for one cup to successfully pour. Even a single grain of sand leaving a cup can trigger a chain reaction. Once you see one slot open, you have a split second to tap the cup that has been waiting the longest. Usually, clearing one bottleneck releases the pressure on the entire system.
Stuck Solution: The "Wrong Color" Blockage
The Scenario: You need Red for the nose, but the only cup available is a Mystery cup that just revealed White. You don't need White. The White cup is now taking up a slot, blocking you from tapping the Red cup behind it.
The Fix: You must force the White sand into the canvas. Even if the flowers are 95% full, tap that White cup. Get it onto the belt. Guide it to the flower corner. Even if it overfills slightly, it's better to have the White cup gone (freeing up the tray) than to have it clogging your inventory. A small overflow penalty is better than a stalled level.
Speed Run Tip: The "Double Tap" Roped Strategy
The Technique: Advanced players know that Roped Pairs are the biggest time sink.
The Strategy: If you have exactly 3 empty slots on your belt, and you see two Roped Pairs available (e.g., a Yellow/Red and a White/Red), you can tap them both in rapid succession.
3 slots - (2 for first pair) = 1 slot remaining. >1 slot - (2 for second pair) = -1 slot.
This sounds impossible, but if you tap them instantly, the game often queues them. However, the safer speed run tip is to pre-load your belt with single cups (Green/Orange) so that when the Roped Pairs appear, you have plenty of space to dump them and keep the tray moving fast. Speed is not about tapping fast; it's about never letting the belt stop.
Speed Run Tip: Ignoring Perfection
The Mindset: To get a fast time, you must abandon perfectionism.
The Action: Do not try to fill the Bear's pixel edges perfectly. If the sand spills slightly into the grass, or the grass spills into the bear, let it happen.
Correcting these tiny spills takes seconds. In a speed run, those seconds matter. Focus on getting the volume of sand into the general area. The game is forgiving about edges; use that to your advantage. Pour fast, pour messy, and clear the level.