
Level 280
HARDHow to solve Sand Loop level 280? Get instant solution for Sand Loop 280 with our step by step solution & video walkthrough. Sand Loop 280 tips and guide.
Play Sand Loop Now
Experience the puzzle challenge firsthand
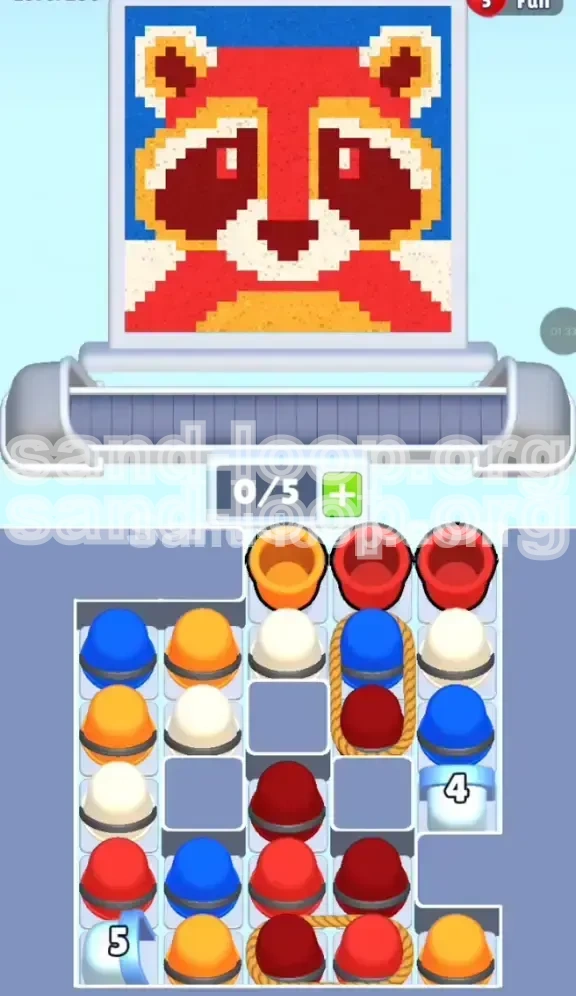
Game Screenshots
Sand Loop Level Guides
Level Overview: The "Cute but Deadly" Red Panda Challenge
Sand Loop Level 280 presents a deceptive challenge. While the objective appears to be a simple pixel art reconstruction of a Red Panda (often mistaken for a raccoon due to the color palette), the underlying mechanics are strictly rooted in logic and inventory management. Unlike earlier levels where players could spam taps to clear the tray, Level 280 requires a calculated approach to "Rope Constraints" and "Ice Block" mechanics.
The difficulty spike in this stage comes from the limited 5-slot conveyor belt capacity. The level is designed to force the player into a "gridlock" scenario if colors are processed in the wrong order. The tray is a mix of loose cups and tethered bundles, meaning one wrong pull can fill your belt with unusable colors (like Sky Blue) while you desperately need Rust Red for the main body. Success in this stage depends less on reaction speed and more on recognizing the priority of color "weights" and managing the physical space on your conveyor track.
The Visual Layout and Mechanics
The game board is divided into two main visual zones: the Canvas at the top (where the Panda is formed) and the Tray at the bottom (where cups reside). The Tray is heavily obstructed by Ice Blocks labeled with numbers (specifically '5' and '4'). These blocks act as gates, preventing cups from sliding naturally. You must clear adjacent cups a specific number of times to shatter these blocks. Furthermore, the tray features two distinct Rope configurations—a vertical tether on the right and a horizontal bind at the bottom—which combine two colors into a single physical unit, complicating your sorting strategy.
The Conveyor Belt Limit
The most critical mechanic in Level 280 is the 5-slot limit on your conveyor belt. You cannot simply pull every cup you see. If you pull a rope bundle that contains a Blue cup (for the background) before the background is accessible, that Blue cup will take up a slot on your belt. It will cycle around endlessly, refusing to pour because the canvas isn't ready for it, effectively blocking you from picking up other cups. Managing this "dead inventory" is the core challenge of the level.
Color Distribution Analysis
The pixel art is composed of five distinct colors with varying "weights" (surface area coverage). Understanding this distribution is vital for planning.
- Rust Red (40%): The dominant color for the head and body.
- Deep Maroon (15%): Critical for the eye mask and nose definition.
- Sky Blue (30%): The background, but mostly buried.
- Cream/White (5%): High contrast details for snout and inner ears.
- Mustard Yellow (10%): Chest patch and accents.
Level Objectives and Strategy
Before tapping a single cup, you must internalize the winning strategy for Level 280. Your primary objective is not just to fill the canvas, but to keep your conveyor belt fluid. A stalled belt is the primary cause of failure here. The strategy revolves around "Front-Loading" your work—dealing with the complex, roped bundles early while you have empty slots, rather than waiting until your belt is half-full of single cups.
Primary Goal: Clear the Roped Bundles
The vertical rope on the right side (Blue/Maroon) is the biggest threat. It sits high in the tray, tempting you to pull it. However, pulling it introduces two colors immediately. Your objective is to time this pull so that the Maroon is used instantly for the face, and the Blue cup can "ride" the belt without clogging your system until the background is ready. You must clear this bundle before the tray becomes too crowded.
Secondary Goal: Shatter the Ice Blocks
The '5' Ice Block on the left and the '4' Ice Block on the right act as anchors. While they stand, the bottom rows of cups are static. Your secondary objective is to chip away at the blocks by clearing the cups resting on top of them. Prioritize clearing the '5' block first, as it holds a significant amount of Rust Red and Cream cups needed for the Panda's face construction.
The "Subject First" Protocol
Unlike standard painting levels where you might do the background first, Level 280 forces you to paint the Subject (the Panda) first. The Sky Blue cups required for the background are trapped deep in the tray or tied up in ropes. Attempting to clear Blue first is impossible. You must commit 100% of your early moves to filling in the Rust Red, Maroon, and Cream areas. Only when the face and body are substantially complete should you worry about the Blue background.
Inventory Management
Always keep an eye on the 0/5 counter. A common mistake is pulling 5 single cups of Red immediately. While this fills the body fast, it leaves no room for the roped bundles. A good rule of thumb is to keep 2 slots open at all times once you enter the mid-game. This buffer allows you to absorb the double-cup penalty from cutting the ropes without getting stuck.
Step-by-Step Walkthrough Guide
This section provides a linear, actionable path to beating Level 280. Follow these steps in order to minimize the risk of a jammed conveyor belt.
Phase 1: The Top Layer Clear (Moves 1-10)
The beginning of the level is the only time you have complete freedom of movement. The top right quadrant usually contains loose Yellow and Red cups.
- Action 1: Tap the top-most Mustard Yellow cup. This is for the chest patch. Pour it immediately.
- Action 2: Tap the adjacent Rust Red cups. Focus on filling the top of the head and the ears.
- Action 3: Avoid the Right-Side Rope. Do not tap the vertical Blue/Maroon rope yet. You need to establish flow first.
- Action 4: Clear the top right quadrant completely so that the cups underneath can slide up into the playable zone.
Phase 2: The Left Flank and Ice Breaking
Once the top right is cleared, shift focus to the left side where the '5' Ice Block resides.
- Action 1: Identify the stack of cups sitting on the '5' block. It usually consists of Blue, Orange, and Cream.
- Action 2: Carefully tap the Blue cups *only* if you have a clear path to the background. If the Panda's head isn't finished, the Blue will jam your belt. It is often safer to ignore Blue here and focus on Orange.
- Action 3: Tap the Cream/White cups. These are high priority. You need them for the snout area before the Red fur overruns it.
- Action 4: Watch the '5' counter. Every cup cleared from this stack lowers the number. Your goal is to reach 0.
Phase 3: The Vertical Rope Dilemma
This is the critical turning point of the level. You will run out of easy moves and must confront the roped bundle on the right.
- Action 1: Check your slots. Ensure you have at least 2 empty slots (e.g., 3/5 or 2/5 filled).
- Action 2: Tap the Vertical Rope. This releases a Maroon cup and a Blue cup simultaneously.
- Action 3: The Maroon cup will likely pour immediately into the eye mask area. Let it happen.
- Action 4: The Blue cup will enter the conveyor. Do not panic. It will loop around. Do not pull more cups until that Blue cup finds a home or the background opens up.
Phase 4: Cracking the Ice and Cleanup
With the ropes cut and the top cleared, the Ice Blocks should be nearing zero.
- Action 1: Finish off the '5' and '4' blocks. This releases the bottom tier of cups.
- Action 2: When the '4' block breaks, it usually releases a vital White cup. Use this for the final ear details.
- Action 3: The '5' block often releases a cluster of Red. Use this to finish the body.
- Action 4: Now that the body is done, the background is your only remaining focus. Pull any remaining Blue cups.
Color Order and Processing Logic
The specific order in which you process colors is the mathematical solution to this puzzle. Processing out of order is what leads to losses. Below is the recommended hierarchy of operations for Level 280.
1. High-Contrast Colors (Cream & Maroon)
Always prioritize Cream and Maroon over Rust Red. Why? Because Rust Red is the "filler." If you accidentally spill Red onto a White patch, it looks messy, but it's often recoverable. However, if you fill the eye mask with Rust Red because you were saving your Maroon, you cannot easily fix the details later. The Maroon defines the face; get it placed early and precisely.
2. The Primary Body (Rust Red)
Once the face details are mapped out with Maroon and Cream, switch to mass-producing Rust Red. This is your "bread and butter." Use these cups to fill the bulk of the head and the lower body. This phase is safe and low-risk, as the Red areas are large and forgiving of slight pouring inaccuracies.
3. The Background (Sky Blue)
Sky Blue is strictly last. The reason is twofold: first, the Blue cups are physically blocked by Ice and Ropes. Second, pouring Blue while you are still working on the face creates a visual distraction. It is much easier to see where you need to pour Red when the whole background is empty grey, rather than a mix of filled Blue and empty spaces.
4. Managing the Roped Colors
The ropes force a specific pairing: Blue with Maroon. When you pull this pair, you are forced to deal with the Blue immediately. Since Blue is a "late game" color and Maroon is an "early game" color, the rope creates a conflict. The solution is to pull the rope when the Maroon is immediately useful (for the eyes), forcing the Blue to take a "lap" on the conveyor belt until you are ready for it.
Key Tips, Common Mistakes, and Solutions
To master Level 280, you need to anticipate problems before they happen. This section outlines the most frequent pitfalls players encounter and how to solve them using logic and timing.
Common Mistake: The Conveyor Jam
The Scenario: You have 5 cups on the belt. None of them are pouring. The game seems stuck.
The Cause: You likely have a cup on the belt that matches a tiny, already-filled (or mostly filled) area, but the game physics won't let it pour because the angle is wrong, OR you have a cup for a background area that is currently blocked by a foreground cup.
The Fix: Wait for the conveyor to make a full rotation. Sometimes the cup needs to align perfectly with a narrow pixel gap. If it doesn't pour after a full loop, you may be "Soft Locked" and need to restart, but usually, waiting 5-10 seconds allows the physics engine to settle the cup into the correct spot.
Key Tip: The "Splash" Effect
In Sand Loop, sand doesn't just pour in a straight line; it splashes. In Level 280, this is dangerous. When filling the large Red areas, do not pour at maximum speed right up against the White snout. The splash particles will cross the boundary and ruin the clean White line. Leave a 2-pixel buffer zone and let the sand settle naturally, or tilt the pouring angle away from sensitive areas.
Stuck Solution: Dealing with the Horizontal Rope
The Problem: The horizontal rope at the bottom (Maroon + Red) is often the last thing remaining, but it won't pour.
Why: It is likely stuck behind the Ice Block debris or other cups.
What to do: You need to clear the vertical space above it. Ensure the '5' block is completely gone. Once the bottom row is free, tap the rope. Since this bundle contains two "Subject" colors (Red and Maroon), it is safe to pull at almost any time during the mid-game, unlike the Blue rope.
Speed Run Strategy
If you are aiming for a 3-Star score or a fast time, do not wait for cups to finish pouring before tapping the next one. While a cup is draining, immediately look at the tray and identify your next target. You can queue up your next tap while the current animation is playing. This "buffering" of actions saves seconds. However, never queue a tap that involves a Rope Bundle unless you are 100% sure of your slot count.