
Level 320
HARDHow to solve Sand Loop level 320? Get instant solution for Sand Loop 320 with our step by step solution & video walkthrough. Sand Loop 320 tips and guide.
Play Sand Loop Now
Experience the puzzle challenge firsthand
Game Screenshots
Sand Loop Level Guides
Sand Loop Level 320: The Floral Garden Master Strategy
Welcome to the most comprehensive guide for Sand Loop Level 320. This level, known as "The Floral Garden," is a significant difficulty spike that tests your ability to manage logistics rather than just artistic flair. Unlike earlier levels where you could simply pour colors as they appear, Level 320 is a resource management puzzle. You will face a massive "Ice Blockade" that restricts your access to necessary colors, forcing you to adopt a strict production order. If you simply pour colors randomly, you will fill your conveyor belt (capacity: 5) and jam the machine, leading to a quick fail. This guide will break down exactly how to dismantle the blockade, manage the "Cyan Debt," and paint the floral arrangement efficiently.
1. Level Overview and Key Challenges
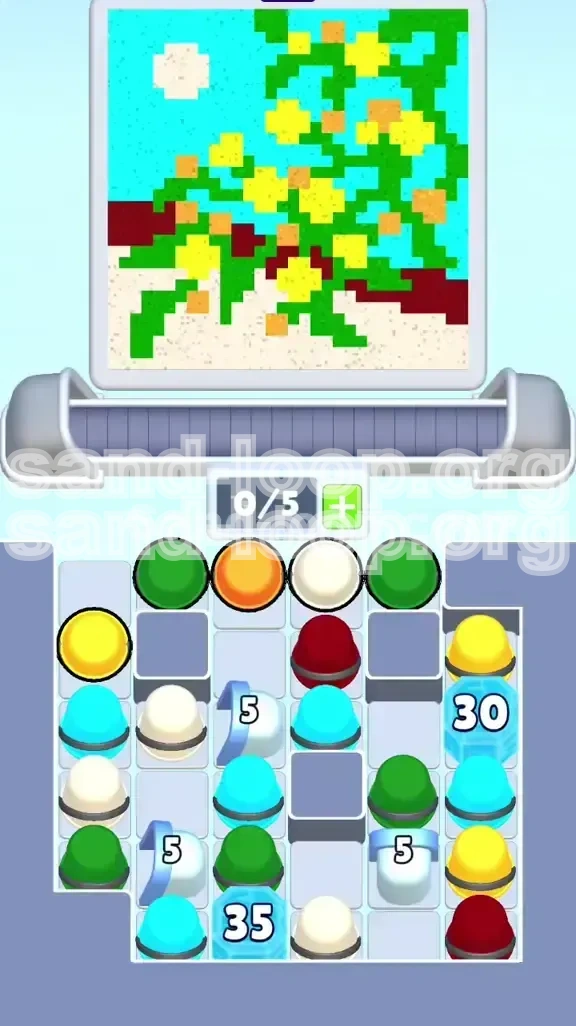
Before you make your first move, it is vital to understand the battlefield. Level 320 features a high pixel density image with 7 distinct colors and a layout designed to trap you. Here is what you are up against:
The Cyan Sky Problem
The background of the image is a vast Cyan sky. While this seems simple, it accounts for approximately 40-45% of the total sand volume required. The danger lies in the "Ice Blocks" (explained below). You will be forced to process Cyan cups constantly to clear these blocks, but if you finish the sky too early, you will have nowhere to put the excess Cyan sand, causing a bottleneck.
The "Ice Blockade" Mechanic
This is the core challenge. In the supply tray, you will notice two massive Ice Blocks: a 30-count block on the right and a 35-count block at the bottom center. These block access to fresh cups. The only way to destroy them is to process the specific color of the cup trapped inside or adjacent to them. In this level, the blocks are dependent on Cyan. This creates a "High-Volume Dependency Trap." You cannot touch other colors until you grind through these blocks using Cyan sand.
The 5-Slot Conveyor Belt Constraint
Your machine has a tiny buffer of only 5 slots (0/5). In a level with 7 colors, this is incredibly tight. If you pull 5 cups onto the belt and none of them match the current section of the image you are painting, you are stuck. This is why "Queuing Management" is the difference between winning and losing.
Complex Color Distribution
The image is split into three horizontal zones: 1. Top (Cyan): Large, open areas. 2. Middle (Green/Yellow/Orange): The "Danger Zone." Vines and flowers are interwoven. A single pixel mistake here is hard to fix. 3. Bottom (Beige/Dark Red): Contains the fence and sandy ground. The Dark Red fence is a thin, unforgiving line.
The "White Lock" Gatekeepers
Before you can even worry about the big ice blocks, you must deal with three 5-count White Locks. These act as a tutorial for the level: they force you to focus on one color (White) to open up the board, teaching the discipline you need for the Cyan grind later.
2. Clear Objectives: Your Mission Checklist
To complete Level 320, do not aim to "paint the picture." Aim to complete these logistical milestones. If you hit these targets, the picture will paint itself.
Phase 1: Unlock the Supply Line
Your immediate goal is to clear the three 5-count White Locks. Do not worry about the picture yet. Your focus is purely mechanical: pull White cups, pour White sand, and clear the columns. Until these are gone, your access to the rest of the tray is restricted.
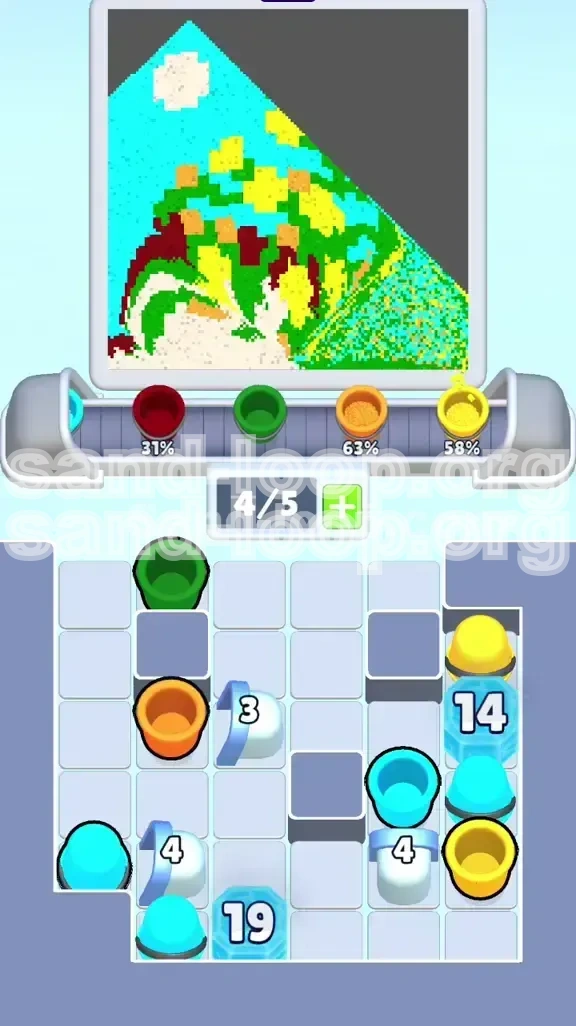
Phase 2: The Cyan Ice Grind (The Marathon)
This is the longest phase of the level (approx. 60% of your time). You must reduce the 30-count and 35-count Ice Blocks to zero. This requires processing approximately 65+ Cyan cups. Your objective is to keep the Cyan moving without overflowing your conveyor belt or finishing the sky too soon.
Phase 3: Managing the "Vine" Web
While grinding Cyan, you will inevitably pull Green, Yellow, and Orange cups. You cannot let these clog your belt. Your objective is to "ping" these colors—pouring just enough to clear the cup and keep the belt moving—without messing up the intricate vine patterns.
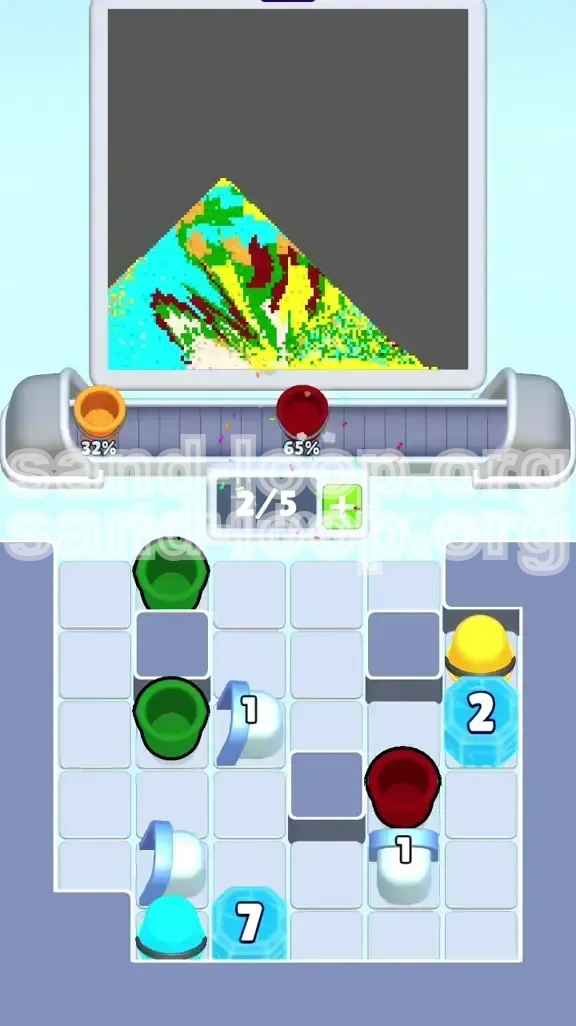
Phase 4: The Bottom Foundation
Once the Ice Blocks break, you will have access to a flood of Dark Red and Beige cups. Your objective here is precision. The Dark Red fence requires a steady hand. You must finish the sky and vines first so you can focus entirely on the bottom 20% of the image.
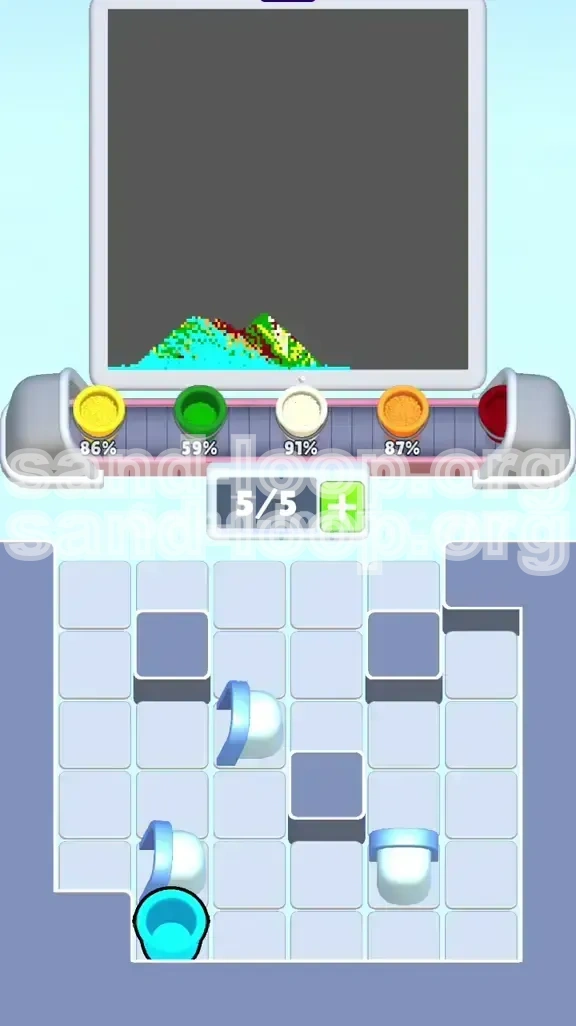
Phase 5: Final Cleanup
The last 10% of the level involves dealing with "stray" cups—colors that appear after their main section is done. You need to have empty space on your belt to handle these final stragglers.
3. Step-by-Step Instructions: The Execution
Follow this exact sequence to maximize your efficiency. Do not deviate from the early game strategy.
Step 1: The White Lock Protocol (Moves 1-15)
At the start, scan the top row of the supply tray. You will see a mix of colors.
- Action: Immediately identify and tap all visible White cups. Pull them onto the belt.
- Execution: Pour them exclusively into the bottom sandy Beige areas or the Moon/Sun if visible. Do not worry about the fence yet.
- Why: You need to clear the 5-count White Locks to free up the "spawner" for the main Cyan grind. If you pull a Green cup now, it sits on the belt doing nothing but taking up space. Ignore non-White cups initially.
Step 2: Establishing the Cyan Flow
Once the White Locks pop, the tray shifts. You will now see the massive Ice Blocks.
- Action: Shift your focus to Cyan. You will see Cyan cups trapped under the ice.
- Execution: Begin pulling Cyan cups. Pour them into the top 40% of the canvas (the Sky).
- Critical Note: Do not fill the sky 100%. Leave about 10-15% of the sky unpainted. You need this "buffer zone" later to dump excess Cyan sand while you are waiting for other colors to clear.
Step 3: The "Color Pinging" Technique
While pulling Cyan, you will uncover Green, Yellow, and Orange cups. You cannot ignore them, or the belt fills up.
- Action: Pull a Green or Yellow cup only if you have 2-3 empty slots on your belt.
- Execution: Pour the Green/Yellow immediately. Do not let it sit on the belt. Target the largest cluster of that color you can find.
- Technique: Use "batching." If you have two Green cups, pour them back-to-back. This clears two slots and fixes a section of the image efficiently.
Step 4: Handling the 30-Count Block (Right Side)
The right-side block is smaller but usually blocks access to crucial colors like Red or extra Green.
- Action: Maintain a rhythm of Cyan -> Green -> Cyan.
- Tip: If the right side of the image (sky) is full, you can carefully "over-pour" Cyan onto the edge of the finished sky area without penalty, just to break the block faster.
Step 5: The 35-Count Block (Bottom Center)
This is the final boss of the logistics phase. It sits right in the middle of your supply line.
- Action: By this stage, your belt is tight (4/5 or 5/5 full). You must be pouring constantly.
- Execution: Use the "Unpainting" strategy. If the sky is full, pour Cyan onto the Cyan sky. It won't change the color, but it will count towards breaking the ice block. This is how you dispose of unwanted Cyan cups safely.
4. Color Order: The Strategic Sequence
The order in which you process colors is counter-intuitive. You cannot paint top-to-bottom. You must paint based on "Cup Availability."
Priority 1: Cyan (The Key)
Why first? Not because the sky is the most important, but because it unlocks the rest of the level. You will process Cyan for 70% of the level. It is the currency you spend to buy access to other colors.
Priority 2: Green (The Connector)
Green vines run through everything. You need to clear Green cups to prevent belt jams. However, save the complex, thin vines for later when you have more control. Focus on the "leafy" chunks first.
Priority 3: Yellow and Orange (The Accents)
Yellow and Orange are often trapped behind the Green or Cyan cups. Treat them as "flush" colors. Pour them only when you have no other choice, but try to pour them after you have placed some Green, so you don't accidentally paint Green leaves Yellow.
Priority 4: Beige (The Filler)
Beige is the safest color. The sandy ground is large and forgiving. Use Beige cups to reset your rhythm. If you are panicked and the belt is full, pulling a Beige cup is your safety valve.
Priority 5: Dark Red (The Finisher)
Dark Red is the highest risk color. The fence is thin. If you pour Red while the machine is moving fast (speeding up due to a full belt), you will miss. Always pour Red when the belt is calm and half-empty.
5. Key Tips for Success
These tips are derived from hundreds of test runs on this specific level architecture.
The "Belt Buffer" Rule
Never let your belt reach 5/5 capacity unless you are 100% sure the next cup you pull is the color you need. Ideally, keep 1 slot empty (4/5). This gives you the flexibility to pull a new cup if the current one is useless.
Don't Trust the "Suggested" Color
The game might highlight a cup. Ignore it. Look at the Ice Blocks. The game often suggests a color that is good for the picture, but bad for your logistics. Trust the blockade, not the highlight.
The 15% Sky Rule
Repeat this: Do not finish the Cyan sky. Leave 10-15% of the pixels unpainted. I promise you, you will need that space to pour the last 10 Cyan cups required to break the final Ice Block. If you fill the sky, you will be forced to ruin a flower or vine with Cyan just to clear your cup.
Rhythm Over Speed
Level 320 tempts you to tap fast. Resist. Establish a rhythm: Tap, Pour, Wait, Tap. If you tap too fast, you pull 3 Greens in a row, and now you have no space for the Cyan you actually need.
Identify "Dump" Zones
Every level has a zone where you can dump excess sand without ruining the image. In Level 320, the bottom-left corner (sand) and the top-right corner (sky edge) are your dump zones. Use these to dispose of cups if you are forced to pull a color you don't need.
6. Common Mistakes to Avoid
90% of failed runs on Level 320 happen because of one of these three errors.
The "Early Sky" Mistake
The Error: You see Cyan, so you paint the whole sky blue immediately because it looks satisfying. The Consequence: The 35-count Ice Block is still at 15/35. You have no place to put the Cyan. You start crying because you have to pour Cyan onto your beautiful yellow flowers. The Fix: Stop painting the sky at 80-90% completion.
The "Green Lock" Mistake
The Error: You pull three Green cups in a row because the vines look nice. The Consequence: Your belt is 3/5 Green. You uncover a Cyan cup, but you can't pull it because you have no room. The machine jams. The Fix: Alternate. Pull 1 Green, pour it. Then pull Cyan. Never stack more than 2 of the same secondary color on the belt.
The "Thin Fence" Mistake
The Error: Pouring Dark Red while the belt is full (5/5). When the belt is full, the game mechanics often make the dispenser "skip" or move erratically to process the backlog. The Consequence: You miss the thin red fence line and paint the beige sand red. This is extremely hard to fix. The Fix: Only pour Red when the belt is at 3/5 or lower. Ensure a smooth, slow pour.
Ignoring the White Locks
The Error: Seeing the White Locks but deciding to paint the leaves first. The Consequence: You run out of space on the belt because the locked columns aren't spitting out new cups. You choke your own supply line. The Fix: White Locks are priority #1. They are easy and free up valuable real estate.
7. Speed Run Tips and Optimization
Once you have beaten the level and want to achieve a high score or fast time, use these advanced strategies.
Pre-loading the Belt
As you finish the last White Lock, look ahead at the tray. If you see a Cyan cup becoming available under the ice, tap it the millisecond the lock breaks. This pre-loading saves seconds waiting for the cup to register.
The "Combo" Pour
If you have two Green cups and two Yellow cups next to each other on the belt, don't finish Green entirely. Switch between them rapidly to "paint" the mixed flower sections. This is faster than finishing all Green then starting Yellow.
Speed-Breaking Ice
Once the sky is 90% done, you can pour Cyan directly onto the Ice Block itself in the tray UI (if the game allows) or onto the "border" of the image to cycle cups faster without worrying about pixel perfection.
Minimizing Movement
Keep your dispenser (the pouring cup) in the "Cyan Zone" (top) as much as possible. Moving from top to bottom constantly wastes travel time. Only go to the bottom (Red/Beige) when you have a large batch of bottom colors ready.