
Level 347
HARDHow to solve Sand Loop level 347? Get instant solution for Sand Loop 347 with our step by step solution & video walkthrough. Sand Loop 347 tips and guide.
Play Sand Loop Now
Experience the puzzle challenge firsthand
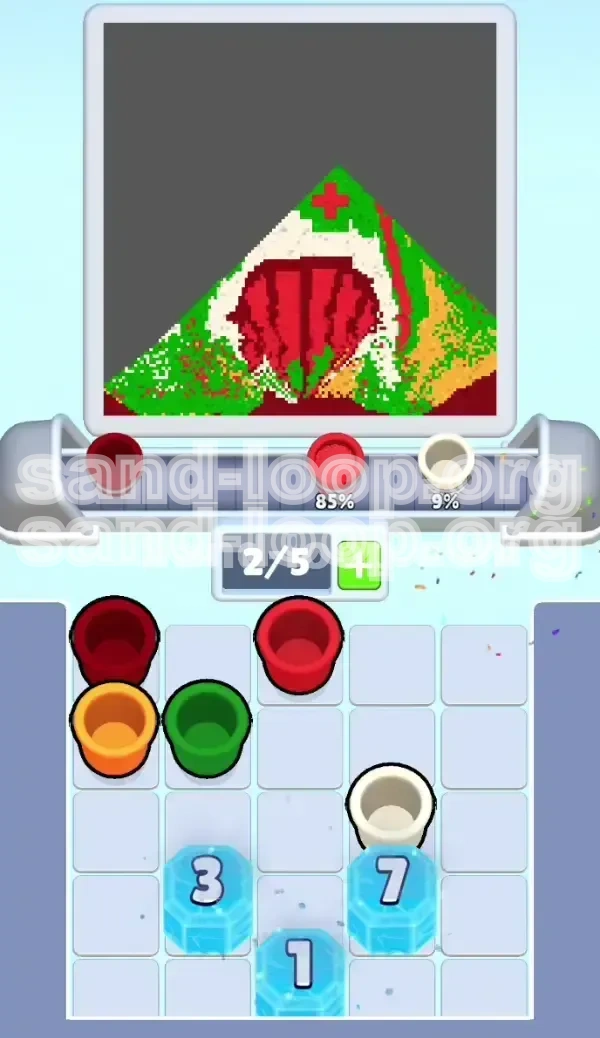
Game Screenshots


Sand Loop Level Guides
Sand Loop Level 347: Complete Walkthrough and Strategy Guide
Level Introduction
Welcome to the comprehensive guide for Sand Loop Level 347. This stage is widely considered one of the "endurance tests" of the mid-game, featuring a complex pixel art design of an Apple Tree perched atop a red fence. While the aesthetic is charming, the gameplay mechanics are unforgiving. You will face a unique combination of "Counter Blocks" that restrict your playing field and a color palette that requires precise timing to execute correctly. Unlike faster-paced levels, this is a strategic grind where resource management is just as important as accuracy.
Core Challenges
The primary difficulty in Level 347 stems from the limited space in your supply tray. The bottom row is occupied by "Counter Ice" blocks that do not disappear until you have cleared a specific number of cups (18, 20, and 24 respectively). This effectively reduces your hand size for the first third of the level, forcing you to play with extreme efficiency. Additionally, the "Danger Zone"—a thin strip of white snow separating the red fence from the green tree—requires a near-perfect color transition, or you risk contaminating the layer and failing the level.
Winning Conditions
To clear Level 347, you must fill the Apple Tree canvas with 100% accuracy. This involves a strict sequence: filling the red fence first, followed by the green bushes, then the critical white snow strip, and finally the complex tree foliage mixed with red apples. The background yellow must be saved for the very end. The key to victory lies in cycling your red and green cups quickly to break the ice locks, while avoiding the temptation to use background colors too early.
Level Statistics
- Difficulty Rating: Hard (4.5/5)
- Primary Colors: Deep Red, Forest Green, White, Mustard Yellow
- Total Move Count (Estimate): 75-90 Moves
- Ice Block Thresholds: 18, 20, and 24 cups cleared
- Failure Rate Point: The White Strip Transition (approx. 40% completion)
1. The Ice Lock Mechanic Explained
Understanding the Bottom Row
Before you make your first move, look at the bottom row of your supply tray (columns 2, 3, and 4). You will see three blue ice blocks marked with numbers: 18, 20, and 24. These are "Global Counters." Unlike standard blocks that break when matched adjacent to a color, these only decrease when a cup is successfully poured and removed from the screen.
Why This Constricts Your Gameplay
These blocks act as a traffic jam. Because they take up valuable slots in your tray, you cannot queue up a long line of cups. You are forced to work with a "small hand." If you blindly fill every available slot with random colors, you will block the conveyor belt from dispensing new, necessary cups. You must keep 1 or 2 slots open at all times to ensure the flow of new cups continues uninterrupted.
The "Curtain" Strategy
On the left side of the board, there is a red curtain marked with the number "13." This acts similarly to the ice but is tied to the Red Fence section. Clearing 13 cups will open this curtain, revealing the upper section of the tree. Therefore, your immediate priority must be clearing Red cups. Focusing on Green or White at the start is inefficient because you need the curtain open to access the full board.
Global Counter Math
Do not try to "save" moves. The numbers 18, 20, and 24 are high. You cannot break them by waiting; you must break them by grinding. Every cup you pour contributes to these totals. A common mistake is trying to preserve specific cups for later. Don't. Pour valid colors immediately to chip away at these ice blocks. The faster they break, the faster you get your tray space back.
Psychological Management
This level is mentally taxing because progress feels slow for the first 30 moves. The ice blocks seem to barely budge. Stay calm. Trust the process. As long as you are pouring valid colors that match the canvas, the counters will drop. The game opens up significantly once the first ice block shatters.
Timing the Breaks
Plan your mid-game around the moment the ice breaks. You will suddenly have an influx of open slots. If you have a messy belt filled with the wrong colors (like Yellow) when the ice breaks, you won't be able to capitalize on the open space. Try to enter the "Ice Break Phase" with a relatively clean belt.
2. Step-by-Step Phase 1: The Foundation
Initial Tray Analysis
When the level loads, inspect your starting lineup. You are almost guaranteed to have a cluster of Deep Red cups in the right-most columns. This is intentional game design. The game gives you the tool you need immediately. Do not look for Greens or Whites yet. Your entire focus for the first 10-15 moves is Deep Red.
Executing the Red Rush
Load the Deep Red cups immediately. Do not hesitate. The bottom of the canvas is a solid block of red fencing and tree trunk. Pouring here is safe and high-reward. It clears space on your belt and attacks the "13" counter on the red curtain. Pour continuously until the red fence section is approximately 80% full or until you run out of immediate Red cups in your tray.
Unlocking the Curtain
Watch the counter on the red curtain. As you pour Red, it decreases. Once it hits zero, the curtain vanishes. This is your first major milestone. It reveals the complex shapes of the tree above. Do not stop pouring Red entirely once it opens, but be prepared to shift your focus. You need to transition smoothly to the next color.
Transitioning to Green
Once the Red Fence is established, look at the base of the tree. It is Forest Green. By now, your belt should be cycling in new cups. Start loading Green cups. Do not worry if you have a few Red cups left; the tree foliage has Red apples later, so keeping a Red cup on the belt isn't the worst thing, but prioritize Green to build the base of the bushes.
Managing the "Yellow Trap"
In Phase 1, you will see Mustard Yellow cups appear. Ignore them. Loading Yellow now is a death sentence for your speed. The Yellow background is the topmost layer. Pouring it now is impossible because the tree and fence aren't done. Loading it onto your belt just wastes a slot that could be used for Green or Red. Let the Yellow cups sit on the conveyor or cycle off-screen if necessary, but do not clog your tray with them.
Belt Management Protocols
Keep a rhythm: Pour, Load, Pour. Never let your belt sit idle while you think. The faster you cycle cups (even wrong colors cycled off the belt), the faster you get new right colors. Since you are fighting the Ice Block counters, speed is your friend. Keep the belt moving.
3. Step-by-Step Phase 2: The White Line Crisis
The "Danger Zone" Defined
This is the most critical section of the guide. Between the Red Fence/Green Bushes and the Main Green Tree Top, there is a very thin, horizontal strip of White snow. It is perhaps only 5-10% of the total canvas area, but it is responsible for 80% of failed attempts.
The Physics of the Spill
The nozzle does not stop moving instantly. When you finish pouring the Green Bushes, the nozzle will naturally drift upward toward the tree. If you have a Green cup loaded and active, the sand will flow into the White zone. Green on White creates a dirty, unfinished look that is usually impossible to fix without wasting massive amounts of White sand later.
Preparation is Key
Before the Green Bushes are 100% finished, look at your belt. Do you have a White cup? If not, you are in trouble. You need to "stage" a White cup. Ideally, you want a White cup to be the next one ready to pour the moment the Green meter hits max.
The Transition Maneuver
As the Green bushes near completion (around 90% full), stop pouring Green. Even if there are tiny gaps, it is better to leave them for a quick touch-up later than to ruin the White strip. Let the current Green cup finish. If your next cup is Red or Yellow, you must burn it (pour it somewhere useless or cycle it) until a White cup appears.
Executing the White Strip
Tap the White cup the second the nozzle allows it. You want a clean, horizontal motion across the middle of the tree. This white strip acts as a separator. It must be crisp. Once the White is down, you can finally move up to the heavy foliage.
Recovery Tactics
If you mess up and pour Green into the White zone, don't panic. Stop immediately. Switch to White. You will need to over-pour White to cover the Green. This is costly on your sand meter, but necessary. Try to limit the "bleed" by being precise with your drag controls.
4. Step-by-Step Phase 3: Foliage and Apples
The Ice Should Be Broken
By the time you are dealing with the White Strip and the main tree top, your initial grind should have paid off. The ice blocks (18, 20, 24) should be shattering one by one. You will hear the satisfying crunch of glass. This gives you 3 extra slots on your tray. Use this space! You can now hold multiple colors to prepare for the complex mixing phase.
The Rhythm of the Canopy
The top of the tree is Forest Green with scattered Deep Red apples. It is not a solid block of color. You cannot just hold "Green" and dump it. You need a staccato rhythm.
The 3-to-1 Rule
A good rule of thumb for the tree top is the "3-to-1" ratio. Pour three Green cups to build the leafy bulk, then one Red cup to fill an apple. Then repeat. If you pour two Reds in a row, you will likely overfill the apple and create a red blob on the green leaves. Since you have open tray slots now, try to keep a queue of: Green, Green, Red ready to go.
Identifying Apple Zones
Look closely at the pixel art. The apples aren't random; they are clustered. Aim your Red pours specifically at these clusters. Don't just spray Red everywhere. Precision here saves you from having to fix mistakes later.
Dealing with the Leftovers
As you finish the tree, you might notice small gaps in the Green leaves you missed earlier. Use your new abundance of tray space to hold a Green cup specifically for these "gap filler" moments. Don't let a gap force you into a bad color decision.
Preparing for the End Game
Once the tree and apples are solid, the only thing left is the background. Look at your tray. Is it full of the leftover Red and Green cups you didn't use? You need to clear these out. Pour them into the completed tree (it won't hurt if it's already full) just to get them off the belt and make room for the Yellow.
5. Final Phase: The Background Fill
The Yellow Harvest
You have successfully ignored the Mustard Yellow cups for the entire level. Now is their time. The background of the image is Yellow. Since the tree, fence, and snow are all done, the Yellow will fill in all the empty nooks and crannies.
Why We Saved It
Background colors always have the largest area to cover but are the lowest priority in layering. If you pour Yellow first, you can't put the fence or tree on top easily without bleeding colors. By saving it for last, you ensure that the Yellow acts as the "grout" that fills the gaps between the main features.
Flood Fill Strategy
With the ice blocks gone, you have maximum space. Load 3 or 4 Yellow cups at once. Pour them aggressively. The Yellow doesn't need the precision the White Strip did. It just needs to cover the voids.
Final Percentages
Watch your completion percentage tick up. You will jump from 85% to 95% very quickly during this phase. The Yellow is the "easy points" you earned by playing smart earlier.
Post-Game Cleanup
Occasionally, you might finish the Yellow and still be at 99%. This usually means there is a single pixel gap in the White strip or a tiny missed spot on the Red fence. Use your remaining cups (any color) to hunt down these last elusive pixels. The game allows you to over-pour slightly to catch these.
6. Speed Run and Pro Tips
Shortcuts for Advanced Players
If you are confident in your aim, you can slightly overlap the Red Fence and Green Bush phases. Instead of waiting for Red to be 100% before starting Green, you can start Green when Red is at 90%. This "phase overlap" saves valuable seconds but requires you to be very careful not to pour Green onto the Red fence.
Tray Slot Optimization
Advanced players never fill their belt completely. Always keep 1 slot open as a "buffer." This buffer allows you to grab a critical cup (like a White one) immediately if it pops up on the conveyor, without having to wait for a slot to clear.
The "Cycle" Technique
If your belt is clogged with useless colors (e.g., you have Yellow but need Green), don't just stare at the screen. Keep pouring the useless colors onto a completed section of the board (like the finished Red Fence). This clears the cup from your tray instantly and forces the game to give you a new cup from the conveyor. It's faster than waiting.
Common Mistakes to Avoid
- The Early Yellow: Loading Yellow in the first 30 seconds. This is the #1 cause of failure.
- The Snow Bleed: Pouring Green into the White strip. Always stop Green at 90% to stage the White cup.
- Hoarding: Keeping a cup "for later" when your tray is full. Use it or lose it.
What to Do If You Get Stuck
If you are stuck with no matching colors and the ice blocks aren't breaking, you have managed your belt poorly. Look at the canvas. Is there any area you can pour? Even if it's already full, over-pouring a color to clear a cup is better than doing nothing. You need to cycle the belt to find the color you actually need.
Speed Run Target Times
- Phase 1 (Red/Curtain): Aim for under 20 seconds.
- Phase 2 (White Strip): Aim for under 30 seconds.
- Phase 3 (Tree/Apples): This is the longest phase, expect 45-60 seconds.
- Phase 4 (Yellow): Should be a fast 15-second finish.