
Level 349
HARDHow to solve Sand Loop level 349? Get instant solution for Sand Loop 349 with our step by step solution & video walkthrough. Sand Loop 349 tips and guide.
Play Sand Loop Now
Experience the puzzle challenge firsthand
Game Screenshots
Sand Loop Level Guides
Sand Loop Level 349: The Happy Cactus Master Walkthrough
Introduction to the Happy Cactus Challenge
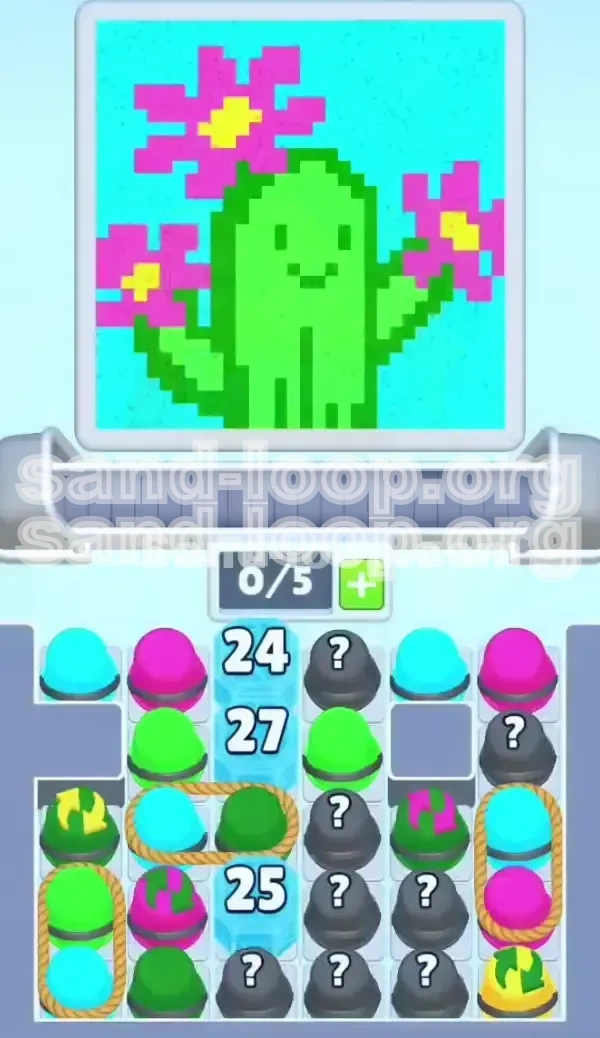
Welcome to Level 349, commonly known by players as the "Happy Cactus" stage. This level is a deceptive mix of cute pixel art design and frustrating logistical bottlenecks. Visually, you are tasked with painting a vibrant desert scene: a large green cactus with three hot pink flowers sitting against a solid cyan sky.
However, the challenge here isn't artistic; it's structural. The game board is vertically bisected by a thick wall of numbered ice blocks (HP barriers). This physical separation creates a "supply crisis" where your most important colors are locked on one side of the wall. You cannot simply paint what you want when you want; you are at the mercy of the ice wall's countdown timer.
The Board Layout Strategy
The board is split into two distinct zones. The **Left Zone** is your active workspace, initially populated with Cyan and Pink cups. The **Right Zone** is locked behind the Ice Wall and contains the bulk of your Green supply and the Mystery cups.
Your primary bottleneck is the conveyor belt capacity. With only 5 slots available, letting the wrong cups onto the belt can clog your machine for minutes. You must maintain a strict "First-In, First-Out" mentality to survive the color switches.
Victory Conditions
To achieve three stars and complete the level, you must adhere to strict filling requirements. The Cyan background requires a massive 40% of your total ink volume, meaning you cannot ignore it even if you want to focus on the cactus. The Green cactus body requires approximately 35% coverage, while the Pink flowers and Yellow centers make up the remaining 25%.
Crucially, you cannot simply "overfill" the canvas to win. The pixel art constraints require precision, especially around the Yellow flower centers. Failure to manage the Yellow flow will result in "contamination," where the yellow ink bleeds into the pink petals, causing a failed run.
Step-by-Step Opening Moves: Managing the Left Flank
The "Clean Slate" Protocol
As the level begins, do not immediately tap every cup you see. The dispenser will start flowing a specific color—usually Cyan or Pink. Identify this starting color immediately. If the sand flowing from the dispenser is Cyan, tap only the Cyan cups on the top left. Ignoring the Pink cups at this stage prevents them from clogging your limited belt slots while you wait for the color switch.
Dealing with the Initial Blockers
The top-left section is stacked with "Blocker" cups. These are standard cups that must be cleared to lower the ropes holding the more valuable inventory below. Prioritize clearing these single-color cups first. Clearing the top layer creates the physical gravity needed to pull the lower Roped Cups up into the playable chute.
The Conveyor Belt Math
Always keep a mental count of your 5 belt slots. If you have 4 cups currently on the belt, and you need to pull up a Roped Pair (which takes 2 slots), you must score a cup immediately. If you attempt to pull a roped pair onto a full belt, the game will jam, or you will be forced to discard valuable paint, setting your progress back by minutes.
Handling the First Color Switch
The dispenser will inevitably switch from Cyan to Pink. When this happens, your belt might still have half-full Cyan cups. Do not panic. Let the Cyan cups finish their cycle. If they are full, send them to the canvas immediately. Do not hold onto a "Cyan" cup hoping to save it for later if the dispenser is now flowing "Pink." Holding cups creates "dead weight" on the belt that stops you from collecting the active color.
Roped Pairs: The Dragging Hazard
Once the top layer is cleared, you will encounter Roped Pairs (e.g., a Green cup tied to a Pink cup). When you tap one, both enter the belt. This is dangerous. If you pull a Green/Pink pair, you now have two cups taking up space, but the dispenser is only flowing one color at a time. One cup will fill, while the other sits empty, acting as a block. You must rotate the belt efficiently, filling the active cup and scoring it, to free up the slot for the second cup's color.
Why the Right Side is Off-Limits
During this opening phase, completely ignore the right side of the board. The Ice Wall (HP 24/27/25) prevents you from accessing those cups. Trying to plan for them is a distraction. Focus 100% of your attention on micromanaging the left side supply to keep your dispenser rhythm smooth. Any progress on the Ice Wall HP at this stage is purely a bonus result of your left-side clearing, not a primary goal.
The Ice Wall Strategy and Timing
Understanding the Ice Wall HP
The central column consists of three blocks with Hit Points (HP): 24 (top), 27 (middle), and 25 (bottom). You cannot damage these directly. They lose 1 HP for every cup you clear adjacent to them. Essentially, every time you score a cup from the left side, the Ice Wall takes damage. This creates a passive progression system. Play aggressively on the left, and the wall will fall naturally.
The "Mystery" Cup Dilemma
Behind the wall, you will see Grey "?" cups. These are wildcards. While it is tempting to want them immediately, they are currently inaccessible. If you worry about what color they will be, you will lose focus on the current task. Treat the Mystery Cups as a future reward. In this level, they are statistically likely to be Green or Yellow, but you must wait for the wall to crack to confirm.
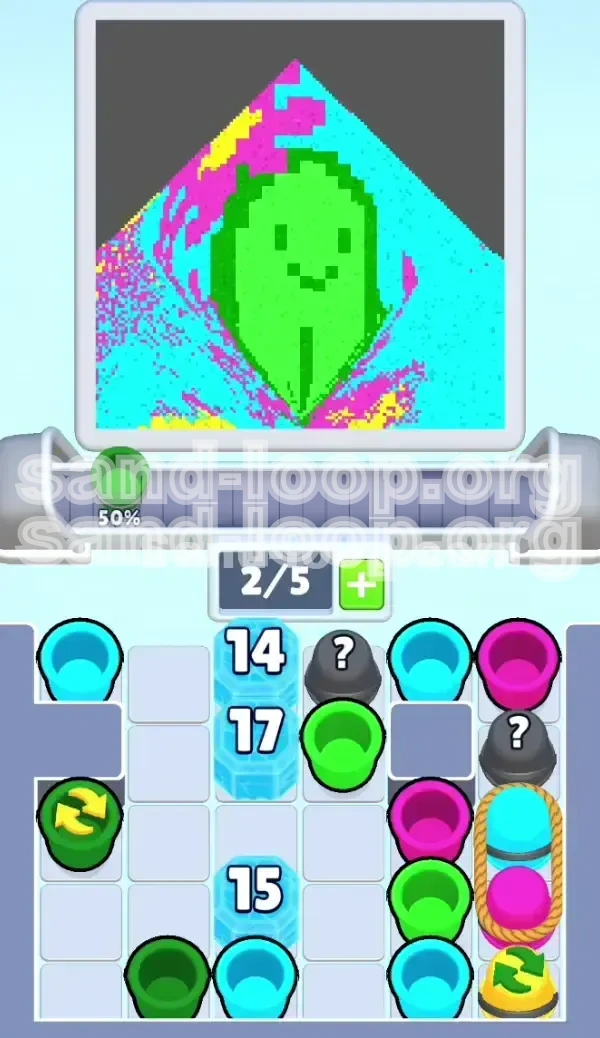
The Breach Point
The top Ice Block (24 HP) is the weak point. It will be the first to break. When this happens, the board physics will shift. Cups from the right side may slide into the middle or become accessible via the dispenser. This moment is critical. The sudden availability of new colors (often the desperately needed Green for the cactus) can overload your belt if you aren't ready.
Managing the Board Flood
Once the wall breaks, you might suddenly have access to 5+ new cups. Do not tap them all at once. Tapping a mass of cups will instantly fill your belt and cause a clog. Release them one by one, or in pairs (if roped), ensuring you have the belt capacity to handle the influx. Treat this phase as a "triage" mode—only pull what you can process immediately.
Transitioning to Mid-Game
The moment the Ice Wall falls, the level changes from a "Survival" mode to a "Collection" mode. Your goal shifts from clearing blockers to collecting specific colors to finish the Cactus body. The middle of the board is now a high-traffic zone. Ensure your belt is empty (or has only 1-2 cups) before the wall breaks to maximize your ability to grab the newly revealed inventory.
Color Order and Processing Logic
The Cyan Foundation (Background)
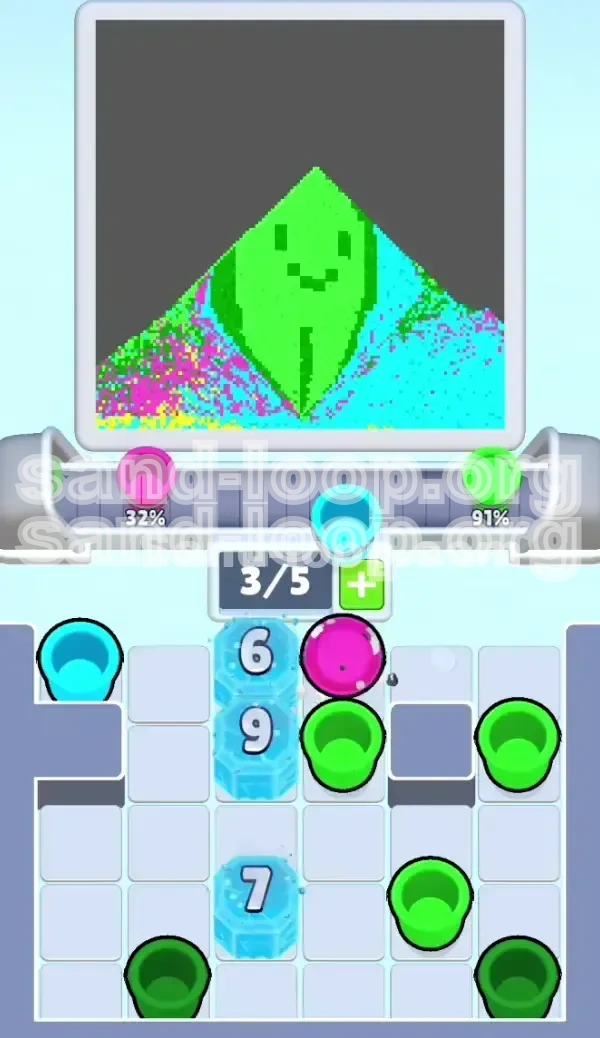
Start your canvas with the Cyan Sky. This is the largest area of the painting. Because it requires 40-45% of the total ink, it is best to fill it early while your belt is relatively empty of complex roped pairs. Filling the background first also prevents "drip" accidents later. If you paint the fine details of the cactus first, a stray drop of Cyan later on could ruin the pixels.
The Green Cactus Body
Once the background is roughly 60% full, shift your focus to the Green cups. You will likely have a stockpile of Green cups released from the Mystery Grid or Roped Pairs on the left. The Green cactus body is thick and forgiving. It requires long, sustained flows of ink. This is the time to clear your Green inventory. Don't worry about precision here; the cactus is a large, solid block of pixels.
The Pink Flowers
The Pink flowers are tricky. They are surrounded by Green (the cactus) and Cyan (the sky). You must be careful with timing. When filling the Pink cups, watch the canvas. If the Pink pixel area is full, stop the flow. Overfilling Pink will cause it to bleed into the Green arms, making the cactus look deformed. You want the Pink to be vibrant and contained within the flower petals.
The Yellow Center Trap
The Yellow centers are less than 5% of the total canvas area but cause 90% of the failures. They are tiny targets. When you process Yellow, you must use "micro-bursts." Fill the cup, let it pour for 1 second, and then drag it away or score it if full. If you leave a Yellow cup on the belt while it's full, it will continue to pour, eventually overflowing the tiny pixel center and turning your flower into a yellow blur.
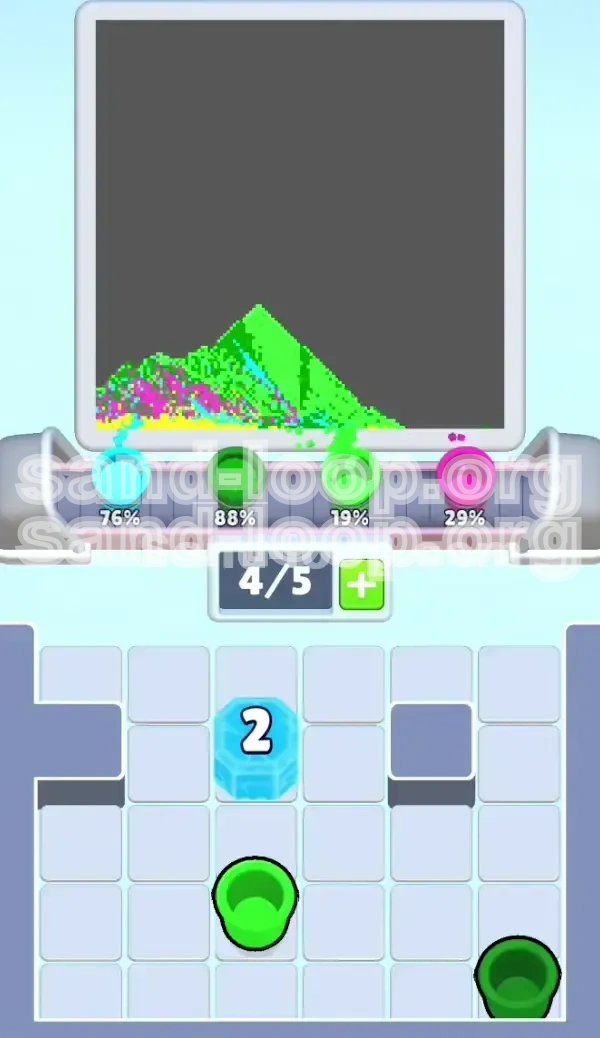
Touch-Up Phase Strategy
After the main colors are down, you will likely have a patchy canvas. You might have 80% Green, but the bottom of the cactus is missing. You might have Pink flowers that are missing a petal. The final phase is about "cleaning up." Use your remaining single cups to fill these gaps. Do not introduce new roped pairs at this stage; they are too unpredictable for fine-detail work.
Utilizing the "?" Cups
By the final phase, the "?" cups should be revealed. If they turned out to be Yellow, save them for the very last polish. If they are Cyan or Green, use them to bulk up the background or body. The logic is simple: Large areas = Large Inventory (Mystery cups). Small areas = Small Inventory (Targeted cups).
Pro Tips, Common Mistakes, and Speed Run Strategy
Common Mistake: Hoarding Colors
Many players try to save a "Pink" cup on the belt while the dispenser is flowing "Green," thinking they will switch back to Pink soon. In Sand Loop, this is a fatal error. The dispenser cycles can be long. That Pink cup sits on your belt, taking up a slot for 30 seconds, preventing you from collecting Green. Rule of thumb: If the cup is full, score it immediately. If it's the wrong color, clear it to make space.
Common Mistake: Ignoring the Belt Counter
The 5-slot limit is not a suggestion; it is a hard mechanic. A common mistake is tapping a Roped Pair when the belt has 4 free slots visually, but one slot is about to be filled by an incoming cup. Always count: 1, 2, 3, 4, 5. If you are at 4, do not tap a pair (which needs 2 slots). You will cause a jam, and the incoming cup will be lost or delayed, breaking your combo.
Key Tip: The "Empty Cup" Rotation
When dealing with a Roped Pair (e.g., Green/Pink), you will fill the Green one first. The Pink one sits empty. Do not let the empty Pink sit in the "filling zone." Drag it to the back of the belt loop. Keep the active (filling) cup at the front. This constant rotation ensures you are always ready to score a cup the moment it hits 100%, keeping the flow moving.
Stuck Solution: The "Hard Reset"
If you find yourself stuck with a belt full of wrong colors (e.g., you have 3 Yellow cups but the Yellow areas are already full, and the dispenser is flowing Cyan), you must clear the jam. You have two options: 1. Score and Waste: Pour the Yellow into a full bin (wasting the paint) just to clear the slot. 2. Wait it out: Stop tapping completely. Let the dispenser cycle until it matches the cups you have. Option 1 is usually faster for your overall time.
Speed Run Strategy: Aggressive Tapping
For experienced players looking for a high score, speed is key. You can tap the next cup in the chute *while* the current cup is filling. This "pre-loading" ensures that as soon as a slot opens, the next cup is instantly on the belt. This requires you to memorize the layout. Know that the Roped Pair is coming next so you can have the slots ready for it before it even arrives.
Dealing with "Dry Spells"
Sometimes, the dispenser will flow a color that you have already completed (e.g., the background is 100% Cyan, but the dispenser keeps giving Cyan). Do not panic. Use this time to clear your inventory of any remaining Cyan cups. Clearing these useless cups frees up space for when the dispenser inevitably switches to the color you actually need. Treat "Dry Spells" as inventory management time.