
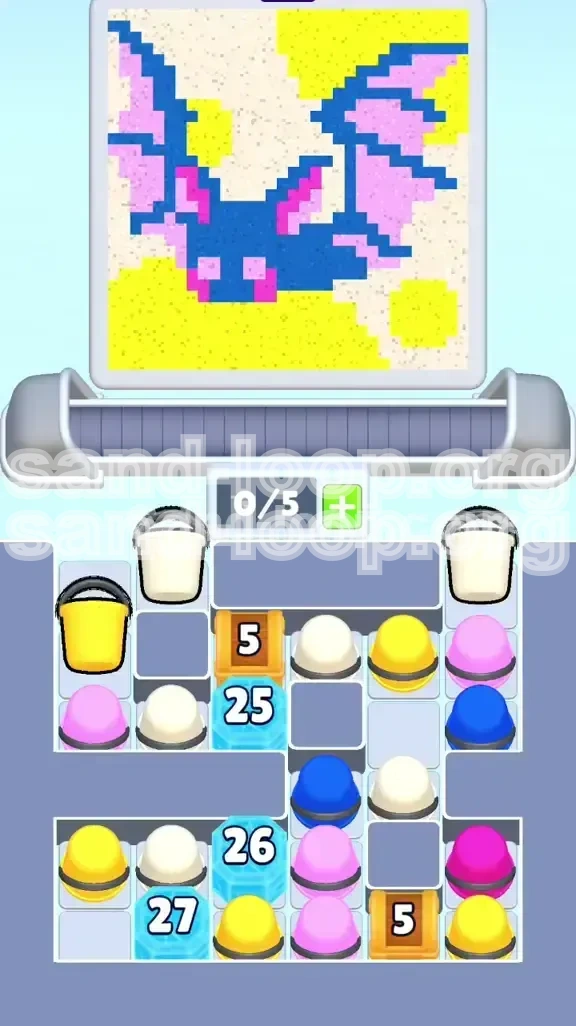
Level 370
HARDHow to solve Sand Loop level 370? Get instant solution for Sand Loop 370 with our step by step solution & video walkthrough. Sand Loop 370 tips and guide.
Play Sand Loop Now
Experience the puzzle challenge firsthand
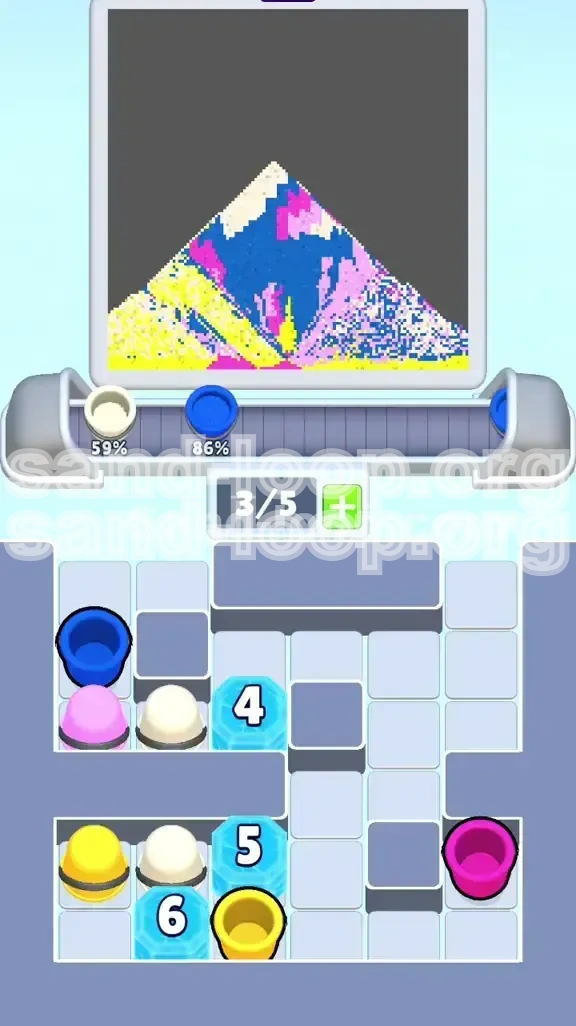
Game Screenshots
Sand Loop Level Guides
Level Overview: The Deep Freeze Gauntlet
Sand Loop Level 370 is not a sprint; it is a tactical marathon. Categorized as a "High-Endurance Grind," this level diverges sharply from previous stages by prioritizing resource management over reflexes. The visual objective—painting a Bat silhouette against a full moon—is deceptively simple. The reality is a battle against "Ice Tanks." This guide provides the analytical breakdown needed to bypass the HP bottleneck and secure victory without running out of time.
The "HP Wall" Phenomenon
The defining statistic of this level is the HP distribution. Unlike standard ice blocks which shatter after 3-5 hits, Level 370 features fortified obstacles.
- Bottom Row Ice: These blocks possess 26 to 27 HP each.
- Implication: To clear a single block, you must process approximately 25-30 adjacent cups.
- Bottleneck: New cups cannot enter the playfield until these blocks are cleared, creating a traffic jam that kills 90% of casual runs.
Color Distribution Analysis
Success depends on understanding the drop rates. The algorithm is not uniform.
- Dark Blue (40%): The primary filler for the Bat body. Abundant but dangerous if mishandled.
- Neon Pink (20%): Critical for wings and eyes. This is your limiting reagent; do not waste it.
- Bright Yellow (30%): The moon background. Used for containment walls.
- White (10%): mostly clutter, used for "bubble wrapping" delicate areas.
The "Wood Breach" Timing
The early game is dictated by a single wooden obstacle in the top center.
- HP Value: 5 HP.
- Time Limit: You must shatter this box within the first 45 seconds.
- Failure Consequence: If the box remains, the conveyor backs up. You lose the ability to cycle your hand, leading to a deadlock.
Endurance Factors
Expect a playtime of 3 to 4 minutes. This is 2-3x longer than average levels.
- Focus Fatigue: The mid-game "Grind" requires repetitive clearing. Do not lose focus in the 2-minute mark.
- Hand Management: Keeping one slot open is physically more important than making a perfect color match.
- Pacing: Play at 1.0x speed. Rushing causes mis-pours on the bat's face, which are irreversible.
Clear Objectives: Mission Breakdown
To navigate this level, you must stop thinking like an artist and start thinking like a miner. Your mission is divided into three distinct phases based on the board's state.
Phase 1: The Flow Restoration (0:00 - 1:00)
Goal: Unlock the conveyor belt.
- Target: The Wood Box (5 HP) at the top center.
- Action: Ignore the Bat art. Treat every cup as a projectile to destroy the wood.
- Metric: Once the wood breaks, gravity will feed cups into the main tray. Do not proceed to Phase 2 until this happens.
Phase 2: The Ice Mining (1:00 - 2:30)
Goal: Clear the floor.
- Target: Bottom-center Ice Block (25 HP) and Bottom-left Fortifications (26-27 HP).
- Strategy: "Tap to Dump." If a cup touches the ice, clear it. Even if you need that color for the art later, clear it now to reduce the HP counter.
- Outcome: When the bottom row is flat, cups will slide down rather than stacking up. This prevents "Board Full" game overs.
Phase 3: The Artistic Fill (2:30 - End)
Goal: Color accuracy.
- Trigger: Board is flat (Ice is gone).
- Primary: Fill the Dark Blue body (40% coverage).
- Secondary: Add Neon Pink wings and eyes.
- Tertiary: Fill Yellow background to 95% to trigger the win condition.
Inventory Constraints
You have 5 slots. Manage them strictly.
- The Golden Rule: Always keep 1 slot empty.
- Reasoning: You cannot pick up a new cup from the top if your hand is full. A full hand stops the conveyor.
- Tactics: If you are holding 5 cups, you must pour one into a "safe" non-critical zone immediately.
The Win Condition
Do not aim for 100% perfection everywhere.
- Priorities: Blue Body > Pink Wings > Yellow Moon.
- Safety Margin: You can leave the White stars/clouds partially empty.
- Trigger: The level usually ends when the *background* coverage hits a high percentage, even if the bat's ear tips aren't perfect.
Step-by-Step Instructions: The Walkthrough
Follow this tactical sequence to navigate the bottleneck safely. This path minimizes the risk of hand-clogging.
Step 1: The Wood Breach (Top Center)
Start the level. Look at the top row.
- Observation: You see a Wood Box (5 HP) surrounded by White and Yellow cups.
- Action: Clear the White cups immediately to the right of the box.
- Action: Clear the Pink cup to the left.
- Tech Tip: Do not save Blue for the bat yet. Pour Blue into non-critical spots if it helps you clear the wood faster. Speed is key here.
Step 2: Attack Ice Block 25 (Center)
Wood is gone. Now focus on the bottom center.
- Target: Ice Block (25 HP) blocking the flow.
- Strategy: Look for cups touching the top and sides of this block.
- Warning: You will see a lot of Yellow and White here. Clear them relentlessly.
- Tip: Do not hold onto Blue cups during this phase. If you hoard Blue while breaking ice, your hand will clog. Use Blue on the "dump zones" if necessary.
Step 3: Excavate the Bottom Left (Ice 26 & 27)
This is the hardest section of the level.
- Target: Bottom-left corner fortress.
- Physics: Gravity will naturally stack cups on top of these high-HP blocks.
- Action: Focus all tapping energy on the bottom-left quadrant. Every clear reduces the number by 1.
- Patience: This takes about 20-30 cup clearings. Do not panic. Just keep the cycle moving.
Step 4: The Mid-Board "Dumping Ground"
While the bottom is frozen, the middle of the board will fill up.
- Action: Use the middle of the board to dispose of excess colors.
- Mechanic: Clearing the middle ensures that when the Bottom Ice finally breaks, the stack above can slide down safely.
- Mistake Avoidance: Do not let the middle stack reach the top of the screen.
Step 5: The Facial Detail Setup
Ice is gone. Board is flat. Now we get precise.
- Preparation: Check your hand. Do you have 2 Pink and 2 Blue saved?
- Strategy: Cycle the conveyor until you have these colors ready.
- Execution: Do not start the face until the board is stable. A moving board makes micro-pouring impossible.
Color Order: Processing the Palette
The sequence in which you pour colors determines whether you win or run out of space. Follow this priority list strictly.
1. Primary: Dark Blue (The Anchor)
Dark Blue is the bulk of the image (40-50% of pours).
- Timing: Start filling the Body immediately after the Wood Box breaks.
- Flow: Fill the bottom of the bat first, then work up to the neck. This creates a stable base.
- Risk: Do not pour Blue while the conveyor is moving horizontally. Wait for the cups to align vertically to avoid "bleeding" into the background.
2. Secondary: Neon Pink (The Details)
Pink is for Wings (bulk) and Eyes (precision).
- The Wings: Fill these aggressively during the "Grind" phase (Step 2). Get them out of the way.
- The Eyes: Save at least 1-2 Pink cups for the very end. If you use all Pink on the wings, you cannot finish the face.
- Tip: If you have excess Pink and the wings are full, dump it into the Yellow moon rather than risking a spill on the face.
3. Tertiary: Yellow (The Container)
Yellow is the background and your primary defense tool.
- Containment: Use Yellow to build "walls" around the Blue bat. This prevents the Blue from spreading into the Moon area.
- Filling: Pour Yellow whenever you are "stuck" waiting for Blue or Pink.
- Win Condition: The level ends when the background (Yellow) is mostly full. Prioritize Yellow in the final 10 seconds.
4. Quaternary: White (The Buffer)
White is mostly an obstacle.
- Function: Use White to separate the Pink wings from the Yellow moon if they are touching.
- Disposal: If you have too much White clogging your hand, pour it into the corners of the background where it won't interfere with the Bat's silhouette.
Color Interaction Logic
Think in terms of "Walls" and "Borders."
- Sandwiching: Never pour Blue between two Pink areas. The Blue will bleed.
- Bordering: Use Pink to outline the ears before filling them with Blue.
- Walling: Build Yellow walls to contain the Blue sand. This allows you to pour faster without needing pixel-perfect aim.
Key Tips & Mistakes to Avoid
Level 370 punishes impatience. Here is how to refine your playstyle.
Key Tip 1: The "Short Tap" Technique
This is the golden rule for the Bat's face.
- The Technique: Never hold down the pour button. Tap, release, tap, release.
- The Reason: Sand physics are fluid. Holding the button causes the sand to mound up and slide sideways.
- Application: Use this for the eyes (Pink) and the snout (Blue). Short taps keep the pile compact and vertical.
Key Tip 2: Peripheral Vision Management
Tunnel vision causes failure.
- The Error: Focusing solely on the ice block HP counter.
- The Fix: Glance at the incoming cups every 3-4 seconds.
- The Benefit: You will see Pink cups coming and can clear a slot in your hand before they even arrive.
Common Mistake: The "Snout Spill"
The Bat's snout is the death zone.
- The Mistake: Trying to pour the Blue body and the snout in one continuous flow.
- The Result: The Blue sand overflows into the Pink eye sockets or the Yellow moon.
- The Correction: Treat the snout as a separate pixel. Pause, align the nozzle, drop 1-2 taps of Blue, stop. Check alignment. Resume body filling.
Common Mistake: Hand Clogging
The "Full Hand" deadlock.
- The Scenario: You are holding 2 Whites, 1 Yellow, 1 Blue. You need Pink. A Pink cup appears. You cannot grab it.
- The Fix: Pour that White into a safe corner immediately to free the slot. Never save a color "for later" if it means filling your hand.
Stuck Solutions: The Deadlock Break
What to do when the board is full and nothing matches.
- Situation: Hand is full (e.g., Blue, Yellow, White, White, Yellow). The board needs Pink. The conveyor shows Pink.
- Solution: You must "sacrifice" a color. Pick the color you have the most of (e.g., Yellow). Pour it into the most empty, non-critical background slot available.
- Emergency: If there is absolutely no space to pour, you have lost. Restart and focus on keeping the board flatter earlier in the match.
Speed Run & Advanced Strategies
For 3-star ratings and leaderboard placement, efficiency is key.
Speed Run Tip: The "Pre-Fill" Method
Gain seconds by anticipating flow.
- Concept: Don't wait for the Wood Box to fully vanish before moving to the side columns.
- Action: While clearing the right side of the Wood Box, simultaneously clear the top-left Pink cup.
- Benefit: This starts the "Grind" on the side ice blocks a few seconds earlier.
Advanced Strategy: The "Funnel" Method
Create a path of least resistance.
- Setup: When the board is flat, use Yellow sand to build a "U" shape around the Bat's head.
- Execution: This funnel guides Blue sand directly into the body cavity.
- Result: You can pour faster and sloppier because the Yellow walls catch the overflow.
Shortcuts for Faster Completion
Skip non-essential pixels.
- The Ears: Don't fill the bat's inner ears perfectly. A rough approximation is enough.
- The Stars: The White clouds/stars are filler. Ignore them if you are behind schedule. Let the overflow from the moon fill them.
- Early Win: If the Bat is 98% full and background is 90% full, dump all remaining Yellow into the center. The splash damage often triggers the win screen.
Mastering the Micro-Pour
The difference between a good and great player.
- Training: Practice tapping the screen for 50 milliseconds. Just a blip.
- Usage: Essential for the Pink Eyes. Drop a single grain of sand, not a stream.
- Payoff: Prevents the need to use White to "correct" spills, saving valuable time.