
Level 380
HARDHow to solve Sand Loop level 380? Get instant solution for Sand Loop 380 with our step by step solution & video walkthrough. Sand Loop 380 tips and guide.
Play Sand Loop Now
Experience the puzzle challenge firsthand
Game Screenshots
Sand Loop Level Guides
Sand Loop Level 380: The Rustic Cottage Master Walkthrough
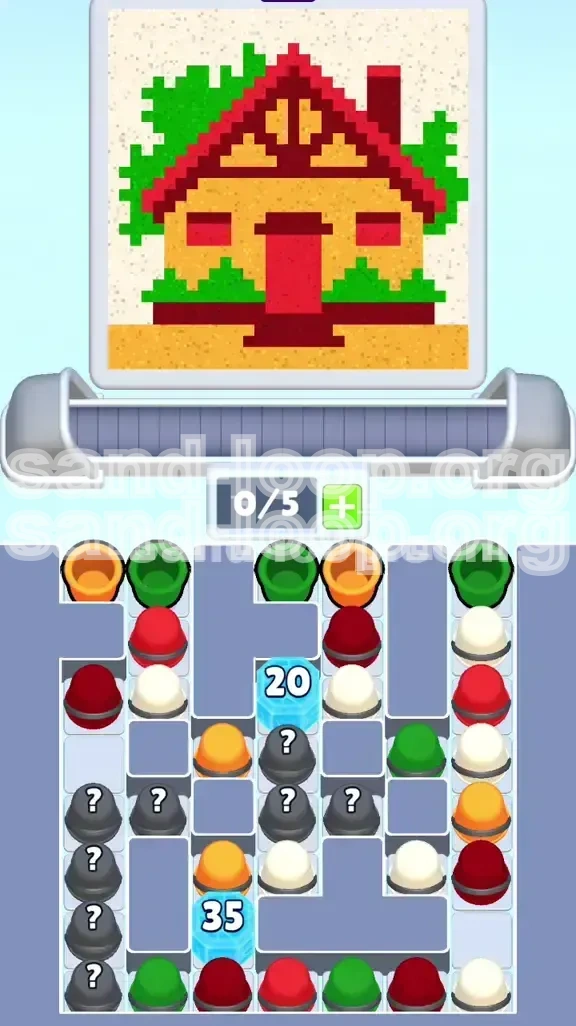
Welcome to the definitive guide for Sand Loop Level 380. This stage is widely considered a major difficulty spike, moving beyond simple color matching into the realm of complex resource logistics and board management. In this level, you are tasked with painting the "Rustic Cottage," a detailed scene featuring a distinctive yellow facade, a sharp red roof, and green landscaping. The challenge lies not in the painting itself, but in freeing up the board to get the paint you need. You will face restrictive Ice Blockades and a conveyor belt that threatens to clog if you aren't careful. This guide provides the tactics you need to secure a 3-star victory.
Level Breakdown and Core Challenges
Level 380 is a test of efficiency. The board is split into your painting tray (bottom), the conveyor belt (middle), and the grid (top). Unlike easier levels, you cannot rely on a steady stream of required colors. Instead, you must actively fight to unlock them.
- The Ice Wall: Two massive Ice Blocks sit on the grid. The top block requires 20 hits, and the bottom block requires 35 hits. These blocks sit directly on top of critical spawn points for Red and Green paint.
- The Mystery Cup Hazard: The conveyor frequently spawns Mystery Cups (marked with a ?). While useful, they are unpredictable. Using them recklessly can flood your tray with colors you don't need.
- The Space Constraint: You have a 7-slot tray. If this fills up with unusable colors, you cannot send new cups up, leading to a stalemate.
- Win Condition: Fill the canvas accuracy meter to 100% before running out of moves.
Color Distribution Analysis
Knowing the math behind the canvas helps you prioritize. Based on the pixel count of the Rustic Cottage, the paint requirements are heavily skewed.
- Yellow (40%): Used for the main walls and ground. This is your most abundant resource and the primary color for clearing tray space.
- Red (25%): Used for the roof. It is scarce early on because it is trapped behind the Bottom Ice Block.
- Cream/White (20%): Used for the sky. This acts as a "safe" buffer color.
- Green (10%): Used for bushes. A high-value, scarce resource.
- Brown (5%): Used for window frames and trims. A detail color that can ruin your accuracy if misplaced.
Understanding the "Ice Gate" Mechanic
The most critical mechanic in Level 380 is the positioning of the Ice Blocks. They function as gates that control the economy of the game.
- Top Block (20 HP): This block guards the Mystery Cup cluster. Breaking it is essential for mid-game momentum.
- Bottom Block (35 HP): This is the "Roadblock." It prevents Red and Green cups from spawning. If you ignore this block to focus on painting, you will run out of Red paint for the roof with no way to get more.
- Strategy: You must adopt a "Demolition First" mindset. Painting pixels is secondary to shattering these blocks in the first 60 seconds.
Why Players Fail: The Tray Lock
The number one cause of failure in Level 380 is the "Tray Lock." This happens when your 7-slot tray is full of colors that don't match the available spots on the canvas.
- The Trap: You focus too hard on painting the Yellow walls. Your tray fills up with Red and Green cups that you can't use yet. The conveyor belt stops moving because there's no room in the tray.
- The Result: You are forced to make random matches on the grid just to free up space, wasting precious moves.
- The Fix: Always keep 2 slots open. Never let the tray fill up completely.
Phase 1: The Ice Breaker (Moves 1-15)
The opening phase is purely logistical. Do not worry about perfect accuracy. Your sole objective is to shatter the Ice Blockade to get your resource lines moving.
Target Identification: The "Adjacent" Rule
As soon as the level starts, ignore the canvas. Look strictly at the grid. You need to find matches that are touching the Ice Blocks.
- Scan the Center: Look for clusters of Yellow or Red cups that are physically touching the Bottom Block (35 HP).
- Force Matches: Even if the Red cup doesn't match the canvas yet, match it on the grid if it breaks the ice. You need the Red spawn point active more than you need the paint right now.
- Tip: Use the "Undo" button if you make a match that doesn't touch the ice, to conserve board position.
Managing the Mystery Cup Flood
As you chip away at the ice, Mystery Cups will begin to fall into your tray. These are high-risk, high-reward.
- The 3-Cup Limit: Never hold more than 3 Mystery Cups in your tray at once. If you have 4, and they all turn into Green when you need Red, your run is effectively over.
- Early Usage: In the first 15 moves, use Mystery Cups immediately. Don't save them. Send them to the canvas. If they turn into White, great—you paint the sky. If they turn into a color you don't need, use them on a filled area to clear them from the tray.
Tray Hygiene: The "2-Slot Buffer"
Effective tray management is what separates pros from casuals.
- The Golden Rule: Keep 2 slots empty at all times.
- Why: When you break a large ice block, several cups drop at once. If your tray is full (7/7), those bouncing cups are lost, or they scramble your grid into an unsolvable state.
- Action: If you have 6/7 cups, stop matching colors on the grid. Start sending cups up to the canvas, even if it's a "wasteful" move, just to lower the tray count to 5/7.
Conveyor Belt Optimization
The conveyor belt only moves if you have space in your tray.
- Check the "Next" Line: Look at the cups waiting to enter the tray.
- Strategic Dumping: If the "Next" line is full of Green, but you are currently painting the Yellow wall, you need to clear space. Dump a Yellow cup onto the wall immediately to make room for the incoming Green.
- Avoidance: Do not let the conveyor belt jam. A jammed belt means no new resources, which means no ice breaking.
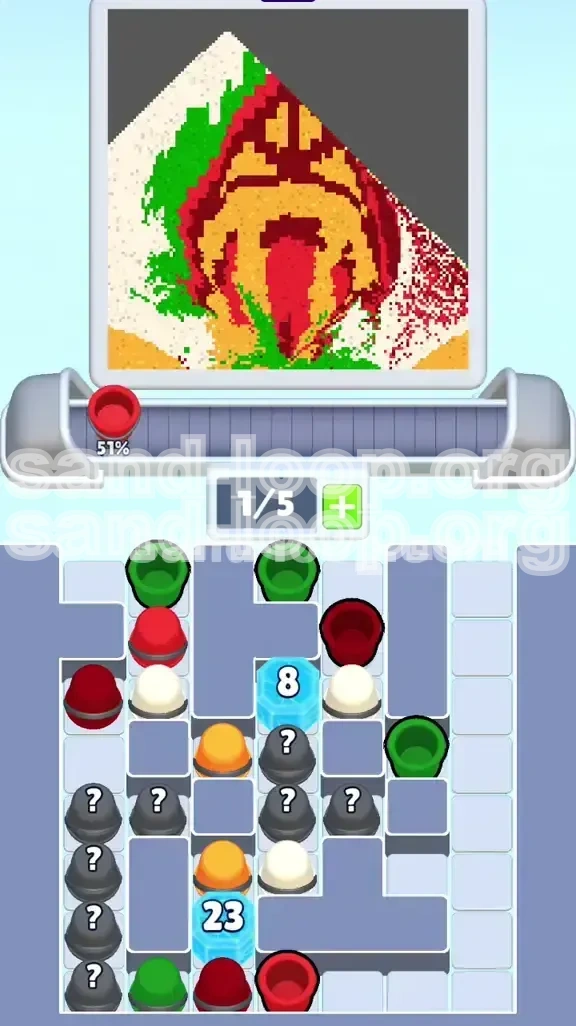
Phase 2: The Foundation Protocol (25% - 50% Progress)
Once the Bottom Ice Block is shattered (or below 10 HP), Red and Green cups will start flowing. Now you can begin painting, but you must follow a strict order.
Step 1: The Sky Buffer (White/Cream)
Always start with the background. Painting the sky first creates a clean boundary for the rest of the house.
- Why: If you paint the Red roof first, and then try to paint the White sky around it, you risk splashing White onto the Red, lowering your accuracy.
- Technique: Use White/Cream cups to outline the top triangle of the roof and the sides of the house. This "contains" the colors you will apply later.
Step 2: The Yellow Base
Yellow is your workhorse. It covers the largest area.
- Flood Fill: Once the sky is outlined, send Yellow cups to the main body of the house.
- Rhythm: Don't tap one by one. Wait until you have 2 or 3 Yellow cups, then send them in a burst. This prevents the sand from "drying" unevenly.
- Note: Do not paint the ground yet. Focus on the walls.
Step 3: The Red Roof (High Risk)
The Red roof is the most dangerous part of the painting because it is surrounded by Yellow and White.
- The Danger Zone: The junction where the roof meets the wall.
- The "Sandwich" Technique: Never send a Red cup if it is touching a Yellow cup on the conveyor. There must be an empty slot between them.
Example: [Red Cup] - [Empty Slot] - [Yellow Cup].
If they touch, the sand pours continuously, causing the colors to mix into orange/brown sludge at the edges.
Step 4: The Green Bushes
Green is scarce. Use it sparingly.
- Precision: Do not use Green cups if you are unsure where they go. The bushes are small clusters at the bottom of the screen.
- Timing: Paint the bushes only after the ground (Yellow) is mostly done. This prevents you from accidentally covering Green pixels with Yellow sand.
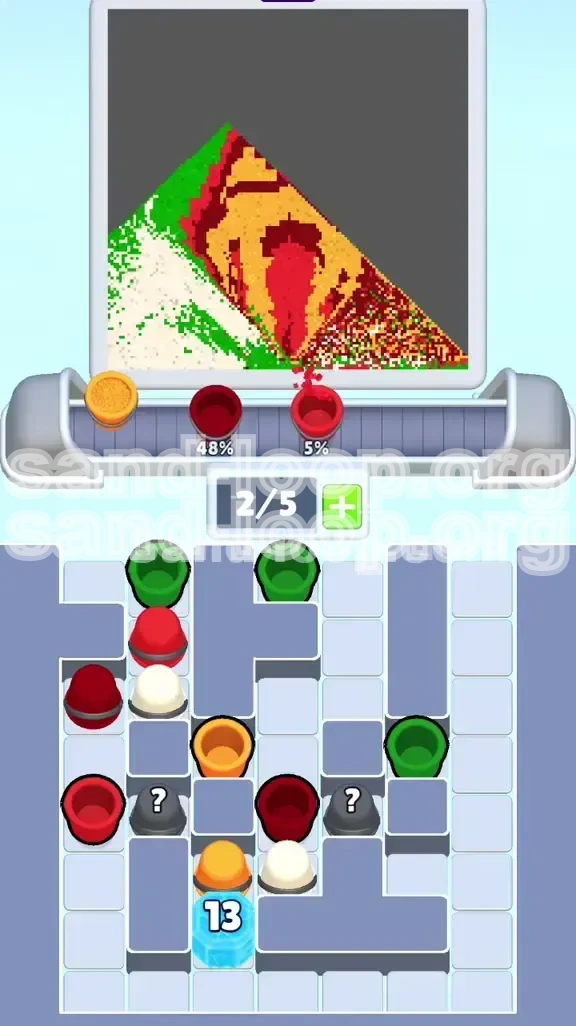
Phase 3: Detailing and Troubleshooting (75% - 100% Progress)
In the final stretch, board space opens up, but precision becomes paramount. Small mistakes here can cost you a 3-star rating.
Handling "Color Bleeding"
Color bleeding happens when the stream of sand drifts into an adjacent area.
- The Cause: Sending cups too fast when the canvas is near full.
- The Fix: Slow down. Watch the sand animation. Wait for the previous cup to finish pouring before sending the next one.
- Cleanup: If you bleed Red into the Yellow wall, stop. You will need a specific Yellow cup later to cover that spot. Don't try to fix it immediately with a "wrong" color.
The Brown Outline Strategy
Using Brown cups is the secret to a high score.
- Don't Fill: Brown is not for filling; it is for edging.
- The Technique: Save 2 or 3 Brown cups for the very end. Use them to trace the window frames and the roof eaves.
- Benefit: A crisp Brown line hides minor inaccuracies in your Red or Yellow fills, artificially boosting your accuracy percentage.
Dealing with "Useless" Cups
Late in the game, you will get cups for colors that are already 100% finished (e.g., White cups when the sky is done).
- The Trash Can Method: If the sky is full, any White cup you pick up is "trash."
- Disposal: Don't match them on the grid (too slow). Instead, pour them onto a part of the canvas that is already full and White. The game will register it as "full" and discard the cup instantly, clearing your tray slot.
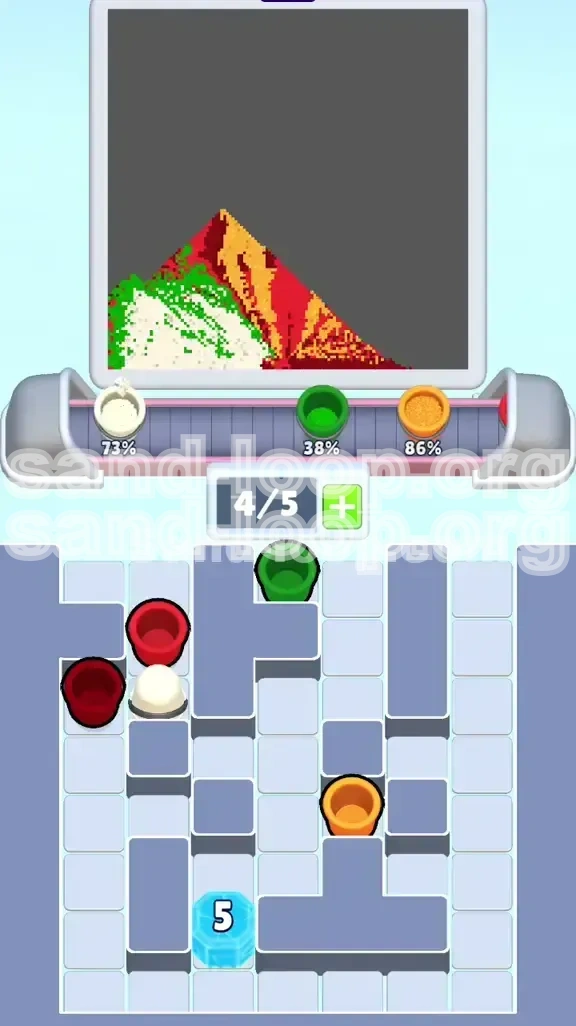
Recovering from Stuck States
Sometimes, despite your best efforts, you will get stuck with no moves.
- The "Cycle" Maneuver: If you have no matches on the grid, pick up a cup from the tray and put it back. This minor action can sometimes force the game to reshuffle the conveyor.
- Power-Up Usage: If you have a Bomb or Rainbow power-up saved, use it now. Don't save it for a rainy day. The endgame is the rainy day. Using a bomb on the bottom row is often enough to dislodge the final few cups you need.
Advanced Speed Run Tactics
For players aiming to top the leaderboards, standard efficiency isn't enough. You need to exploit the game's mechanics.
The "Combo Start" Opening
The first 5 seconds are crucial for setting your pace.
- Pre-Loading: While the level is loading, visually scan the center column. Identify the first match you will make.
- Instant Action: Tap the match the millisecond the game allows input. Breaking the first 5 HP of ice instantly gives you a head start on the RNG cycle.
Batch Processing Colors
Switching cognitive targets takes time. Minimize it.
- Grouping: Don't switch between Red and Yellow constantly.
- Technique: Wait until you have 3 Red cups. Send them all. Then switch your brain to Yellow. Wait for 3 Yellow. Send them all. This "assembly line" approach is significantly faster than "one of this, one of that."
The 80% Rule (Perfection is Slow)
Trying to fill every single pixel to 100% is a trap.
- Aim for 80%: Fill the main body of the zones.
- The Splash Effect: The game has a mechanic where filling the center of a zone often auto-completes the edges due to "splash" or proximity logic.
- Application: Don't obsess over the corners of the roof. Pour Red into the center. If the corners remain slightly transparent, the game will often fill them in when you pour the adjacent color.
Risk Management with Mystery Cups
In a speed run, you cannot afford to be cautious with Mystery Cups.
- Spam Strategy: If you have a full tray of Mystery Cups, send them all to the largest unpainted area (usually the Yellow wall).
- Acceptance: If they turn into Green, that's fine. Pouring Green onto a Yellow wall is "waste," but it clears your tray instantly, allowing you to pull fresh cups from the conveyor. It is faster to waste a cup than to wait for the perfect color.