
Level 381
HARDHow to solve Sand Loop level 381? Get instant solution for Sand Loop 381 with our step by step solution & video walkthrough. Sand Loop 381 tips and guide.
Play Sand Loop Now
Experience the puzzle challenge firsthand
Game Screenshots
Sand Loop Level Guides
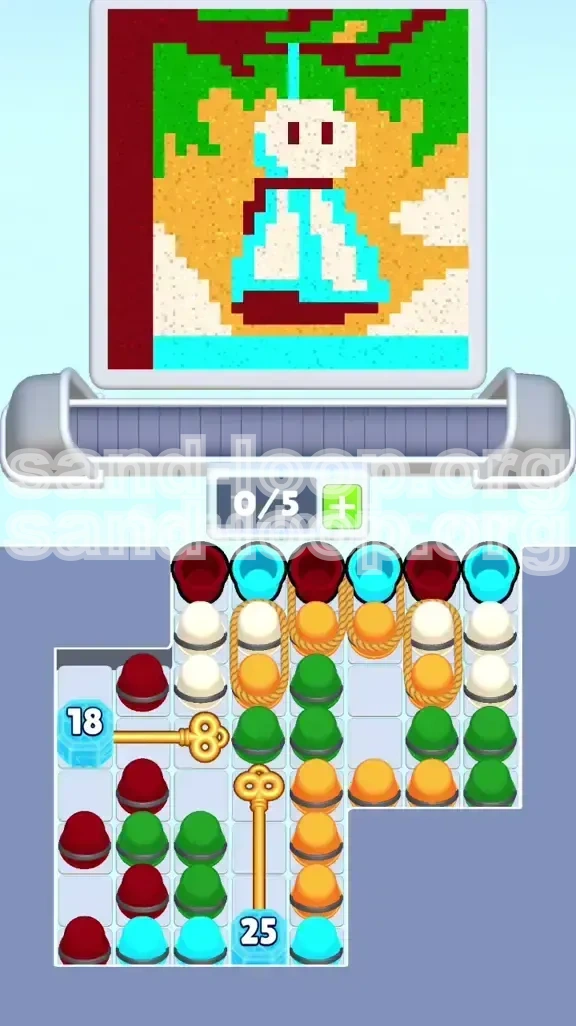
Level 381 Overview: The Pixel Sailboat Challenge
Level 381, famously known as the "Pixel Sailboat" stage, is one of the most intricate logic puzzles in the Sand Loop series. Unlike standard levels where you can simply blast through colors, this stage requires a methodical, almost surgical approach to resource management. The visual aesthetic—calming waters and a sandy beach—belies a high-stress logistical challenge hidden beneath the surface.
At first glance, the board appears spacious, but you are essentially operating within a "fortress" layout. The playable area is tightly constrained by two major Ice Blocks that lock away essential color reserves. The primary difficulty lies not in finding the colors, but in accessing them. You are boxed in by physics mechanics (Ropes) and arithmetic locks (Ice Block health) that force you to drain the central stack efficiently before the game opens up.
This level is estimated to have a 25% completion rate for first-time players, primarily because of move exhaustion. It is not uncommon to fail with 90% of the boat painted, simply because you ran out of moves trying to crack the final defenses.
Stage Characteristics and Layout
The level is built around a central "spine" of accessible cups flanked by locked reserves. The layout forces a vertical playstyle in the first half, transitioning to a horizontal sweep in the second half. The "Pixel Sailboat" aesthetic requires precise color separation; painting over the lines isn't an option if you want to maximize your score efficiency.
The Ice Block Mechanics
There are two massive obstacles: Ice Block (18) and Ice Block (25). These do not function like standard glass breakers. They operate on a "Proximity Damage" system. You must clear cups physically adjacent to the ice to reduce their hit points. This means you cannot ignore the filler colors; every white or green cup you clear in the center is a direct attack on the locks holding your reds and oranges hostage.
Why Moves Run Out
The most common failure state in Level 381 is running out of moves while the "25" Ice Block is still at 10% health. Because the central stack is comprised of filler colors (White, Green) that are needed in smaller quantities than the background (Beige), players often "paint themselves into a corner" by clearing the easy cups first and leaving the hard-to-reach blockers for last when no moves remain.
The Visual Palette Breakdown
The sailboat image uses a distinct 5-color palette. Understanding the volume of each color is crucial:
- Dark Red (High Volume): Used for the hull and the thick mast framing on the left.
- White (Medium Volume): The main sail. This is your "filler" color and is abundant.
- Cyan (Medium Volume): The water details. Usually accessible early.
- Beige/Orange (High Volume): The sandy background. This is your bottleneck resource.
- Green (Low Volume): Foliage accents. Often locked away behind the first ice block.
Difficulty Spike Analysis
The difficulty spikes at the 40% mark. Once the initial top rows are cleared, the board will feel stagnant. The belt will slow down as you hit the roped sections. This is the "make or break" moment where poor planning leads to a deadlock. The key is maintaining momentum on the central column even when it feels like you aren't making visual progress on the picture.
Clear Objectives: The "Inside-Out" Protocol
To conquer Level 381, you must abandon the instinct to paint the picture from top to bottom. Instead, you must follow an "Inside-Out" strategy. You are essentially drilling a tunnel to freedom. Your primary objective is not to paint the sail, but to liberate the supplies trapped in the Left and Bottom reserves.
The level is divided into three distinct phases of operation. Completing Phase 1 is necessary to even start Phase 2 effectively. If you try to rush Phase 3 without fully clearing Phase 2, you will run out of moves.
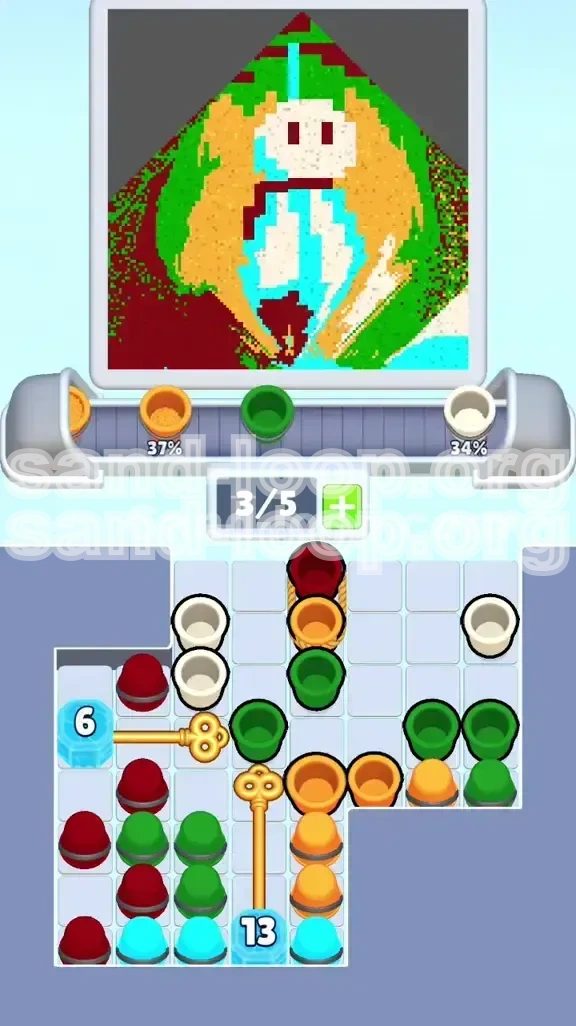
Phase 1: The Central Drill
Your immediate goal is to decimate the central stack of cups. Do not worry about painting the bottom 20% of the sandy beach yet. Focus entirely on clearing the White, Green, and Yellow cups in the middle of the screen. Every cup cleared here damages the Ice Blocks. Think of this phase as "charging" your keys.
Phase 2: Liberation of the Flanks
Once the "18" Ice Block shatters, the board dynamics change. A new column of Red and Green cups will cascade from the left. Simultaneously, you must have maintained enough move momentum to attack the "25" block. The objective here is to switch from vertical clearing to horizontal sweeping, using the new Red supply to finish the boat structure.
Phase 3: The Beach Fill
The final 15% of the level is a race against the move counter. The "25" block breaks, flooding the board with the necessary Beige/Orange cups to finish the background. The objective is to rapidly deploy these into the sand areas without over-filling your tray (overfilling the tray causes a game over in this mode).
Move Efficiency Targets
To stay on track for a win, aim for these benchmarks:
- Moves 1-10: Clear the top rows and expose the Roped Yellows.
- Moves 11-25: Reduce the "18" Ice Block to zero.
- Moves 26-40: Utilize the Left Reserve to finish the boat.
- Moves 40+: Break the "25" block and execute the final fill.
Resource Prioritization Logic
Prioritize clearing cups that are touching the Ice Blocks over cups that are floating freely. A free cup gives you points, but a cup touching the ice gives you points AND progress toward unlocking the rest of the board. Always choose the "productive" clear over the "easy" clear.
The Gold Key Strategy
Visualize the Gold Keys not as locks, but as valves. The Horizontal Key controls the water (Cyan) and structure (Red). The Vertical Key controls the earth (Beige). You must turn the water valve before you can access the earth valve. There is no shortcut to this order.
Step-by-Step Walkthrough
This section provides the exact sequence of actions required to navigate the gridlock of Level 381. Follow these steps in order to maximize your efficiency.
Step 1: The Rhythmic Top-Row Tap
The level opens with a scripted sequence: Red, Cyan, Red, Cyan. Do not deviate from this pattern. Tap the Red, wait for the pour animation to finish (~50% completion), then tap the Cyan. This keeps the tray moving. If you tap too fast, you risk a momentary bottleneck where the tray is full and the belt stops. Keep the rhythm: Tap, Pour, Tap, Pour.
Step 2: Isolating the Roped Yellows
After the initial rows, you will encounter two Yellow cups linked by a Rope. This is a critical mechanic. Do not try to pull the Roped pair immediately. Instead, clear the single White cups located on the far left and far right of the row below the ropes. This removes the support structure, allowing the Roped Yellows to drop freely into the "pocket" you just created. If you pull them too early, they will jam against the cups below, costing you 2-3 moves to fix.
Step 3: Targeting the "18" Block (Left Flank)
Now you are in the "Grind." Focus your eyes on the left-center of the screen. Identify the "18" Ice Block. Your target is the column of cups directly to its right (usually White and Green). Clear these cups with aggressive intent. Do not save them for "perfect placement." Every time you clear one, the ice number drops. When it hits 0, the Left Reserve (holding critical Red and late-game Green) will unlock.
Step 4: Managing the Left Reserve Cascade
The moment the "18" block breaks, a vertical stack of Red and Green cups will fall. This is a high-risk moment for your tray capacity. Immediately pause clearing the center. Switch your focus entirely to pouring these new Red cups into the boat's hull and mast. You need to clear these fallen cups quickly to prevent the board from clogging up again.
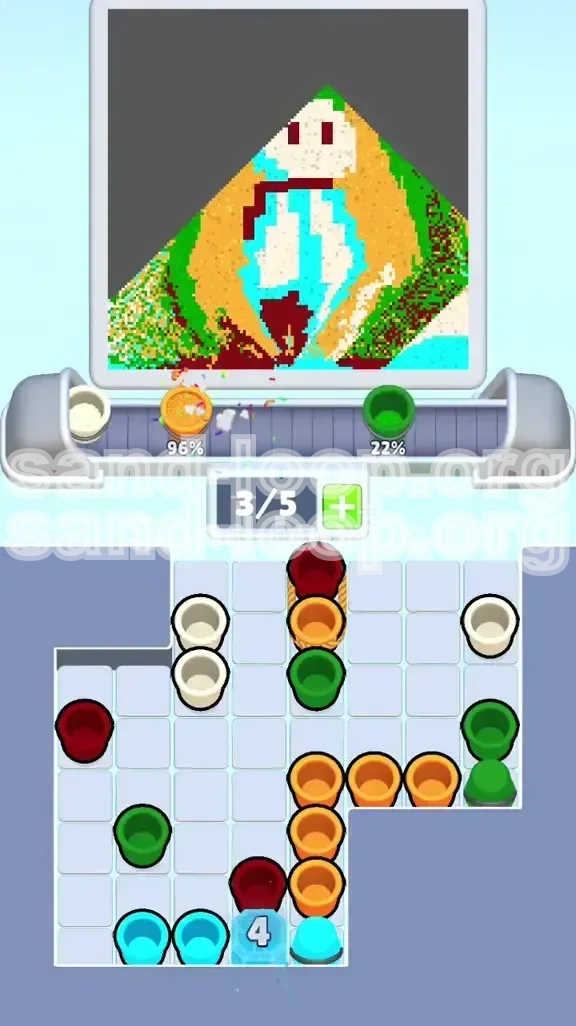
Step 5: The "25" Block Descent
With the left side cleared, you can now focus purely on the bottom center. The "25" Ice Block is the final barrier. You likely have a mix of White and Green cups remaining in the center stack. Use these to chip away the final 10-15 points of the block's health. Do not worry about running out of center cups; the game design ensures there are exactly enough to break the block if you haven't wasted moves.
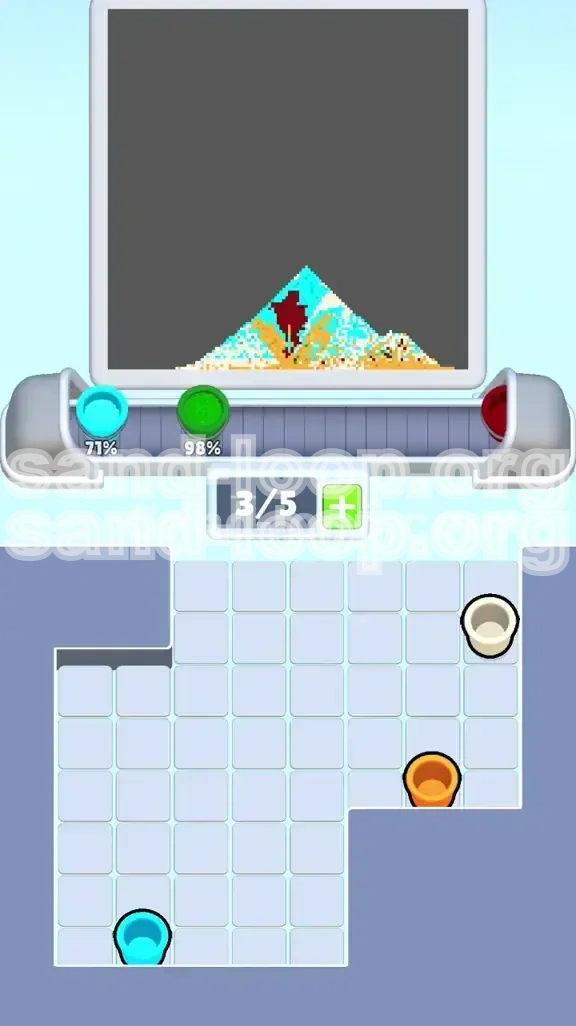
Step 6: The Final Sprint
Once the "25" block shatters, the Vertical Key turns, and the Bottom Reserve of Beige/Orange cups unlocks. The screen will fill with sand-colored cups. At this point, the puzzle is solved, and it becomes a speed test. Rapidly tap the Beige cups to fill the remaining background areas. Keep your tray below 4/5 capacity to ensure the belt keeps moving until the final "Level Clear" triggers.
Processing the Color Order
The specific order in which you process the colors dictates your success rate in Level 381. Processing them in the wrong order (e.g., trying to finish the sand before the boat) leads to immediate failure because the required cups are physically locked behind ice.
Priority 1: Cyan (The Water)
Why first? Because Cyan cups are almost exclusively located in the top, accessible rows and the immediate left reserve. There are no Cyan cups locked behind the major "25" Ice Block. You should aim to complete 100% of the water elements by Move 15. This clears the visual clutter and allows you to focus on the complex mechanics.
Priority 2: Dark Red (The Structure)
Red is your "Gatekeeper" color. It is abundant in the top rows but heavily dependent on the Left Reserve (unlocked via the "18" block) for the mid-game. Treat Red as a limited resource in the beginning. Don't waste top-row Red on small details; use it for the hull. Once the "18" block breaks, you can go wild with Red to finish the mast.
Priority 3: White (The Sail)
White is your "Workhorse" color. You will process White cups continuously throughout the game because they are the primary component of the central stack that you are drilling through. You don't need to "prioritize" White actively; you will process them automatically as you break the Ice Blocks. Just ensure they don't clog your tray.
Priority 4: Green (The Foliage)
Green is a "Trickle" color. You get a few at the start, a bunch when the "18" block breaks, and the rest are scattered. Do not focus on Green until the Red structure is mostly done. Green is mostly aesthetic (trees) and doesn't block other colors, so it can be a cleanup task.
Priority 5: Beige/Orange (The Sand)
DEADLAST. This is the golden rule of Level 381. Do not actively try to paint the sand background until the very end. The Beige cups are trapped behind the "25" Ice Block. Trying to paint sand early is a waste of moves because you will run out of paint and be forced to wait for the block to break anyway. Leave the canvas bare until the final cascade.
The "Full Tray" Management
Because the processing order forces you to use specific colors at specific times, your tray will often be unbalanced. You might have 3 Reds and 2 Whites sitting there while you wait for Green. This is normal. Do not force a pour just to clear a slot if that color is needed elsewhere later. Patience with the tray is better than a mis-painted pixel.
Key Tips and Strategic Notes
Mastering Level 381 requires understanding the hidden mechanics that aren't explicitly explained in the tutorial. These tips are distilled from hundreds of playthroughs and highlight the subtle "gotchas" that trip up most players.
The "Rope" Physics Explained
The Roped Yellow cups are the biggest cause of accidental stalemates. Remember the rule: Ropes move as one unit. If the cup on the right is blocked, the cup on the left cannot move down, even if the path is clear. Always look at the bottom-most cup of the roped pair before making a move. If it's sitting on top of a color you don't want to use yet, you must clear that blocking color first.
Ice Block Adjacency Rules
The Ice Blocks are picky about what counts as a "hit." Only cups that are physically touching the side or the top of the block count. Diagonal touches usually do not register damage. When planning your moves to break the "18" or "25" blocks, prioritize cups directly to the left or right. Clearing a cup above the block is less effective than clearing one beside it.
Mid-Game Resource Scarcity
There is a "dead zone" around Move 20 where it feels like there are no cups of the colors you need. This is intentional. The game is forcing you to use the "filler" White cups to break the ice. Don't panic when you don't see Red or Orange. Keep breaking the ice, and the supplies will return.
Efficient Tray Management
Your tray has 5 slots. In Level 381, try to keep 2 slots open at all times. This gives you the flexibility to catch random drops from the reserves when they unlock. If your tray is consistently at 4/5 or 5/5 capacity, you risk "bouncing" new cups, which can mess up the queue order. A clogged tray is the silent killer of speed runs.
Recognizing the "Soft Lock"
A "soft lock" happens when you have moves left, but no legal moves that advance the board (e.g., only Reds available, but the Red areas are full). If you recognize this state, you must immediately clear a cup of a different color—even if you don't want to—just to cycle the belt and get new options into play.
The Importance of the "25" Block Timing
Don't be in a rush to break the "25" block. Unlike the "18" block, which unlocks necessary items, the "25" block unlocks the finishing items. If you break it too early (e.g., Move 25), you might flood the board with Beige cups while you still have large chunks of the boat unpainted. This forces you to juggle colors inefficiently. Ideally, break the "25" block only when the boat is 90% done.
Common Mistakes to Avoid
Even experienced players fall into these traps. Analyzing these common errors will help you self-correct during the game if you feel things going wrong.
Mistake 1: The "Perfect Picture" Syndrome
Many players try to paint the picture perfectly, color by color, finishing the water before touching the boat. In Level 381, this is fatal. You must paint opportunistically. If you have White cups and White ice needs breaking, pour the White even if it messes up your rhythm. The mechanics dictate the play, not the aesthetic.
Mistake 2: Ignoring the "Filler" Colors
Some players skip clearing White or Green cups in the center because "they aren't needed for the picture yet." This is a mistake. These cups are not just paint; they are tools to break the ice. Ignoring them leaves the locks in place and guarantees you will run out of moves.
Mistake 3: Breaking the Second Ice Block Too Early
As mentioned in the tips, unlocking the Orange reserve too early creates a logistical nightmare. You will have a tray full of sand colors while the boat is still begging for Red. This leads to a jammed tray and wasted moves dumping oranges into temporary slots.
Mistake 4: Mismanaging the Roped Pair Drop
A common error is clearing the cups under the roped pair without ensuring the roped pair has a place to go. If you clear a single cup underneath a roped pair, the pair drops, but if the columns below are clogged, they just sit there, blocking the flow. Always ensure you have a "landing pad" (an empty or matching color slot) before triggering a rope drop.
Mistake 5: Panicking at Low Move Counts
If you reach Move 35 and the board looks half-frozen, don't panic. The "snowball effect" is real in this level. Breaking the first ice block takes 40% of your effort, breaking the second takes 30%, and finishing the level takes the final 30%. The game accelerates at the end. Stick to the drill strategy, and you will often clear the final 20% of the screen in just 5 moves.
Mistake 6: Over-Focusing on the Left Side
Because the first objective is the "18" block on the left, players tend to ignore the right side of the board. Keep an eye on the right. Sometimes a simple clear on the right can cascade the center cups more effectively than attacking the left directly. Balance your strikes.
Solutions When You Get Stuck
Sometimes, despite best efforts, the board seems to lock up. If you stare at the screen for 10 seconds and see no moves, use these diagnostic steps to get unstuck.
Scenario 1: "The Belt Stopped Moving"
Diagnosis: The belt isn't bringing new cups.
Solution: Your tray is likely full (5/5). You must make a pour, any pour, even if it's not the perfect color. Get rid of one cup to open a slot. The belt will only advance if there is physical space for the new cup to enter the tray.
Scenario 2: "No Moves for Locked Colors"
Diagnosis: You need Red to finish the boat, but only White/Green are available.
Solution: This means you haven't damaged the Ice Block enough. Look at the "18" block. Is it still high? Take the White/Green cups and pour them into their respective zones (Sail/Trees) purely to clear them from the board. This "grinding" is the only way to spawn the Red keys.
Scenario 3: "Ice Block at 1, Won't Break"
Diagnosis: The block says "1" but won't shatter.
Solution: This is a proximity glitch or a visual overlap. Look for a cup that is diagonally touching the block. Sometimes the game's hitbox is generous. If that fails, check if a cup is "stuck" in the chute above the block. You may need to pour a cup from the tray to dislodge the one above the block.
Scenario 4: "Tray Mismatch"
Diagnosis: Tray has 3 Reds, but the sail (White) is the only thing open.
Solution: You have to "waste" the Reds. Find a spot on the boat that overlaps with the sail or a dark spot and pour the Red there. You cannot hold the Reds forever; you need to cycle them out to get the Whites you actually need.
Scenario 5: "Roped Pair Stuck in Mid-Air"
Diagnosis: You cleared the under-cup, but the roped pair didn't fall.
Solution: This happens if the columns below the drop zone are full to the top. You need to create space in the columns directly under where the roped pair is sitting. Clear 2-3 cups from those specific columns, and gravity should take over.
Speed Run Tips
For players looking to achieve 3-star status or top the leaderboard, efficiency is everything. Here is how the pros shave 20% off their time.
Pre-Loading the Tray
Before the level even fully starts (during the fade-in), tap the screen rapidly. If you are fast enough, you can "preload" the first pour command. This shaves a fraction of a second off every move, which adds up over 50 moves.
Chaining Combos
Look for "Chain Reactions." If you clear a cup that causes a Roped Pair to drop, which in turn clears a row of Ice, try to time your taps so the game registers them as a combo. The UI often rewards rapid successive clears with score multipliers or faster belt animations.
The "Blind" Break
Don't wait for the pour animation to finish 100% before tapping the next cup. Once the liquid is about 80% poured, you can safely tap the next cup in your queue. This "quick-tap" method keeps the flow fluid. It's risky but essential for speed runs.
Memorizing the "18" Trigger Point
The "18" block always breaks at the same time relative to the stack depth. Memorize which specific cup clears the block (usually the 3rd White cup from the left in the 5th row). Once you know this, you can plan your moves 3 steps in advance, setting up the board for the Red cascade before it even happens.
Ignoring the Small Details
Speed runners often ignore the small "pixel dots" (like the tiny windows on the boat or single-pixel flowers) until the very end. Focus entirely on the large color blocks (Hull, Sail, Water). Filling the large blocks clears more cups faster, which cycles the belt quicker. You can dot the i's and cross the t's in the final 10 seconds when the board is mostly empty.
Utilizing the "Pause" Buffer
If the game lags or you need to think, pause immediately. The timer (if there is a countdown for bonus points) often pauses, but your brain keeps planning. Use this to survey the board for the optimal "drill path" without wasting precious seconds watching the belt move.