
Level 44
HARDHow to solve Sand Loop level 44? Get instant solution for Sand Loop 44 with our step by step solution & video walkthrough. Sand Loop 44 tips and guide.
Play Sand Loop Now
Experience the puzzle challenge firsthand
Game Screenshots
Sand Loop Level Guides
Level 44: The Pixel Garden - Complete Strategy Guide
The "Tulip Trio" Challenge Overview
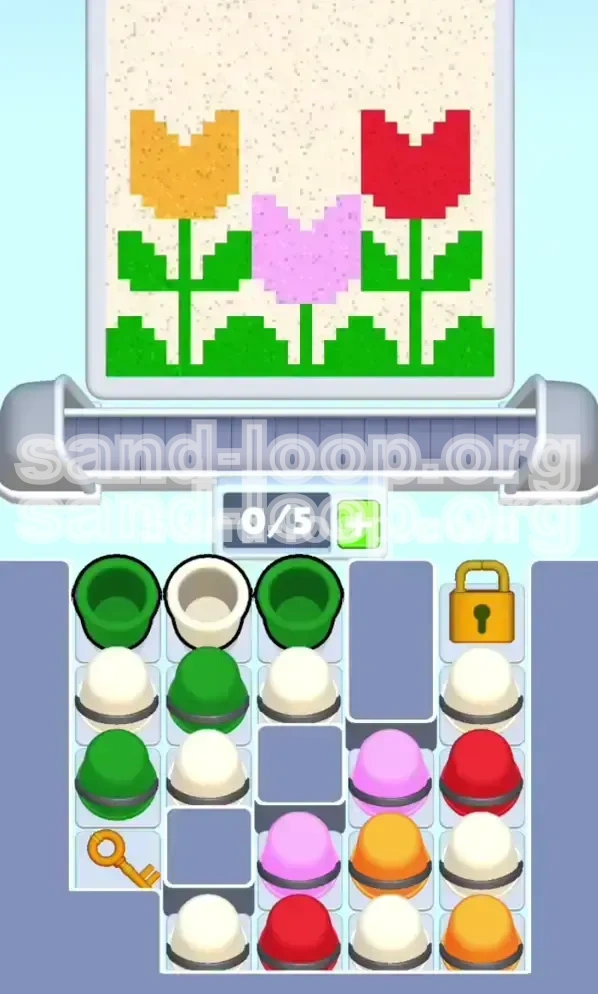
Sand Loop Level 44 is a deceptive logic puzzle disguised as a simple art task. While the objective appears to be painting a cheerful 8-bit garden scene featuring three tulips (Yellow, Pink, and Red), the true challenge lies in resource management and excavation mechanics. This is not a stage where you can simply paint by numbers; it is a test of your ability to manage a clogged supply tray.
Why This Level Stumps Most Players
The failure rate on Level 44 is high because of the "Deadlock Trap." The screen presents you with the colors for the flower heads immediately, tempting you to paint them. However, the slots available on the conveyor belt are limited. If you prioritize the bright colors (Red, Yellow, Pink) before clearing the background materials (Green, White), you will fill your belt with unusable cups. When the essential Green cups arrive to build the stems, they will have nowhere to go, causing a game over.
Resource Distribution Analysis
To succeed, you must understand the composition of the supply tray:
- Base Materials (60%): An overwhelming amount of Green and White cups. These form the soil, stems, and negative space.
- Accent Colors (30%): A moderate stack of Pink cups for the center flower.
- Locked Resources (10%): The Red and Yellow cups are initially hidden behind a Gold Lock, making them inaccessible during the first phase of the level.
The Key Mechanic
The defining feature of this stage is the buried Gold Key. It is located deep within the supply tray, covered by layers of "trash" cups (Green and White). You cannot access the vibrant flower colors until you physically dig through the boring base layers to retrieve this key. This enforces a strict linear progression: you must build the background before you can paint the foreground.
Primary Objectives and Completion Goals
Objective 1: Clear the "Overburden"
Your first goal is not visual appeal, but tray management. You must process the bottom-left stack of Green and White cups. Think of these as the "overburden"—the dirt you must shovel away to find the treasure. You must clear approximately 40% of the total cup volume before the key becomes accessible.
Objective 2: Locate and Extract the Key
Hidden beneath the initial layers is the Gold Key. You must expose this item by pouring the cups directly above it. Unlike standard levels where you might save a power-up, this key must be used immediately upon discovery to progress.
Objective 3: Unlock the Color Arsenal
Once retrieved, the key must be dragged to the Gold Lock located on the top-right side of the supply tray. This action triggers a release mechanism, dropping the Red and Yellow stacks into play. This is the "turning point" of the level.
Objective 4: Precision Placement
After unlocking the colors, the challenge shifts from excavation to precision. The stems (Green) are thin, pixel-wide paths. Pouring White or colored sand over them accidentally will ruin the image. You must alternate flows carefully to maintain the integrity of the pixel art.
Step-by-Step Walkthrough: Phase 1 - The Dig
Step 1: Initial Assessment (0-5 Seconds)
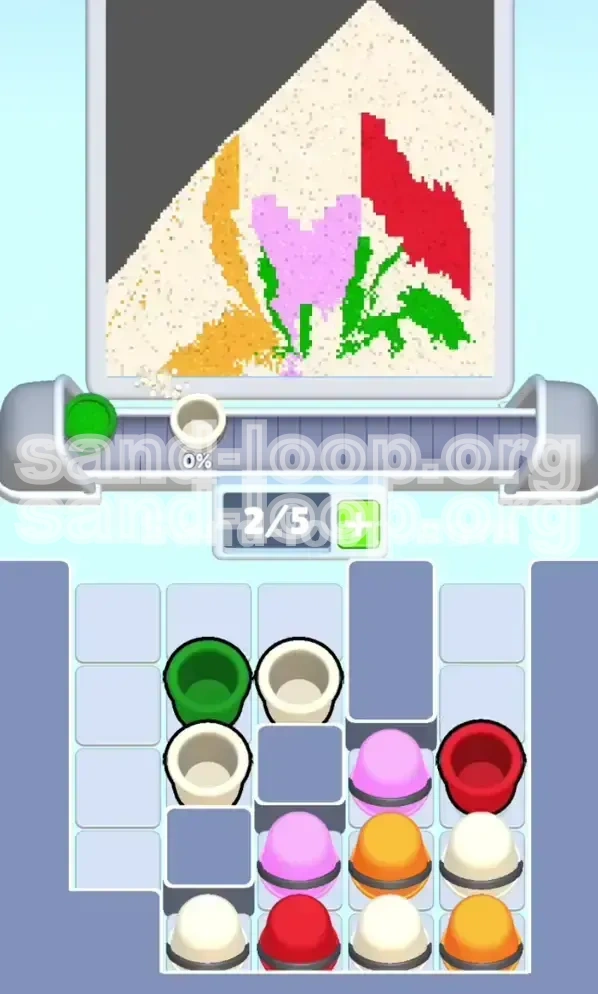
As the level loads, ignore the temptation to touch the Pink stack in the center or the locked area on the right. Focus your eyes 100% on the bottom-left corner of the supply tray. Identify the Green cups that are sitting on top of the "pile." These are your only targets for the first 30 seconds.
Step 2: Pouring the Foundation (Green)
Tap the Green cups in the bottom-left stack. Send them down the conveyor belt immediately.
- Target Area: The bottom of the canvas (Leaves and Soil).
- Strategy: Do not wait. Tapping these cups immediately clears space in the tray for the next layer of cups to slide down.
Step 3: Managing the White Blocker
As you clear Green cups, a White cup will likely slide into place or be revealed directly above the Key. This is a critical moment. Check your canvas for the "negative space" (the sky or empty areas between stems). Tap the White cup to pour it.
- Note: This is not just about painting; this is about removing the physical cup that is blocking your access to the key.
Step 4: The Excavation Rhythm
Establish a rhythm of "Green, White, Green." The bottom of the image requires a heavy mix of green leaves and white background/soil. By aggressively tapping these two colors, you are essentially "digging" vertically down through your supply tray. You will know you are doing this correctly when the stack on the left starts shrinking rapidly.
Step-by-Step Walkthrough: Phase 2 - The Unlock
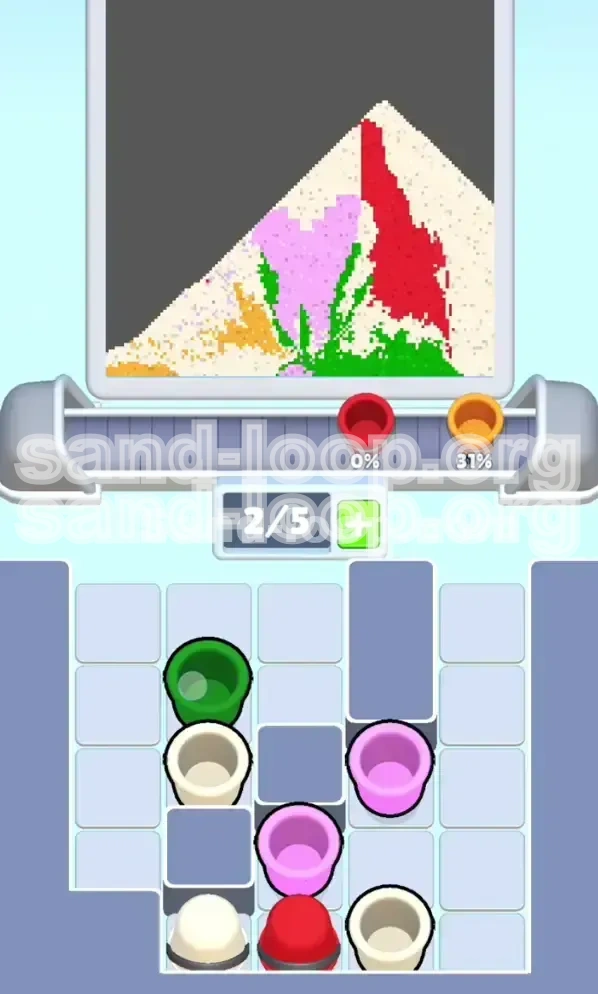
Step 5: The Key Reveal
After pouring roughly 6-8 cups of Green and White, the Gold Key will be fully exposed at the bottom of the left stack. It will be sitting on top of the tray's "floor."
- Crucial Action: Pause your pouring for a split second. You need to tap the Key itself.
Step 6: Unlocking the Right Side
Tap the Gold Key. It will fly across the screen to the Gold Lock on the top right. A mechanical shift will occur. The lock will open, and a new stack of cups—containing White, Red, and Yellow—will slide down to replace the empty space on the right.
Step 7: Assessing the New Layout
Now look at your tray. You likely have: 1. A dwindling stack of Green/White on the left. 2. The original Pink stack in the middle (untouched). 3. A fresh stack of White, Red, and Yellow on the right.
Step 8: Transitioning to Color
Do not panic if the left side is still clogged. You now have access to the colors needed for the flower heads. The "digging" phase is over, and the "painting" phase begins. Shift your focus from the bottom of the canvas to the top, where the flower petals are outlined.
Step-by-Step Walkthrough: Phase 3 - The Tulip Trio
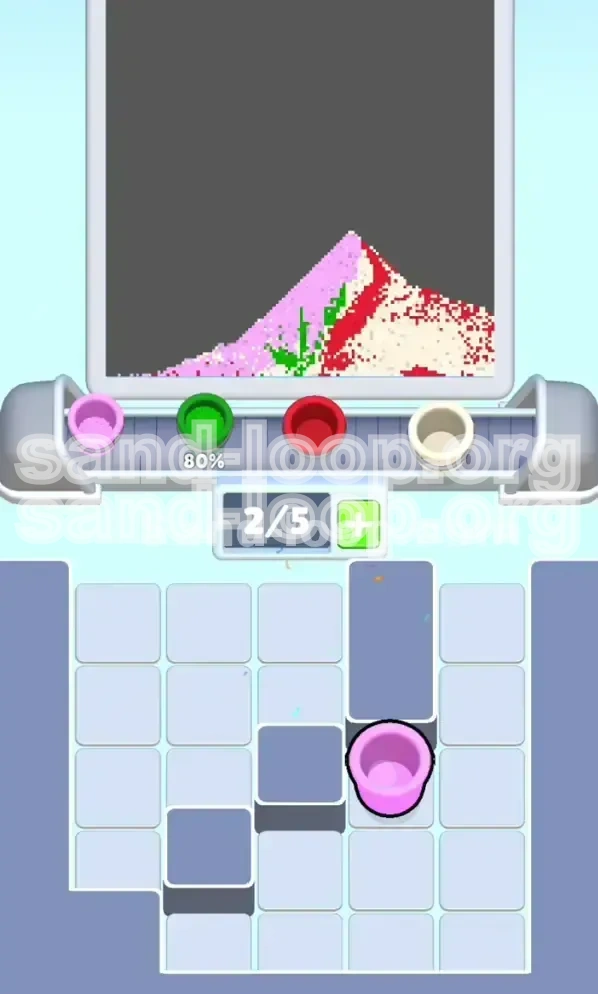
Step 9: Painting the Right Tulip (Red)
Focus on the stack on the far right. Tap the Red cups. These should be poured into the top-right outline of the canvas (the Right Tulip).
- Warning: Ensure you have cleared enough stem space (Green) below it, or the red sand will just bleed into the stem area.
Step 10: The Center Piece (Pink)
Now activate the Pink stack in the middle. This has been sitting there patiently. Pour Pink cups into the center flower outline. This flower is usually the focal point, so ensure the pixels are filled completely.
Step 11: The Final Flower (Yellow)
Finally, tap the Yellow cups from the right stack. These complete the Left Tulip. At this point, you will be juggling three different colors.
Step 12: Final Polish (White)
You will likely have remaining White cups from both the original left stack and the unlocked right stack. Use these to fill in any remaining gaps in the background, the sky, or to clean up edges where colors might have bled into each other.
Key Tips for a Clean Run
The "Stem Safety" Rule
The stems in this pixel art are only 1-pixel wide in some places. A single misplaced pour of White or Red can destroy the stem's definition. Always prioritize pouring Green when the belt is empty to ensure the stem structure rises from the bottom up before you add "risky" colors to the top.
Slot Management Mathematics
Remember that your conveyor belt usually holds 5-6 cups max. If you have 3 cups of Green waiting to be poured, and you suddenly tap Red, Pink, and Yellow, you will jam the belt. Keep 2 slots open at all times for "emergencies."
Visualizing the Layers
Think of the canvas as a 3D sculpture. 1. Layer 1 (Bottom): Green Leaves and Soil (High volume). 2. Layer 2 (Middle): Green Stems (Low volume, high precision). 3. Layer 3 (Top): Flower Heads (Medium volume, high variety). Always work from Layer 1 up to Layer 3.
The "Tap and Wait" Technique
When you unlock the Red/Yellow cups, don't spam-tap them. Tap one Red cup, wait for it to pour halfway, then tap a Pink cup. Alternating colors prevents the "mixing" of sand on the canvas, which results in muddy colors and unclear pixel edges.
Common Mistakes to Avoid
Mistake 1: The Early Bird Error
The Trap: Tapping Pink or visible colors immediately because they look nice. The Consequence: You waste belt slots on non-essential items while the Green cups (which are needed for 50% of the image) pile up in the tray, causing a deadlock.
Mistake 2: Ignoring the Key
The Trap: Being so focused on pouring that you don't notice the Key is exposed. The Consequence: You might accidentally pour a cup *on top* of the key, or simply run out of moveable cups while the Red/Yellow supply remains locked, leaving you with an incomplete image.
Mistake 3: Bleeding the Colors
The Trap: Pouring Red or Pink before the Green stems are fully established. The Consequence: The colored sand will spread sideways into the stem area. In Sand Loop, sand stacks on top of itself. If you put Red down first, Green cannot easily overwrite it without burying the bottom of the flower head.
What to Do If You Get Stuck
Solution 1: Tray Is Full But No Key
If your tray is jammed with cups and you can't find the key: Look at the bottom-left stack. You likely have a layer of White or Green cups sitting there that you haven't touched because "they didn't match the picture." Tap them anyway. You must sacrifice them (pour them into the background or soil) to dig down to the key.
Solution 2: Unlocked Colors But No Space
If you have unlocked the Red/Yellow cups but your belt is full of Green: You need to clear the Green immediately. If the stems are already full, pour the excess Green into the "soil" patches at the very bottom corner of the canvas. It's better to overfill the soil than to jam the machine.
Solution 3: Ruined Stems
If you accidentally poured White over a Green stem: Don't restart immediately. Look for a Green cup. If you pour Green directly on top of the White, it will re-establish the stem color. However, this makes the stem thicker. If the stem gets too thick, you may have to restart the level.
Speed Run Tips
The "Blind Tap" Start
For advanced players looking to optimize time: You can tap the bottom-left Green cups before the image even fully renders. Since you know the level requires Green excavation first, start tapping the bottom-left corner the millisecond the level loads. This saves 1-2 seconds.
Pre-Loading the Belt
While the first Green cup is pouring, you can already have your finger hovering over the next Green cup (or the White cup underneath it). Do not wait for the cup to finish pouring before selecting the next one. Queue up your actions to keep the belt moving at maximum velocity.
Ignoring Perfection
In a speed run, 100% pixel perfection is not required. If a leaf is slightly miscolored or the soil has a spot of white, ignore it. Focus only on unlocking the Key. The moment the Key is free and the lock is open, the hardest part of the speed run is over.