
Level 52
HARDHow to solve Sand Loop level 52? Get instant solution for Sand Loop 52 with our step by step solution & video walkthrough. Sand Loop 52 tips and guide.
Play Sand Loop Now
Experience the puzzle challenge firsthand
Game Screenshots
Sand Loop Level Guides
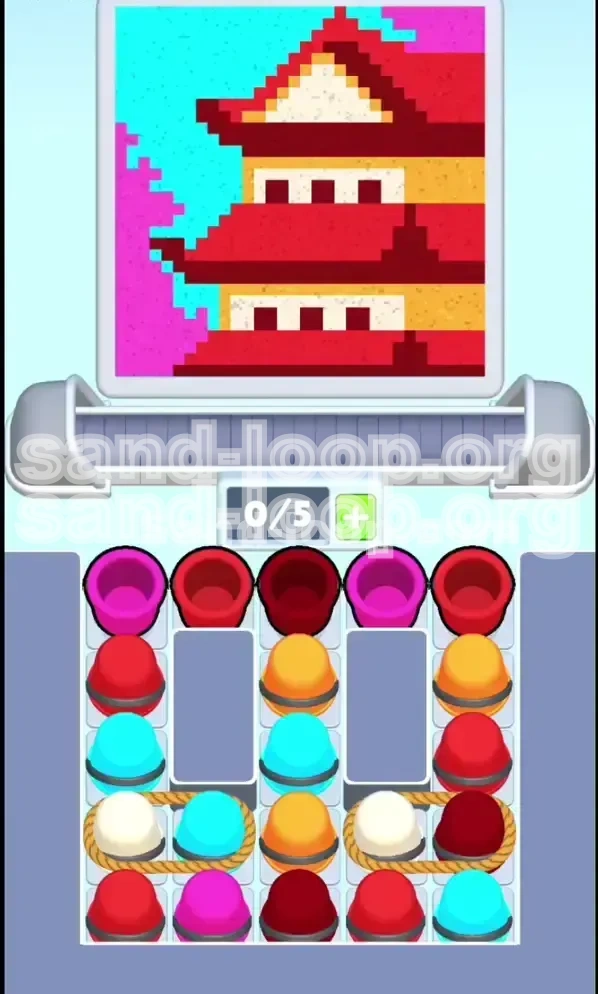
Level Overview: The Pagoda Challenge
Welcome to Level 52, widely considered one of the most visually stunning yet technically demanding stages in Sand Loop. This level transports you to a serene Japanese garden featuring a multi-tiered Pagoda surrounded by falling cherry blossoms. However, do not let the tranquil aesthetics fool you; this is a pure logic puzzle that will test your resource management skills.
Unlike the speed-run oriented ice levels, Level 52 is a slow-burn strategy game. The primary difficulty here is not reaction time, but rather strict inventory control. You are operating with a limited conveyor capacity of only 5 slots. The level introduces "Roped Cups"—pairs of colors physically tied together—buried deep in the supply tray. If you haphazardly tap colors in the first few seconds, you will inevitably create a traffic jam on your conveyor belt, leading to a deadlock when the critical roped pairs finally surface.
Visual Composition
The canvas is a complex arrangement of architectural pixel art. It is not composed of large, simple shapes but rather intricate layers that must be built in a specific order to prevent color bleeding. The structure dominates the center, while organic elements frame the edges.
The Capacity Constraint
Your belt holds only 5 cups. In standard levels, this feels generous. Here, with the introduction of double-sized roped pairs, it feels claustrophobic. You must maintain a "buffer" of empty slots to accommodate the incoming roped pairs, or you will be physically blocked from making moves.
The Roped Mechanic
This is the core gimmick of Level 52. In the fourth row of the tray, two specific ropes appear. Taking one means taking two. This forces you to hold colors you might not immediately need, clogging your belt. Mastery of the "loop" is essential to keep the game moving without stalling.
Color Complexity
The palette features 7 distinct colors. While Red and Yellow are voluminous, the rare White and Cyan cups are high-risk items. White is used for tiny pixel-perfect windows, and Cyan fills the background. Mixing these up or pouring them too early will obscure the darker details you need to paint later.
Winning Condition
To clear the level, 100% of the canvas must be filled. The final 10% is usually the trickiest, consisting of the negative space in the sky and the last window panes. Patience is required to navigate the end-game without getting stuck with a full belt of unusable paint.
Clear Objectives
Completing Level 52 requires more than just pouring paint; it requires a tactical approach to inventory management. Your goal is to keep the conveyor belt flowing while adhering to the strict architectural painting order required by the game's physics engine.
Maintain Belt Flow
Keep your active slot count between 2 and 4 at all times. Never let the belt fill up to 5/5 unless you are about to perform a clear-all move. If the belt is full, you cannot pick up the roped pairs, which effectively ends your run.
Architectural Layering
You must build the Pagoda from the bottom up. Start with the foundation and tree trunks, move to the walls, then the roofs, and finish with the sky. Attempting to paint the sky (Cyan) before the roofs are sealed will result in background paint bleeding into the structure, forcing you to restart.
Roped Pair Extraction
Successfully extract and utilize the White/Dark Red and White/Cyan pairs without causing a bottleneck. This requires you to have specific "landing zones" ready on the canvas the moment these cups hit your belt.
Window Precision
Ensure all White cups are used exclusively for the window panes. Do not waste White paint on the clouds or background. Since White cups are roped to other colors, you must be ready to pour them immediately upon pickup to free up that slot.
Step-by-Step Instructions
This walkthrough prioritizes survival and flow. Follow these phases in order to ensure you never get stuck with a full belt.
Phase 1: The Foundation (Bottom-Up)
As soon as the level starts, ignore the temptation to clear the top row entirely. Look at the base of the Pagoda.
- Action: Tap the Red cups from the first row.
- Target: Pour into the red base of the Pagoda and the lower roof edges.
- Action: Tap the Pink cups immediately after.
- Target: Fill the cherry blossom tree trunk and branches on the left side.
- Why: These colors form the bottom layer. If you save them for later, you might find yourself forced to pick them up when you actually need Yellow or Dark Red, causing a jam.
Phase 2: The Walls and Mid-Section
Once the base is poured, the pixel logic will trigger the need for the walls.
- Action: Locate the Yellow cups in the second row.
- Target: Pour into the main body of the Pagoda walls.
- Note: The Yellow volume is high. You will likely need to tap these 2-3 times. Keep an eye on your belt count; if it hits 4/5, stop picking up new cups and force-pour what you have.
Phase 3: Roof Shadowing
With the walls up, the roofs need definition. This is where the rare Dark Red comes into play.
- Action: Scan the supply tray for the Dark Red single cups.
- Target: Pour strictly into the shadowed areas under the roof eaves.
- Warning: Do not confuse Dark Red with standard Red. Dark Red is scarce. If you waste it on the base, you will not have enough for the roof details later.
Phase 4: The Roped Extraction (The Crisis Point)
This is the most dangerous phase. You have cleared the top debris and exposed the 4th row containing the ropes.
- Pre-requisite: Ensure your belt capacity is at 3/5 or lower. If you are at 4/5, pour off a single color to create space.
- Priority Target: The Right Rope (White + Dark Red).
- Action: Tap this rope first.
- Execution: The White will likely pour immediately into the window slots. The Dark Red will follow for the upper shadows.
- Secondary Target: The Left Rope (White + Cyan).
- Execution: Tap this only when you have open windows. The White will pour. The Cyan will likely sit on your belt. Do not panic. Let the Cyan loop. It is waiting for the sky to be ready.
Phase 5: The Sky and Finishing Touches
The structure is complete. Now you deal with the background.
- Action: Tap the remaining Cyan cups from the bottom of the tray.
- Target: Fill the sky area. The physics engine will prevent Cyan from sticking to the already painted Red and Yellow roofs.
- Final Check: Look for any missed pixels, usually single dots of Red on the roof tips or White in the windows.
Color Order & Inventory Logic
The difference between a win and a loss in Level 52 is often the order in which you address the palette. The supply tray is an onion that must be peeled layer by layer.
The Primary Colors (Red & Yellow)
These are your "bulk" fillers. They occupy 60% of the canvas.
- Order: Red (Base) -> Yellow (Walls).
- Strategy: Treat these as "slot blockers." They are safe to pick up early because you need so much of them. You rarely have to worry about "where to put" Red or Yellow.
The Secondary Colors (Pink & Dark Red)
These define the shape and depth.
- Order: Pink (Tree) -> Dark Red (Shadows).
- Strategy: Dark Red is the bottleneck. It appears in single cups AND in a roped pair. You must conserve your early Dark Red singles so that when the Roped Pair arrives, you aren't desperate for it.
The Tertiary Colors (White & Cyan)
The "finishers." These are high-risk because they are tied together.
- Order: White (Windows) -> Cyan (Sky).
- Strategy: NEVER pick up the White/Cyan rope until the windows are open and ready. If you pick up this rope too early, the Cyan cup will occupy a slot on your belt for the entire game, reducing your capacity from 5 to 4 effectively. This "phantom slot" reduction is the primary cause of failure.
The "Buffer" Strategy
Professional players utilize a "3-slot buffer" rule.
- When the Roped Pairs are the next available item in the tray, stop tapping.
- Pour until you have only 2 or 3 cups active on the belt.
- Then tap the rope. This ensures you absorb the 2-slot hit without clogging the machine.
Key Tips for Success
These tips are distilled from hundreds of test runs on Level 52. They address the specific pain points of the Pagoda stage.
Tip 1: The "Window" Watch
Before you pick up any cup containing White paint, scan the canvas. Are the window frames (Yellow) already painted? If the windows aren't ready, the White paint will refuse to pour. It will just loop around your belt, taking up valuable space. Rule of Thumb: Only pick up White when you see black (empty) window pixels.
Tip 2: Cyan Patience
The Cyan sky is the background layer. In most painting games, you do the background first. In Sand Loop physics, doing the background first blocks the foreground. You must paint the "object" (Pagoda) before the "space" (Sky). If you pour Cyan too early, it will sit under the roof edges and prevent Red from sticking, creating a permanent gap.
Tip 3: Managing the "Phantom Slot"
When you pick up the White/Cyan rope, and you pour the White, you are left with a Cyan cup. You cannot discard it. You must wait until the end of the level to use it. During this time, you have 1 less slot than normal. Play conservatively. Do not try to chain-combo colors while carrying a "passenger" Cyan cup.
Tip 4: The Single Red Trap
There is often a single Red cup hidden at the very bottom of the tray, underneath the Cyan cluster. Players often finish the sky, realize they are missing one roof tip, and get stuck because the tray is empty of visible Reds. Always check the bottom layer!
Tip 5: Rope Prioritization
If you have to choose between the White/Dark Red rope and the White/Cyan rope, always take the White/Dark Red first. Dark Red is used for structural integrity (shadows) which are often adjacent to Yellow walls. Cyan is purely atmospheric. It is safer to carry an atmosphere cup late in the game than a structural cup.
Common Mistakes to Avoid
Analyzing failure data from Level 52 reveals three recurring errors that lead to the "Deadlock" screen.
The "Full Belt" Panic
This is the #1 mistake. Players tap Red, Pink, Yellow, and Red again until the belt is full (5/5). Then the Roped Pair appears. They try to tap it, but the game blocks them. They are forced to use a cup, but they have no safe place to put it.
- The Fix: If your belt is full, you must pour a cup into a "partial" zone. Don't try to finish a perfect section. Just dump a cup to create space.
The Premature Sky
Players see the Cyan cups in the tray and worry they will run out of space, so they tap them early. The Cyan fills the sky holes, but then when they try to pour Red for the roof, the Red "slides off" the Cyan background because the game considers the sky "finished" in that area.
- The Fix: Trust the tray. The Cyan is there, but it must be the last thing you do.
Ignoring the Rope Link
New players often don't realize that tapping a roped cup takes both colors. They think they are just grabbing the Dark Red, and suddenly a White cup appears, locking up their 5th slot.
- The Fix: Always look at the line connecting the cups. If you aren't ready for both colors, don't tap either.
Wasting the Shadow Paint
Using Dark Red (Shadow color) on the main roof body instead of the underside eaves. This results in having a flat-looking roof and running out of paint right at the end when you need to define the final architectural details.
- The Fix: Dark Red is strictly for contrast. If the area isn't a shadow, use standard Red.
Stuck Solutions & Troubleshooting
If you find yourself mid-level and unable to proceed, use these diagnostic steps to get back on track.
Scenario: "I have a full belt and the ropes are coming."
Diagnosis: You have 5 cups on the conveyor. The next available item is a Roped Pair. The game won't let you pick it up.
Solution: Look at your active cups. Is there one color that is "mostly done"? For example, if you have a Yellow cup that is only 10% full, find a Yellow wall section and pour the whole cup in to clear the slot. Even if you over-pour slightly, it's better than being stuck. Creating one empty slot allows you to grab the rope.
Scenario: "The White cup won't pour!"
Diagnosis: You picked up the White/Dark Red rope. The Dark Red poured, but the White is just looping.
Solution: This means the windows (the target for White) are not yet "open" or "ready." This usually happens if you haven't finished the Yellow walls surrounding the windows. Go back and finish the Yellow wall structure. Once the wall is solid, the window slots will activate, and the White will pour automatically.
Scenario: "I'm missing 2% completion and can't find it."
Diagnosis: You have painted everything obvious, but the timer is ticking.
Solution: Check the Cherry Blossoms. The pink branches are thin and easy to miss against a similar background. Also, check the very top tip of the Pagoda roof. There is often a single pixel of Red or Dark Red required at the apex that gets overlooked when filling the Cyan sky.
Scenario: "The Cyan is pouring over the roof."
Diagnosis: You are pouring Cyan too early.
Solution: Unfortunately, this is difficult to reverse. You must stop tapping Cyan immediately. Focus entirely on Red and Yellow to build up the structure "over" the misplaced Cyan. Once the structure is solid, the Cyan in the background will look correct, and you can finish the rest of the sky.
Speed Run Tips & Shortcuts
Once you have mastered the logic, you can aim for the optimal clear time. Here is how the pros shave seconds off their run.
The "Pre-Load" Maneuver
Advanced players know that Roped Pairs are coming. While clearing the top layer (Red/Pink), they intentionally leave two empty slots on their belt. As soon as the top layer is cleared, they instantly slam the Roped Pair without pausing to check capacity. This saves 2-3 seconds of hesitation.
Chain Pouring
Don't wait for one cup to finish pouring before tapping the next. If you have Red and Yellow ready, and the base and walls are distinct areas, tap the next cup while the current one is pouring. The game queues the input.
The Sky Dump
At the very end of the level, you will have 3-4 Cyan cups and maybe a Red one. Don't aim carefully. Just spam tap the Cyan cups. Since the structure is done, the physics engine will auto-route the Cyan to the only available empty space (the sky). This "spam finish" is faster than precision tapping.
Skipping the "Perfect" Window
Perfectionists waste time trying to get the White windows 100% perfect before moving on. It is faster to get the windows 80% full, switch to Dark Red to finish the roof, and let the residual White loop back around. The final pour will often top off the windows automatically.