
Level 51
HARDHow to solve Sand Loop level 51? Get instant solution for Sand Loop 51 with our step by step solution & video walkthrough. Sand Loop 51 tips and guide.
Play Sand Loop Now
Experience the puzzle challenge firsthand
Game Screenshots

Sand Loop Level Guides
Level 51 Overview: The Supply Chain Puzzle
Visual Breakdown and Composition
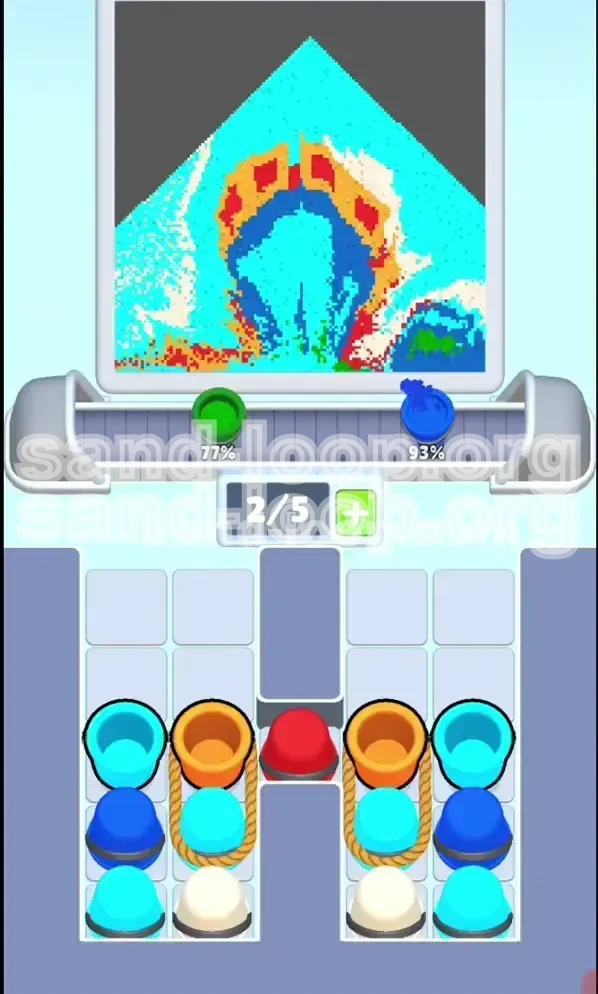
Sand Loop Level 51 is not just a painting challenge; it is a logistical test defined by a multi-layered pixel landscape. The canvas is dominated by three distinct zones that demand your attention simultaneously. The upper 40% of the canvas is a sprawling Cyan sky, punctuated by mechanical details in Red and Gold. The middle section is a complex gradient where Cyan blends into Green and Deep Blue, representing a transition zone between sky and ground. Finally, the lower third is a vibrant Green landscape cut through by Deep Blue water features. This vertical layering means you cannot simply finish one color and move to the next; you must bounce between zones to prevent overflow.
The 5-Slot Bottleneck
The defining constraint of this level is the strict conveyor limit. You are restricted to a maximum of 5 active slots on the belt at any given time. This limitation is the primary cause of failure for most players. If you tap cups rapidly without monitoring the belt, you will hit the "Slot Cap," causing the conveyor to jam and halting your progress. In Level 51, time is not just about speed; it is about flow. A jammed belt costs you roughly 3-5 seconds of recovery time, which is often the difference between a perfect clear and a failed run.
The Accessibility Problem
Unlike previous levels where all colors might be readily available, Level 51 utilizes a "Stacked Tray" layout. Your primary colors—Green and Blue—are stacked high and are immediately accessible. However, your secondary accents—Orange and Beige—are buried at the bottom of the stacks. This physical blockage forces a specific order of operations. You cannot simply paint the Gold accents first because you physically cannot reach the cup. You must burn through the top layers of Green and Blue to "dig" down to the buried colors. This mechanic turns the level into a resource management game where you are forced to over-pour early colors just to unlock later ones.
Victory Conditions
To achieve a 3-star rating on Level 51, you must complete the canvas with zero waste and zero overflow. This means that by the time the final pixel is filled, your color meters should be hovering in the 98-100% range. Finishing with 105% on any color indicates a loss of efficiency, likely due to a "spam tapping" strategy. The challenge lies in the fact that you are forced to load Green and Blue cups early (to unblock the tray), but you must avoid filling their meters too quickly before you have access to the Beige and Orange cups required for the mid-ground structures.
Psychological Preparation
Approach this level with a rhythm-game mindset. Do not treat the cups as individual entities; treat the conveyor belt as a continuous loop. You are not just filling a meter; you are managing a queue. The visual feedback of the "fill" bar is helpful, but your eyes should be focused on the belt movement. If you can internalize the rhythm of the belt, you can predict when a cup will arrive at the dispenser, allowing you to focus on the canvas rather than the tray.
Strategic Objectives and Color Management
Primary Objective: Tray Unblocking
Your first and most critical objective is not to fill the canvas, but to clear the supply tray. The Orange and Beige cups are trapped under the Green and Blue stacks. You must adopt a "digging" strategy. This involves intentionally loading Green and Blue cups onto the belt—not necessarily to fill the canvas completely, but to cycle them out of the tray. You need to clear the physical space in the tray to expose the bottom layer. Expect to have Green and Blue at roughly 40-50% completion before you even see your first Orange or Beige cup.
Secondary Objective: Rationing the Cyan Sky
Cyan is deceptive. It covers the largest area of the canvas (the sky), which tricks players into pouring it aggressively at the start. However, if you fill the Cyan meter to 100% before you have finished the middle-ground details (which require small amounts of Cyan), you will be unable to finish the level. Your objective is to treat Cyan as a "background texture" for the first half of the level. Pour it only to clear the belt or when there are no other critical colors needed. Aim to keep Cyan around 60-70% until the mid-game.
Tertiary Objective: The Red and Orange Accent Timing
Red and Orange are "high-risk, low-volume" colors. They are used sparingly on the canvas (train cars and mechanical details), meaning their meters fill up incredibly fast—often in just 2-3 pours. The objective here is precision. Do not queue these colors. Only tap a Red or Orange cup when it is the *very next* cup to be dispensed. Loading an accent color into a full 5-slot queue is a guaranteed recipe for overflow, as it will likely sit on the belt too long and be poured automatically or force you to waste it.
The "Gap" Strategy
Throughout the level, maintain a "One-Slot Gap." Ideally, you want 3 cups on the belt, not 5. Why? Because keeping 2 slots empty gives you the flexibility to react. If you see a color meter creeping up, you can stop loading that color. If you have a full belt of 5 cups, you have lost control; you are committed to whatever sequence you started. Keeping the belt partially empty ensures you are always making active decisions rather than reacting to a pre-loaded queue.
End-Game Efficiency
The final objective is the "meter balance." In the last 20 seconds of the level, you will likely have three colors sitting at 90% (Green, Blue, Cyan) and the accents done. The challenge here is avoiding the "auto-pour" overflow. The objective is to manually stop pouring a color when it hits 98%, even if there are tiny gaps left, and let the final drips of other colors fill those gaps naturally. Relying on the final few drops to fall into the right place requires that you haven't saturated the canvas with too much of one color early on.
Step-by-Step Walkthrough Guide
Phase 1: The Dig (0:00 - 0:15)
Start the level by immediately tapping Green. Your eyes should be on the supply tray. Watch as the Green cup lifts, revealing the next layer. As soon as the Green cup is on the belt, tap Blue. Alternate these two colors: Green, Blue, Green, Blue. Do not worry about where the sand is landing on the canvas yet. Your focus is entirely on the physical stacks in the tray. You are peeling back the layers. By the 15-second mark, your Green and Blue meters should be roughly 20-30% full, but you should finally see the Orange and Beige cups exposed at the bottom of the tray.
Phase 2: The Accent Insert (0:15 - 0:25)
Now that the buried colors are accessible, pause the Green/Blue cycle. You need to address the accents. Look at the conveyor belt. Wait for a moment when there is a gap (or when a cup is about to finish). Tap Red. Once the Red cup is dispensed (usually takes 1-2 pours), immediately tap Orange. Follow this with Beige. Be very careful here: these colors fill up in just 2-3 seconds of pouring. Do not queue them one after another if the belt is full. Wait for the previous cup to finish before loading the next accent. By the end of this phase, Red, Orange, and Beige should be 100% complete.
Phase 3: The Mid-Game Balance (0:25 - 0:45)
You are now left with the big three: Cyan, Green, and Blue. This is the "Grind Phase." Resume loading Green and Blue to maintain the unblocking of the tray, but now start incorporating Cyan taps. The goal is to keep all three meters rising at roughly the same rate. If Green hits 70% while Cyan is still at 40%, stop tapping Green and focus on Cyan. Use the "Load, Wait, Watch" method: Tap a color, watch it travel to the dispenser, pour, and *then* tap the next color. Do not pre-load the next cup while the current one is pouring; this breaks your visual focus and leads to jams.
Phase 4: The Final Stretch (0:45 - End)
When all three primary colors are above 80%, stop loading cups entirely. Let the current queue on the belt drain. This is the most dangerous part of the level. It is tempting to tap "just one more" to fill a gap, but resist. Watch the meters. If a color stops exactly at 95%, do not load another cup of that color unless you are positive the remaining gaps *only* accept that color. Often, a gap looks Blue but will accept Green or Cyan. Let the existing cups on the belt cycle through. If you run out of cups on the belt and the level isn't finished, *then* tap the specific color needed to fill the last few pixels.
Handling the "Deadlock"
If you reach a point where the belt is empty but no single color will fill the remaining gaps without overflowing, you have a "Deadlock." This usually means you have two colors at 98% and one at 95%. The solution is to load the 95% color. Even if it seems to spill, the game often allows a tiny bit of overflow (up to 102-103%) to clear the level. Better to slightly overflow one color than to fail because you were too scared to tap. The "deadlock" usually happens because of uneven pouring in Phase 3, so if you balanced well in Phase 3, Phase 4 should be a smooth coast to the finish line.
Color Order and Technical Analysis
The Logic of the Sequence
Why Green and Blue first? It is purely mechanical. The game engine in Sand Loop often locks specific colors behind stack depth. In Level 51, the "Liquidity Priority" is assigned to Green and Blue. They act as the key to the rest of the level. If you try to start with Cyan, you will eventually run out of easy pours while the tray remains blocked, forcing you to awkwardly dump Green and Blue later when you might not need them as much.
Understanding Color Interference
The canvas in Level 51 has high "color adjacency." The Deep Blue water sits directly next to the Green grass, and the Cyan sky touches the Green horizon. This means that pouring one color often fills the edges of another. When you pour Deep Blue, you are likely also filling the Green requirement. This is why you can afford to "over-pour" Green and Blue slightly early on—they act as a buffer. You don't need to be pixel-perfect with Green because the Blue pours will help finish the Green edges. Cyan, however, is often isolated at the top, meaning it gets no help from other colors. You must manually control 100% of the Cyan input.
The Red/Orange Exception
Red and Orange are "Island Colors." They are surrounded by Beige or Cyan, meaning no other color you pour will accidentally help fill them. This isolation is what makes them dangerous. If you miss a Red pixel, you *must* use Red to fix it; you can't rely on Blue or Green to bleed into it. This is why their placement in the queue matters so much. They must be treated as precision surgical tools, not bulk paint.
Percentage Targets by Time
To ensure you are on track for a Speed Run or an efficient clear, follow these benchmarks. At 20 seconds, you should have Green/Blue at 30% and accents at 0%. At 40 seconds, accents should be 100%, Green/Blue at 65%, and Cyan at 50%. At 60 seconds, you should be in the final cleanup phase with all colors above 85%. If you find Cyan above 70% at the 40-second mark, you are pouring too fast and risk locking yourself out of the mid-ground details.
Pro Tips, Mistakes, and Speed Running
Top 3 Common Mistakes
- The Early Cyan Flood: The most common error is treating the sky (Cyan) as the first priority. Players pour 50% Cyan in the first 10 seconds. This creates a massive problem later when you need to use Cyan for small details in the middle ground, but the meter is already capped.
- The "Jam" Panic: When the conveyor jams (6 cups loaded), inexperienced players keep tapping, thinking it will speed up. It won't. It freezes the game logic. If you jam, stop tapping immediately. Wait for a cup to pour and clear a slot before resuming.
- Ignoring the Tray: Staring at the canvas and not the tray leads to "Ghost Taps." You tap a color you *think* you need, but you forget that color is buried under three other cups. You waste time tapping a blocked cup. Always glance at the tray before tapping.
Speed Run Strategies
For players aiming to break the 40-second barrier, you must remove "Wait" time. The biggest time sink is the travel time of the cup from the tray to the dispenser. To minimize this, use the "Queue Pre-load" technique. While the current cup is pouring (falling sand), you have a 1-second window where the game accepts input for the *next* cup. Tap the next color *during* the pour of the current cup. This queues the next cup instantly, removing the travel delay. This is high-risk (can lead to jams if not careful), but it is the only way to achieve top-tier times.
What to Do When Stuck
If you are stuck at 95% completion and can't find the last pixel, zoom in (if on mobile) or look for the "sparkle" indicator. However, a common issue in Level 51 is "Hidden Blue." There are often pixels of Deep Blue hidden within the Green landscape that look Black or Dark Green. If Green is full and you have gaps, try tapping Blue. The game's color matching can be forgiving; sometimes a pixel looks Green but is coded as Blue due to shading.
Recovery Tactics
If you accidentally overfill a color (e.g., Red goes to 110%), do not restart immediately. Check if the level logic allows "Waste." In Sand Loop, sometimes hitting 105% just means you wasted 5% material, but if the canvas is full, the level still ends. You can often "spill" your way to a victory if the alternative is restarting. Only restart if you jam the belt so badly that you stop pouring entirely.