
Level 60
HARDHow to solve Sand Loop level 60? Get instant solution for Sand Loop 60 with our step by step solution & video walkthrough. Sand Loop 60 tips and guide.
Play Sand Loop Now
Experience the puzzle challenge firsthand
Game Screenshots
Sand Loop Level Guides
Level 60 "Pixel Night" Comprehensive Walkthrough
The "Reverse-Gravity" Puzzle Logic
Level 60, titled "Pixel Night," is arguably the most complex logic puzzle in the Sand Loop series due to its inverted supply mechanic. Unlike standard levels where the bottom of the cup holder corresponds to the base of your painting, this level inverts gravity. Your objective is to build a layered sunset scene starting with a deep blue ocean at the bottom and transitioning up to a magenta night sky. However, the game provides the sky colors (Yellow/Orange) at the top of the supply rack and the ocean colors (Blue/Cyan) buried at the bottom. This forces a specific "Dig and Reset" strategy that contradicts normal player intuition.
Visual Breakdown of the Target Layers
To succeed, you must visualize the final image as a 5-layer stack. Understanding the volume required for each section is crucial for resource management:
- Layer 1 (Base): Dark Blue Ocean (Requires approx. 40% of total sand volume).
- Layer 2: Cyan Waves (Requires approx. 15% of total sand volume).
- Layer 3: Yellow Horizon (Requires approx. 15% of total sand volume).
- Layer 4: Orange Dusk (Requires approx. 15% of total sand volume).
- Layer 5 (Top): Magenta Sky with White Moon/Stars (Requires approx. 15% of total sand volume).
The "Inverted Supply" Crisis
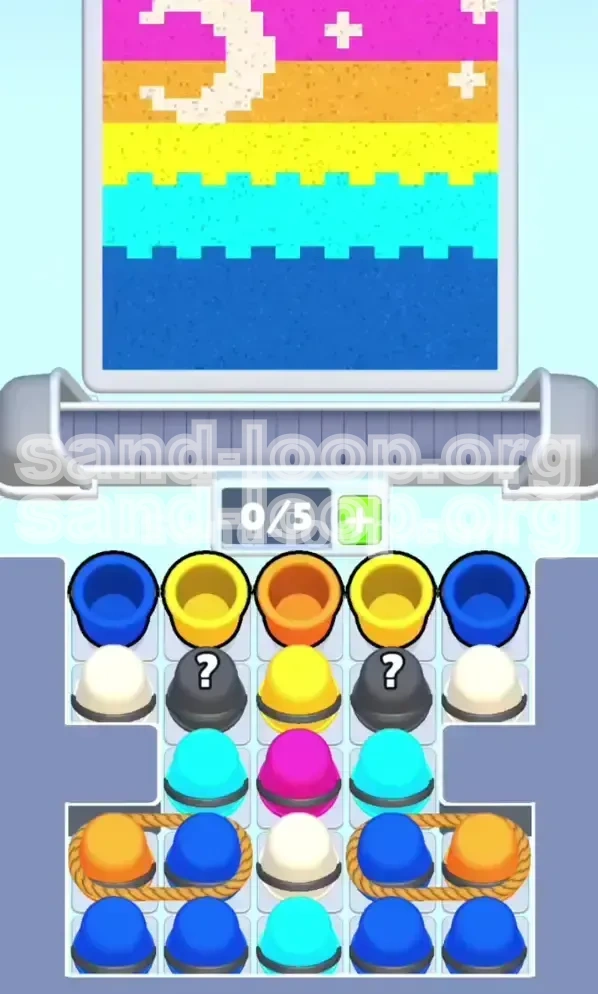
The primary challenge is the supply tray configuration. The tray is stacked with "Sky" colors (Yellow, Orange) physically blocking access to the "Ocean" colors (Blue, Cyan) situated beneath them. You cannot reach the Blue cups without first clearing the obstructing top-layer colors. This creates a dilemma: pouring Yellow/Orange first will contaminate your Blue Ocean base, leading to a muddy brown failure state. The solution lies in the specific mechanic of the "?" Mystery Boxes located in the second row, which serve as a "Board Clear" mechanism.
The Rope Mechanic Constraint
A secondary obstacle in this level is the "Rope Trap." Located in the middle-lower section of the tray, several stacks of Blue cups are physically tied to Orange cups via a rope connector. Tapping one forces you to pour both simultaneously. This creates a high-risk scenario where filling the final 10% of your Blue ocean layer accidentally dumps a large amount of Orange sand directly into the water, ruining the purity of the color. Success requires waiting until the Blue layer is maximally full (99% capacity) before triggering these paired cups.
Strategic Preparation: Analyzing the Supply Tray
The "Blocker" Row (Row 1)
The top row of the supply tray is your first enemy. It typically consists of a pattern such as Blue-Yellow-Orange-Yellow-Blue. While the Blue cups are useful, the Yellow and Orange cups act as "Blockers." You have a finite number of slots on your conveyor belt (usually 5). If you pick up these colors prematurely, you will fill your belt with colors you cannot use yet, causing a deadlock where you cannot pick up the Blue cups you actually need.
The "Reset" Row (Row 2)
This row contains the key to the level: the Grey Mystery Boxes (?) flanked by White and Yellow cups. In the context of Level 60, these Mystery Boxes are programmed to function as "Bombs" or "Erasers." They do not add sand to the canvas; instead, they remove the top layer of sand. Your strategy relies on dumping the "Blocker" colors onto the canvas to clear them from the tray, then using these Mystery Boxes to wipe that dumped sand away, resetting the canvas to a clean state.
The "Foundation" Reserve (Row 3 & 4)
Once you dig through the top two rows, you reach the "Reserve." This area contains the bulk of your Dark Blue and Cyan cups arranged in a "T" shape. This is the only safe zone in the level. Your primary goal in the first 60 seconds of the round is simply to clear away the debris above this section so you can access these pure colors without obstruction.
The "Wings" (Side Slots)
On the far left and right edges of the tray (the "wings"), you will find White cups and Magenta cups. These are for the final layer (Moon and Stars). You must absolutely avoid tapping these until the very end. If White sand is poured early, it will sink to the bottom of your ocean, creating unnatural white streaks that are impossible to cover up later.
Phase-by-Phase Execution Guide
Phase 1: The "Controlled Chaos" Dig
Start the timer and immediately ignore the canvas. Do not worry about making a mess. Your only objective in Phase 1 is to dig through the top rows.
- Step 1: Tap the Top Left and Top Right Blue cups. Pour them onto the canvas. This is correct.
- Step 2: Tap the central Yellow and Orange "Blocker" cups. Pour them onto the canvas. Yes, this ruins the painting. You will have yellow sand mixing with your blue base. This is intentional.
- Step 3: Keep tapping until the top row is completely empty. Your belt should now be full of unwanted colors, and your canvas should look messy.
Phase 2: The Tactical Reset
With the top row cleared, the "Reset" row (Row 2) is now accessible.
- Step 1: Locate the Grey Mystery Boxes (?) in the center of the newly revealed row.
- Step 2: Tap these Mystery Boxes immediately.
- Step 3: Watch the "Eraser" mechanic trigger. The game will explode or wipe the canvas, removing the incorrect Yellow/Orange sand you just poured. The canvas should now be empty (or mostly empty) and ready for the correct base layer.
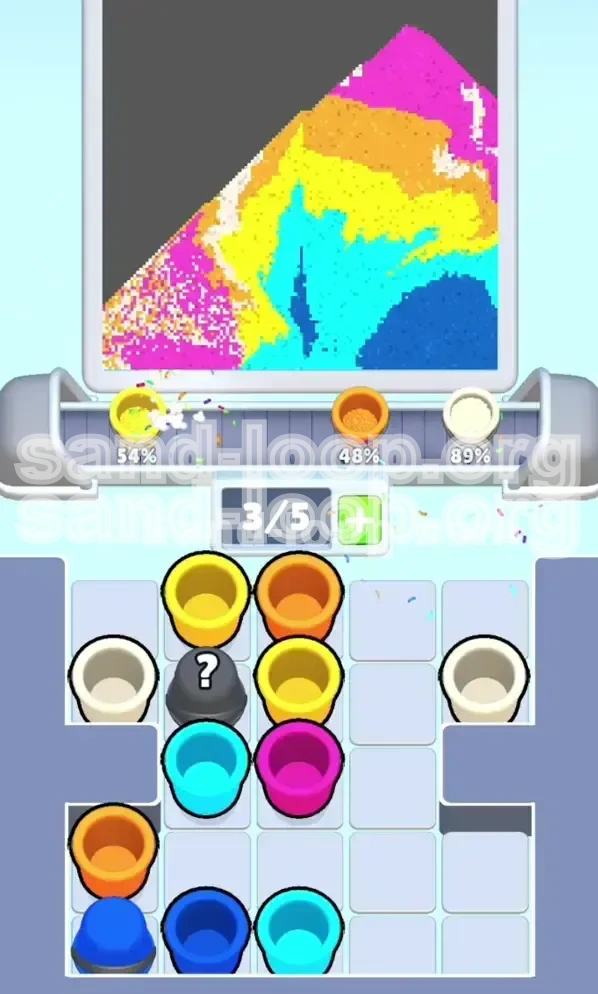
Phase 3: Building the "Deep Blue" Foundation
Now that the board is reset and the path is clear, you can finally play the game "correctly."
- Step 1: Access the "T" shape reserve of Dark Blue cups in the lower tray.
- Step 2: Rapidly tap and pour the Dark Blue cups. Fill the bottom 40% of the canvas with a solid, flat layer of blue.
- Step 3: Do not touch the Cyan cups yet. Ensure the Blue layer is thick enough to support the waves. If the blue is too thin, the cyan waves will mix with the white background below.
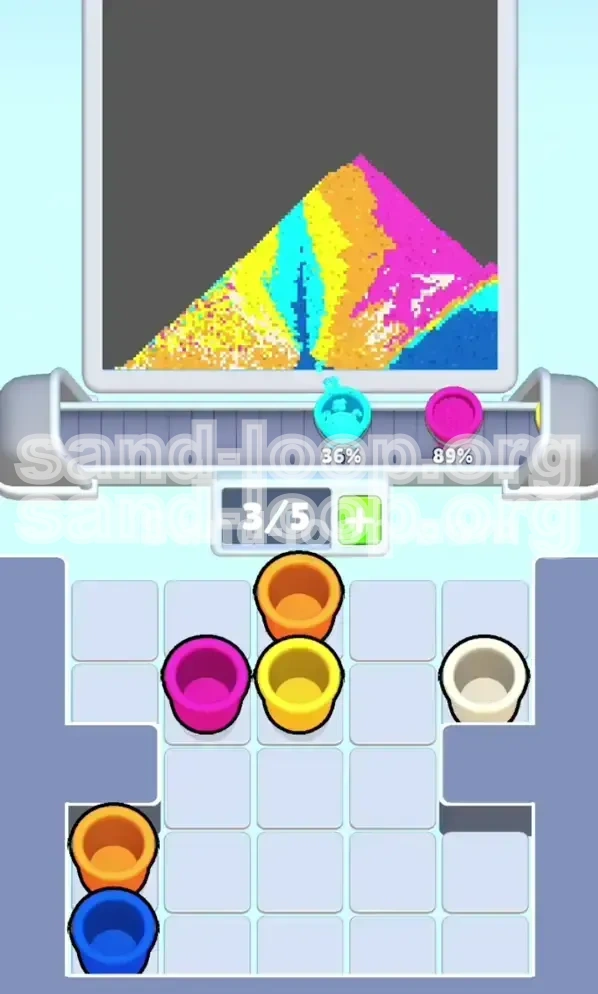
Phase 4: The "Rope Trap" Transition
This is the most dangerous moment in the level. You have likely exhausted the loose Blue cups and are left with the Roped pairs (Blue tied to Orange).
- Step 1: Assess your Blue level. Is it 95% full? If not, look for loose Blue cups you missed.
- Step 2: If you are ready, tap the Roped pair.
- Step 3: The Blue sand will top off the ocean. The Orange sand will land on top. Since Blue is heavy and Orange is light, they should separate reasonably well, provided the Blue layer had almost no room left. This creates the initial gradient for the sky.
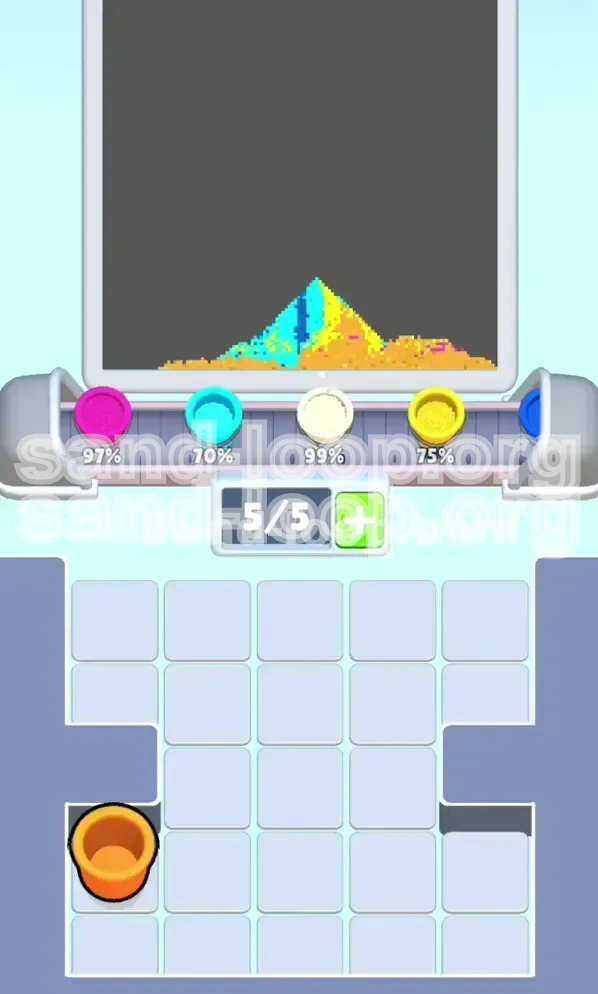
Phase 5: Layering the Sky and Celestial Bodies
With the ocean complete, the rest is straightforward execution.
- Step 1: Pour the Cyan cups to create the jagged wave layer just above the blue.
- Step 2: Pour the remaining Yellow and Orange cups to build the sunset gradient. Make sure the Yellow blends slightly into the Orange to create a realistic dusk effect.
- Step 3: Finally, tap the White and Magenta cups in the "Wings" (side slots). Pour these to create the moon and stars at the very top of the canvas.
Advanced Mechanics & Color Theory
The Color Stacking Physics
Understanding the game's physics engine is vital for the 3-star rating. In Sand Loop, heavier/denser sands (Dark Blue) sink instantly to the bottom, displacing lighter sands (White/Yellow) upwards. However, if you pour a light sand (White) into a heavy liquid (Blue) that hasn't settled, the White will get trapped in the middle, creating a "cloudy" texture. Always wait for the previous layer to stop moving before pouring the next color to ensure clean, sharp lines between the ocean and the sky.
The "Mystery Box" Probability
While the Mystery Boxes in this level are designed as Reset tools, there is a roughly 10% chance they might spawn a color instead of a bomb. If a box pops open and reveals "Pink" or "Grey" sand instead of clearing the board, you must immediately pivot strategies. Treat that spawned sand as the new "Top Layer" and build your sky downwards from there, ensuring you don't bury the new color under the heavy blue ocean.
The Conveyor Belt Limit (5-Slot Rule)
You can only hold 5 stacks of cups at once. In Phase 1, do not fill your belt with Blockers if you have a Mystery Box ready to tap. You need to keep one slot open to pick up the Mystery Box immediately. If you find yourself with a full belt of Yellow cups and no space to grab the Bomb, you have to pour the Yellow onto the canvas, which is messy, but necessary to free up the slot for the reset tool.
Efficiency Analysis: Speed vs. Precision
This level is not a speed run; it is a precision run. Rushing the "Rope Trap" phase is the #1 cause of failure. Taking the rope 1 second too early results in a 50/50 Blue/Orange mix that fails the level. Taking it 1 second late results in a wasted Blue cup. The optimal strategy is to pour the Blue until you see the surface tension of the sand rise near the transition line, then trigger the rope.
Troubleshooting & Optimization
Fixing a "Muddy" Ocean
If you accidentally poured Yellow into the Blue ocean and didn't get a clean reset, all is not lost. If the contamination is less than 10%, you can sometimes fix it by pouring a massive amount of Dark Blue on top. The density of the Blue sand will push the Yellow particles up and out, eventually settling them at the border between the water and the sky. It won't be a perfect 3-star score, but it can salvage a win.
Recovering from a Bad Reset
Sometimes the Mystery Box doesn't clear 100% of the board. If small patches of color remain on the canvas after the reset, ignore them. Do not try to fix them with your precious Blue cups. Instead, build your new Blue layer directly on top. The new, thick layer of Blue will cover the old blemishes. Trying to patch small holes usually leads to over-pouring and running out of Blue for the main layer.
Dealing with "Stuck" Cups
Occasionally, physics glitches can cause a cup to get stuck on the edge of the tray. If a cup is vibrating but not moving onto the belt, tap it multiple times rapidly. If it refuses to budge, treat it as a "dead slot" and adjust your layering strategy. If it's a White cup stuck in the wings, you are lucky—use it last. If it's a Blue cup stuck in the base, you will need to be more conservative with your other Blue pours to ensure you don't run out before reaching the fill line.
3-Star Speed Run Strategy
To achieve the maximum time bonus for a 3-star score, you must combine Phase 1 and Phase 2. Do not wait for the "Blocker" sand to fully settle on the canvas before tapping the Mystery Box. As soon as the Yellow/Orange cups leave your hand and hit the tray, immediately tap the Mystery Box. The game allows the "Clear" animation to override the "Settling" animation. Saving these 2-3 seconds of waiting time is often the difference between a 2-star and a 3-star finish.