
Level 434
HARDHow to solve Sand Loop level 434? Get instant solution for Sand Loop 434 with our step by step solution & video walkthrough. Sand Loop 434 tips and guide.
Play Sand Loop Now
Experience the puzzle challenge firsthand
Game Screenshots
Sand Loop Level Guides
Level 434 Overview: The Perched Songbird Strategy
Introduction to Level 434
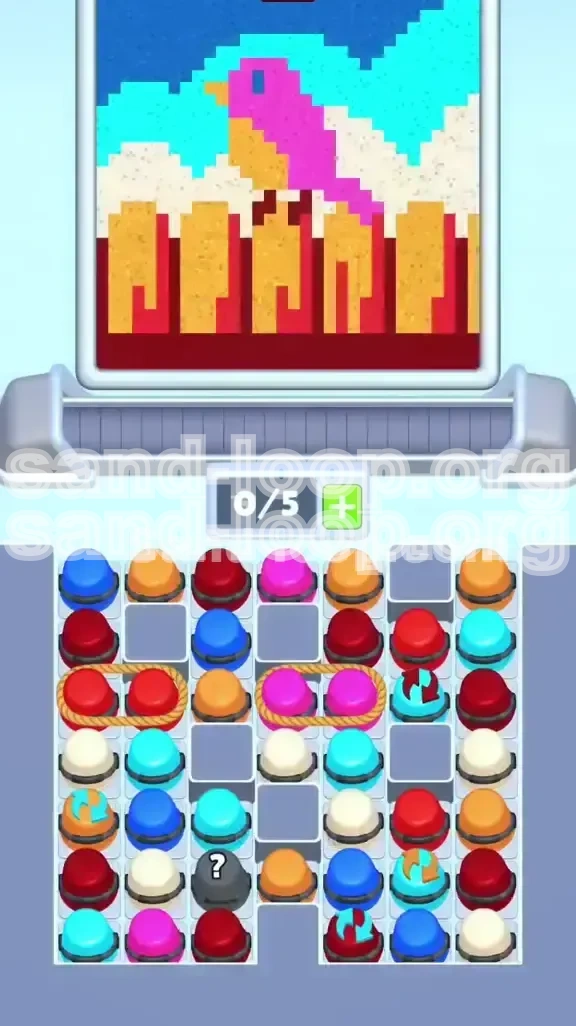
Welcome to the ultimate strategy guide for Sand Loop Level 434, entitled "The Perched Songbird." This level represents a significant difficulty spike in the pixel-art puzzle genre, moving beyond simple color matching into complex spatial logic. You are tasked with reconstructing a vibrant magenta bird perched on a rustic fence against a cloudy sky. The challenge is not just artistic but logistical; you must manage a limited inventory of sand colors while preventing your conveyor belt from jamming. This guide will break down the exact sequence of moves required to achieve a 100% completion rate without falling into the common deadlock traps.
Core Challenge: Slot Management
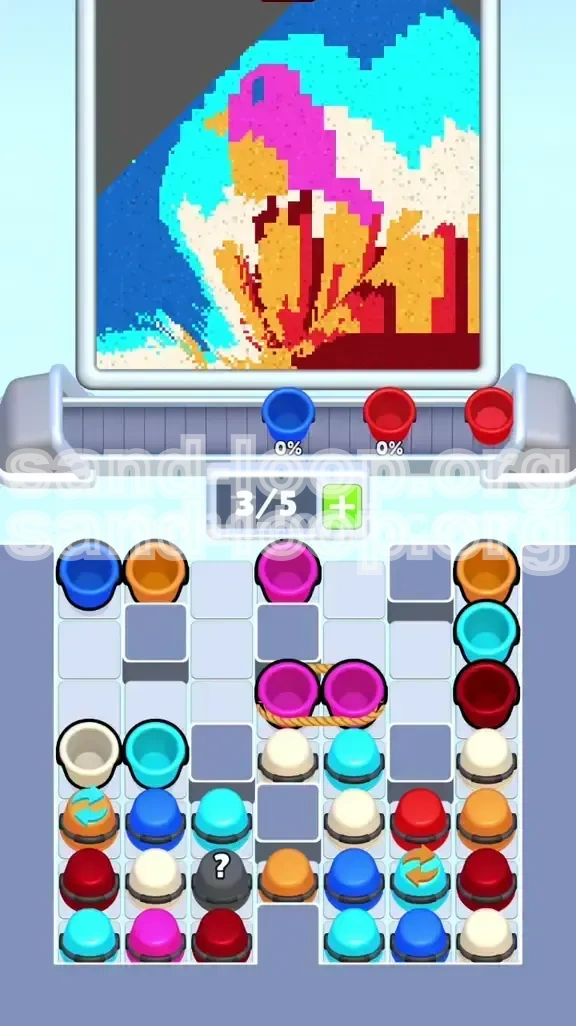
The defining mechanic of Level 434 is the strict "Slot Economy." Your conveyor belt has a maximum capacity of 5 cups. However, the game frequently introduces "Rope Tied" cups—pairs of containers linked together that occupy two slots simultaneously. If your belt has 4 cups and you tap a Rope Tie, your capacity hits 6/5, causing an immediate deadlock that forces a restart. Success depends on keeping your belt in the "Goldilocks Zone" of 3 to 4 cups, ensuring you always have room to maneuver when critical color spawns appear.
Visual Breakdown of the Canvas
To solve this puzzle efficiently, you must visualize the image as four distinct layers that must be filled in a specific order. The image consists of Zone A: The Red Floor (bottom 15%), Zone B: The Orange Fence (vertical posts), Zone C: The Magenta Bird (center focal point with Blue eyes and Orange beak), and Zone D: The Cyan/Cream Sky (background). Attempting to fill these zones out of order—specifically filling the sky before the bird—will result in pixel contamination and failed runs.
Winning Conditions
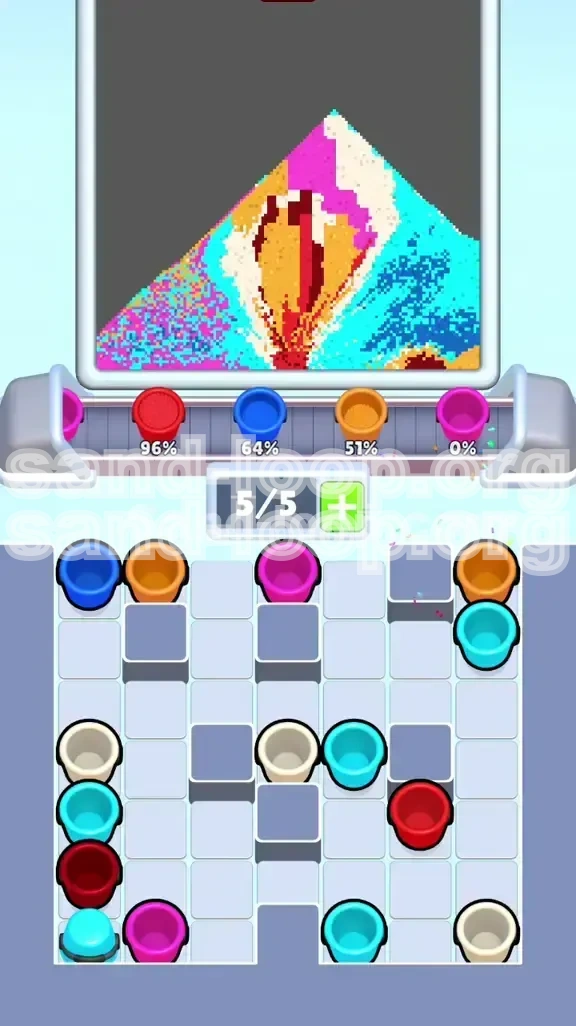
Victory in Level 434 requires 100% pixel accuracy. Every single grid cell must be filled with the correct color, and no "orphaned" pixels can remain. Furthermore, you must achieve this without running out of moves. The "Par" score demands that you optimize your belt usage, avoiding wasted time waiting for cups to empty. A clean run requires you to prioritize large volume colors early and save low-volume detail colors for the end.
Key Obstacles to Watch For
This level introduces three specific hindrances: Rope Ties (which consume double capacity), Rotators (cups that cycle colors randomly), and the Mystery Cup (a wildcard item). The Rotators are particularly dangerous for the Cream color required for clouds; tapping them at the wrong moment can clog your belt with a color you don't need yet. We will cover exactly when to tap these in the walkthrough section.
Essential Preparation: Color Theory and Mechanics
The Priority Ladder
Not all colors are created equal in Level 434. You must process colors based on their "volume risk." High-volume colors like Red and Magenta should be added to your belt first to ensure you have space to pour them. Low-volume colors like Blue (for the eye) and Cream (for clouds) are "Surgical Colors"—you need very little of them, so picking them up too early wastes valuable slot space. Follow this strict hierarchy: Red > Orange > Magenta > Cream > Blue > Cyan.
Understanding "Rope Ties"
Rope Ties are the primary cause of failure. When you see two cups connected by a brown rope, recognize that tapping them consumes 40% of your total capacity (2 out of 5 slots). Never tap a Rope Tie when your belt is at 4/5 capacity. The optimal time to tap a Rope Tie is when you are at 2/5 or 3/5 capacity, allowing you to reach 4/5 or 5/5 respectively without overflowing. Ideally, tap them immediately after pouring a cup to free up space.
The "Rotator" RNG Risk
Rotator cups cycle through a set of colors (usually Cyan, Blue, Cream, Orange). You cannot control the cycle speed, but you can control *when* you tap. If you need Cream for clouds but the Rotator is showing Cyan, wait. Do not tap it "just to get it on the belt." A belt full of unwanted Cyan is a recipe for disaster. Wait for the icon to align with your current objective before adding it to your inventory.
The "Surgical Pour" Technique
Unlike the broad strokes needed for the Red floor or the Cyan sky, detailed work requires a "Surgical Pour." This involves tapping the screen rapidly to release single grains of sand, or using a very quick swipe to drop a tiny dot. This technique is mandatory for the bird's eye and the small gaps between the fence posts. Attempting to pour continuously for these details will result in "blooming," where sand overflows into adjacent pixels.
The Mystery Cup Strategy
The Question Mark cup is a gamble. In Level 434, it usually dispenses a high-volume background color like Cyan. Treat this as a "Trash Can" opportunity. If you pick it up and it's Cyan, pour it immediately into the sky background to clear the slot. If it gives you a color you don't need (like extra Red), find a safe spot to dump it or use it to top off an existing area. Never let a Mystery Cup sit idle on your belt if it contains a color you aren't ready to use.
Phase 1 Walkthrough: Foundation and Structure
Step 1: The Red Foundation (Zone A)
As the level loads, immediately scan for Red cups. If you see a "Red Rope Tie," tap it immediately. Your goal is to secure the base color first. Drag the Red cup to the nozzle and pour continuously along the bottom 15% of the screen. Do not worry about precision here; the Red zone is a solid block with no internal details. Pouring this first clears your slots rapidly, creating the necessary bandwidth for the complex colors that follow.
Step 2: The Fence Posts (Zone B)
Once the floor is complete, look for Orange cups. These are required for the vertical fence posts. If the Orange is on a Rotator, wait for the cycle to hit Orange before tapping. Pour the Orange sand in short, controlled bursts to fill the vertical posts. Accuracy is key here; avoid spilling Orange into the background area, as this creates "dirty" edges that are difficult to fix later. Establish the fence boundaries now to give yourself a visual guide for the bird.
Step 3: The Bird's Beak (Precision Step)
Before you touch the Magenta bird body, you must address the beak. The beak is Orange and sits directly in front of the bird's face. If you fill the face first, placing the beak becomes incredibly difficult. Use the remaining Orange sand (or a fresh cup) to fill the small, triangular beak area. Use the "Surgical Pour" technique here—tap lightly to avoid overflowing onto the future Magenta body.
Step 4: The Magenta Body (Zone C - Part 1)
Locate the Magenta cups. This is the heaviest color in the level. Drag the Magenta cup to the bird's outline. Start pouring from the center of the bird and work outward. CRITICAL WARNING: Stop pouring when you are within 2 pixels of the eye socket and 1 pixel of the beak. Do not fill these gaps yet. Overfilling the body will block the tiny Blue eye pixel later, resulting in a failed level. Leave a small "donut hole" of empty space around the eye.
Step 5: Managing the "Deadlock" Risk
At this stage, your belt should be relatively empty (2-3 cups). You might see the Mystery Cup or a Cyan Rope Tie appear. Ignore them for now. Picking up Cyan now fills your belt with "future work." Keep your slots open for the detail colors (Cream and Blue) which are rarer. If a Rotator appears, watch it. If it lands on Cream, tap it. If it lands on Cyan, let it rotate.
Phase 2 Walkthrough: Details and Background
Step 6: The Clouds (Cream Color)
The sky is not just blue; it contains Cream clouds. This is often the bottleneck. Watch your Rotators like a hawk. Wait for the Cream color to appear. Once you have it, use the "Surgical Pour" to fill the cloud outlines. These areas are small and unconnected, so pour carefully to avoid wasting Cream. Filling this now clears your slots for the final push.
Step 7: The Blue Eye (The Surgical Strike)
You are now looking for a single Blue cup. This is the hardest color to acquire. It may be hidden behind other cups or in a Mystery Cup. Once you have Blue, do not pour it into the sky. Move the nozzle directly over the bird's empty eye socket. Tap the screen once or twice very lightly. You only need a few grains to fill the pixel. Overfilling here is disastrous, as Blue sand will contaminate the Magenta face.
Step 8: The Sky Fill (Cyan & Blue)
Now that the bird, fence, and clouds are 100% complete, the rest of the screen is your "dumping ground." Aggressively tap all Cyan and remaining Blue cups. The sky is a continuous block with no internal details, so you can pour as fast as the game allows. Pour rapidly to clear your conveyor belt. This is the "cleanup phase" where you burn through your inventory to finish the level.
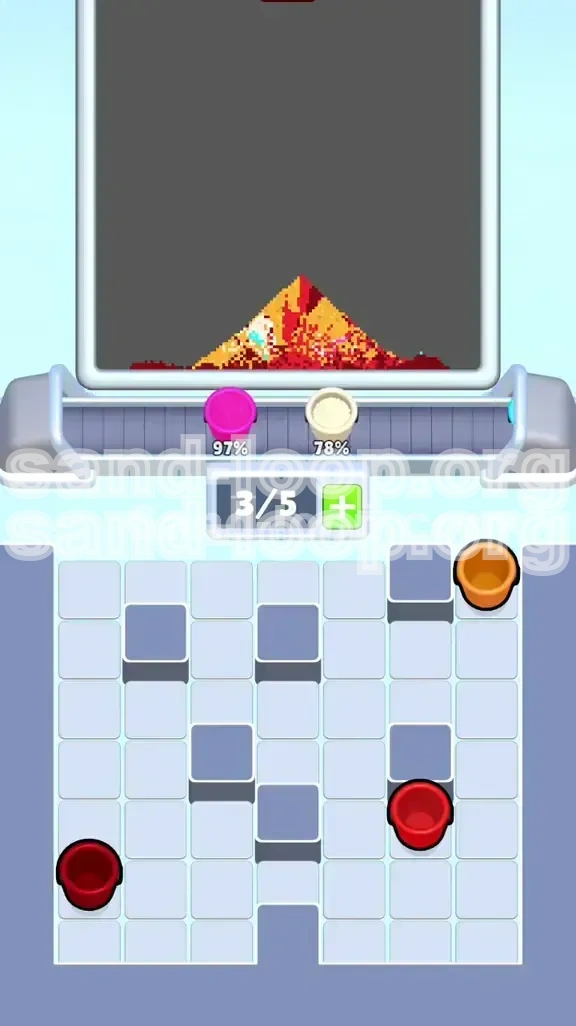
Step 9: The Final Cleanup
You might notice small gaps or "holes" in your pixels, especially where the fence meets the sky or the bird meets the fence. Use any remaining dregs of cups to patch these holes. If you have a "dead" cup (a color you don't need), look for a corresponding pixel that is slightly underfilled (maybe 98% instead of 100%). Every pixel counts towards the final percentage.
Step 10: Victory Verification
Before celebrating, zoom in (if possible) or scan the four corners of the screen. Players often miss the top-left and top-right sky corners. Ensure the fence posts are fully filled to the top. Once the meter hits 100%, the level will end. You have successfully navigated the Slot Economy and Pixel Logic of Level 434.
Advanced Tips and Speed Run Strategies
Common Mistake: The "Early Sky" Trap
The most common error in Level 434 is filling the Cyan sky before the bird is finished. This seems intuitive because the sky is large, but it creates a massive risk. When you try to place the Magenta bird later, you have to be hyper-careful not to touch the Cyan. Furthermore, if your belt is full of Sky cups, you can't pick up the Bird cup. Always prioritize "foreground" elements (Fence, Bird) over "background" elements (Sky, Clouds).
Speed Run Tip: The "Tap-Release" Rhythm
For players aiming for a 3-Star score, speed is everything. Instead of holding down the pour button, learn to "Tap-Release." In Sand Loop physics, the sand continues to flow for a split second after you release. By tapping rhythmically, you maintain better control over the sand stream and prevent the "blooming" effect where sand piles up too high. This is essential for the Fence Posts and the Bird's Eye.
Handling Inventory Deadlocks
If you find yourself with a full belt (5/5) and the color you need is buried behind other cups, you must perform a "Sacrifice Pour." Look at your current active cup. Is there *any* pixel on the screen that matches that color, even if it's already 95% full? Pour into that slightly-full pixel to empty the cup just enough to make it disappear, freeing up a slot to cycle your belt to the next cup.
Rotator RNG Optimization
Sometimes, the game simply refuses to give you the color you need from a Rotator. If a Rotator is stuck cycling between colors you don't need (e.g., Green and Purple, which aren't in this level), or colors you aren't ready for (Cyan), do not tap it. Let it sit in the tray. Sometimes, waiting for a fresh cup to spawn is better than clogging your belt with a Rotator that won't give you the color you want.
Dealing with Rope Ties Mid-Level
In the late game, you might encounter a Rope Tie when you are at 3/5 capacity. You want the color, but tapping it brings you to 5/5 (Danger Zone). The strategy is to pour one cup from your current inventory *first*, dropping you to 2/5. Then tap the Rope Tie (2 slots), bringing you to 4/5. This keeps you safe from deadlock. Never tap a Rope Tie when you are at 4/5 capacity unless you are ready to pour immediately.