
Level 436
HARDHow to solve Sand Loop level 436? Get instant solution for Sand Loop 436 with our step by step solution & video walkthrough. Sand Loop 436 tips and guide.
Play Sand Loop Now
Experience the puzzle challenge firsthand
Game Screenshots

Sand Loop Level Guides
Level 436: Sand Loop "The Carrot-Crunching Logic Puzzle" Strategy Guide
Level Overview: The Logic-First Bottleneck
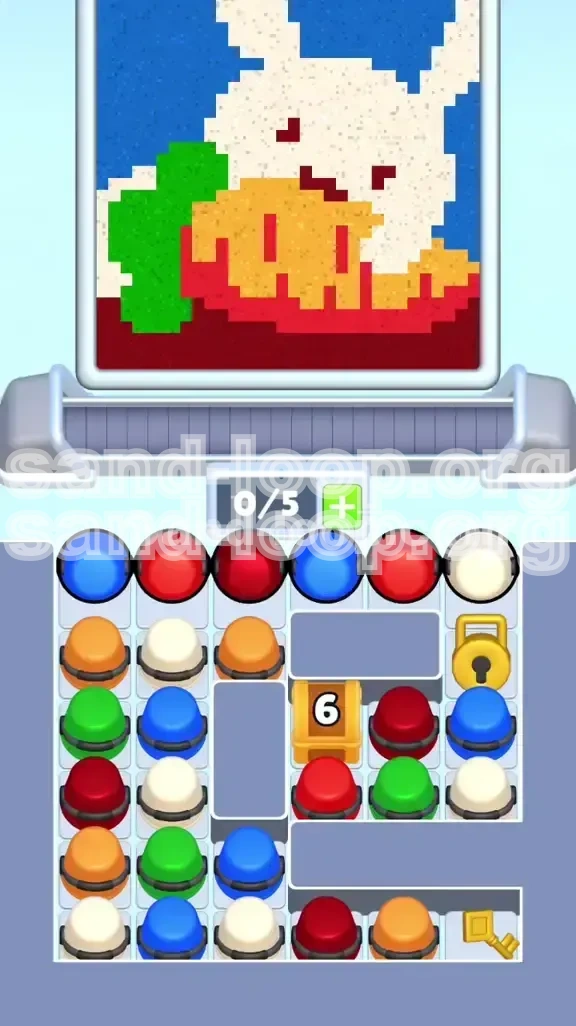
Sand Loop Level 436 is a deceptive puzzle that masquerades as a casual sorting game but functions as a strict logic test. Unlike previous levels where you might rely on reflexes, Level 436 demands a calculated, queue-based approach. The visual objective is to reconstruct a pixel art scene of a white rabbit standing beside a large orange carrot against a blue sky.
However, the level is notorious for its "Capacity Trap." Your cup tray is hard-locked to a maximum of 5 slots. This limitation turns the game into a tightrope walk where every move must be planned three steps in advance. The board is divided by static grey walls that create "dead zones" where sand can get stuck if poured prematurely. The central challenge revolves around a "Number 6 Box" mechanic and a color-separation logic that prevents background colors from bleeding into the foreground.
Core Mechanics: The 5-Slot Constraint
The defining feature of this level is the 5-slot tray limit. In standard levels, you might have 7 or 8 slots, allowing for loose play. Here, filling your tray to capacity (5/5) halts the conveyor belt. If the belt stops while critical cups are out of position, you enter a "Soft Lock" state where the only option is to restart. Every click must be calculated to ensure a slot opens up just as a new cup is needed.
The "Color Weight" Physics
Understanding the physics of sand weight is crucial for Level 436. The game engine treats darker colors (Dark Red, Blue) as "heavier" and lighter colors (White, Bright Yellow) as "lighter." Heavier sands tend to sink and displace lighter sands. If you pour the White Rabbit first and then pour the Dark Red floor afterwards, the Red will slide underneath the White, pushing the white pixels out of alignment and dirtying the background. The level requires a "Background-to-Foreground" pouring order to work correctly.
The Number 6 Box & Yellow Lock
The board is guarded by two primary mechanics. First, the "Number 6 Box" sits in the center-right, acting as a gatekeeper for the right side of the board. It requires exactly six inputs of specific colors to shatter. Second, the "Yellow Lock" on the far right prevents access to a massive reservoir of Blue and White cups needed for the sky and the rabbit. You cannot access these reservoirs until the lock is opened by a key hidden in the bottom-left corner.
Victory Conditions
To achieve 100% completion and clear Level 436, you must meet three specific conditions without deadlock. First, the "Number 6 Box" must be destroyed to open the board's center. Second, the Yellow Key must be retrieved to unlock the color reservoirs. Third, the color layering must be pristine: the Blue Sky and Red Floor must be 100% filled before the White Rabbit is poured. If you finish the level with "mixed" colors (e.g., pink floor due to red/white mixing), your score will be significantly penalized.
Psychological Preparation
This level is designed to induce panic through "conveyor belt freeze." When your tray hits 5/5, the game creates a visual pause that can cause players to tap frantically. The key to winning is to remain calm during these pauses. Treat the tray like a heartbeat rhythm; fill it, let it empty, and fill it again. Do not force taps when the belt is full.
Primary Objectives: The Critical Path
Objective 1: The Box Shatter Sequence
Your immediate priority is the destruction of the Number 6 Box. This box blocks the essential "Yellow Key" from moving up the board. The box has a durability of 6 points. You must deal exactly 6 points of "color damage" to it by tapping specific cups located in the top-left and vertical columns. Do not waste moves on other parts of the board until this box is gone.
Objective 2: Key Retrieval and Extraction
Once the box is shattered, the geometry of the bottom row changes. The Yellow Key, located in the bottom-right corner, becomes accessible. Your second objective is to manipulate the bottom row cups to slide the Key out of its pocket. This is the most mechanically difficult part of the level and requires specific taps on the bottom-left cups to create a "vacuum" that pulls the key to the left.
Objective 3: Unlocking the Reservoir
Retrieving the key is only half the battle. You must then feed the key into the system to unlock the Yellow Lock. When the lock opens, a cascade of Blue and White cups will flood your tray. Managing this flood is the third objective. If your tray is full when the lock opens, you will lose cups and fail the level. You must have exactly 1 or 2 slots open before the lock breaks.
Objective 4: Clean Color Layering
The final objective is artistic completion. You must execute a "Base Layer" strategy. This means prioritizing Dark Red and Blue cups to fill the background and floor before touching the White or Green cups. A common failure point is players finishing the "Carrot" (Orange/Green) too early and finding themselves with no tray space to fix the background. Always prioritize the heavy, background colors first.
Objective 5: Tray Management
Throughout all other objectives, you must maintain tray fluidity. Never let the tray sit at 5/5 for more than a second. This objective is ongoing. If you find yourself staring at a full tray, you have made a sequence error. The correct path always involves "Staggered Tapping"—tapping, waiting for processing, and then tapping again.
Phase 1: Breaking the Center Barrier
Understanding the Box Mechanics
The Number 6 Box is not a timer; it is a counter. It tracks the number of cups you send to the dispenser. The game creates a false sense of urgency here, but you must ignore the timer and focus on the count. The box is vulnerable to specific colors located in the "Top Row" and "Far Left Column." Tapping random cups will not work; you must hit the specific cups that align with the box's hitbox.
Step 1: The Top-Row Salvo
Begin the level by looking strictly at the top row of the board. The bottom half is irrelevant for now.
- Tap the Blue Cup (Top-Left): This is your first background color. It adds 1 point to the box.
- Tap the Bright Red Cup (Top-Row, 2nd): This starts the carrot.
- Tap the Dark Red Cup (Top-Row, 3rd): This establishes the floor.
Analysis: At this point, your tray is at 3/5 capacity. CRITICAL: Do not tap the 4th cup yet. Wait for the first cup to process and drop to 2/5. This "rhythm pause" is the difference between success and failure.
Step 2: The Vertical Column Strike
Once your tray has processed the initial wave and you have space (1 or 2 slots open), shift your eyes to the far-left vertical column. This column is unobstructed by walls.
- Tap the Orange Cup (Top of Left Column): This adds the 4th point to the box.
- Tap the Green Cup (Middle of Left Column): This adds the 5th point.
- Tap the Dark Red Cup (Bottom of Left Column): This is the final blow. It deals the 6th point.
As the last cup processes, the Number 6 Box will shatter with a distinct cracking sound. The board layout will shift slightly, opening up the central pathways.
Tray Management During Phase 1
The biggest risk in Phase 1 is the "Full Tray Deadlock." If you tap all 6 cups in rapid succession, your tray will hit 5/5 and stop. The 6th cup (the final blow) might not register correctly if the belt is stalled. To avoid this, use the "Tap-Wait-Tap" method. Tap three, wait for the dispenser to finish, then tap the next three. This ensures the box breaks cleanly.
Preparation for Phase 2
As soon as the box breaks, stop tapping. Take a second to assess the bottom row. The removal of the box has shifted the bottom row cups. You need to identify the "Yellow Key" location. It is usually trapped behind an "Orange Cup" in the bottom-right corner. Do not tap anything else until you have visually confirmed where the key is sitting.
Phase 2: The Key and Lock Strategy
The "Dead-End Pocket" Trap
The Yellow Key is located in a geometric "pocket" formed by the grey walls on the right side. It cannot move up because of a wall, and it cannot move down because it is on the bottom row. It can only move Left. However, it is currently blocked by an Orange Cup and potentially a Dark Red Cup, depending on your previous moves.
The Bottom-Row Extraction Logic
To free the key, you must clear the obstacles to its left. Think of this as unblocking a drain. You need to remove the cups acting as a plug. The order is critical: White -> Blue -> White -> Dark Red -> Orange. This sequence clears the left side of the row, creating a vacuum that pulls the remaining cups (and the key) to the left.
Step-by-Step Extraction
Follow this sequence precisely. Do not deviate.
- Tap the Bottom-Left White Cup: This creates space on the belt.
- Tap the Bottom-Left Blue Cup: This continues the chain.
- Tap the Bottom-Left White Cup: (If available).
- Tap the Bottom-Right Dark Red: This is the heavy blocker. Removing it is essential.
- Tap the Bottom-Right Orange Cup: This is the final move. As soon as this cup leaves the row, the Yellow Key will slide left into the empty slot.
The "Auto-Unlock" Mechanic
Once the Yellow Key slides into the active row (the bottom-most playable row), the game logic automatically triggers the unlock sequence. You do not need to tap the key itself. As soon as it slides into position, the Yellow Lock on the right side of the board will dissolve.
Managing the Post-Lock Flood
When the Yellow Lock dissolves, a wall of cups (mostly Blue and White) will drop down from the top-right chamber. This is dangerous. If your tray is full, these new cups will stack up on the conveyor belt, potentially pushing other cups out of alignment. Tip: Ensure your tray is at 3/5 or lower before you make the final "Orange Cup" tap that frees the key. This gives you enough buffer (2 slots) to handle the immediate influx of new cups without stopping the belt.
Phase 3: Painting the Canvas
The "Bottom-Up" Filling Rule
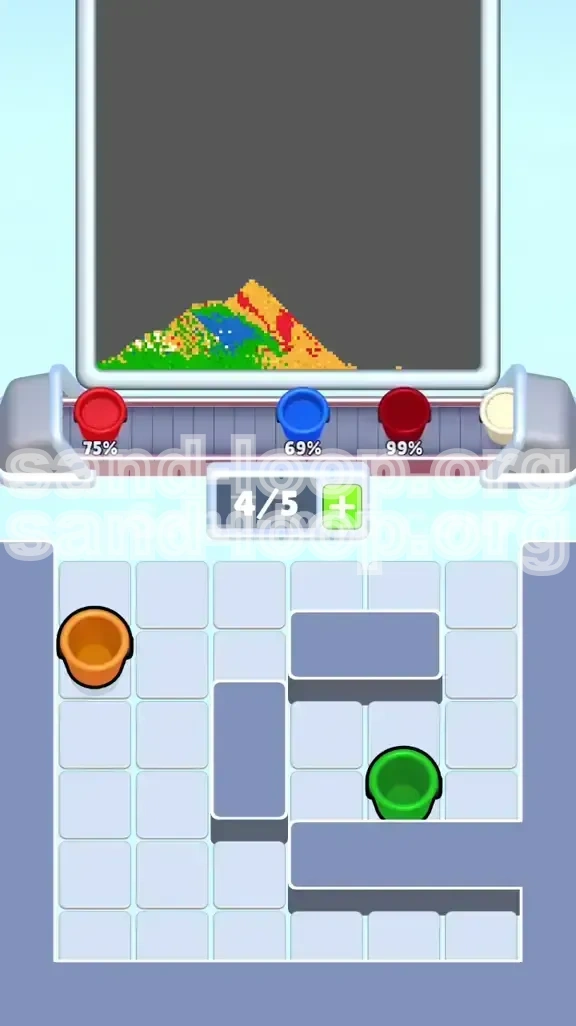
With the board fully unlocked, the game shifts from a puzzle to an art sim. The golden rule is "Bottom-Up." In the game's physics, bottom pixels fill first. If the bottom (floor) is already filled with Dark Red, any overflow sand will slide off to the sides. If the bottom is empty, sand will pile up there. Therefore, you must fill the "Floor" (Dark Red) and "Background" (Blue) to 100% before touching the "Foreground" (White Rabbit).
Prioritizing the Foundation
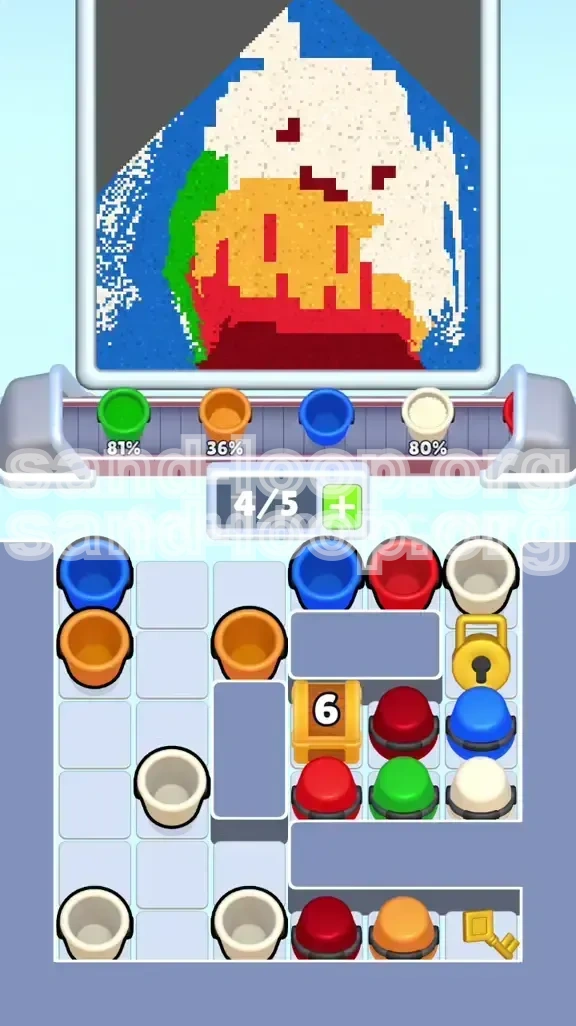
Look at the Color Gauge at the top of the screen.
- Dark Red (Floor): Aim for 100% completion. Tap every Dark Red cup you can see. Since these are heavy, they will settle firmly at the bottom.
- Bright Blue (Sky): Aim for 100% completion. This is the safest color to tap. It occupies the background layer and won't interfere with the rabbit.
- Bright Orange (Carrot Body): Aim for 90% completion. Leave a tiny bit of room (10%) for error correction or layering adjustments.
The Carrot: Orange and Green
The carrot consists of the body (Orange) and the leaves (Green). The leaves are located at the top of the carrot. Green is a "light" color compared to the Dark Red floor, but it can bleed into the White rabbit if poured carelessly.
Strategy: Finish the Green leaves first (or simultaneously with Orange). If you pour the Orange body first and it overflows, it might touch the rabbit's white head. By doing Green first, you minimize the risk of "Orange Bleed" onto the white pixels. Once Green is done, flood the Orange to finish the carrot.
The White Rabbit Reveal
The White Rabbit is the final piece of the puzzle. It is the "Foreground" element. By the time you start tapping White cups, your floor should be solid Dark Red, your sky solid Blue, and your carrot solid Orange/Green.
Warning: Do not tap White cups until the Blue Sky is at least 95% full. If you pour White onto an empty Blue background, the White sand will sink into the background layer, turning the sky a dirty grey color. Once the Blue is established as a "base," the White sand will sit proudly on top, creating crisp pixel art.
Final Polish
After the main colors are poured, you might notice a few "stray pixels" or holes in the art. Use your remaining tray slots to patch these up. If you have a single stray White pixel on the Red floor, you can sometimes fix it by pouring a specific color, but often in Level 436, stray pixels are acceptable as long as the main "percentage" goals are met. Don't risk a deadlock for a single pixel.
Advanced Tactics & Speed Running
Speed Run Strategy: The "Batch Tap" Method
For experienced players looking to clear Level 436 in under 60 seconds, you can use "Batch Tapping." During Phase 1 (The Box Shatter), you can tap the first three cups (Blue, Red, Red) almost instantly. The game allows a small input buffer. However, you must pause before tapping the vertical column. This "Fast-Slow-Fast" rhythm is the key to speed running this level without soft-locking the tray.
Advanced Tip: The "Travel Time" Exploit
There is a delay between tapping a cup and the sand hitting the canvas. You can exploit this. If you need to alternate between two colors rapidly (e.g., Orange and Green for the carrot), tap them in quick succession: "Orange-Green-Orange-Green." Because of the travel time, the first Orange cup will hit the canvas just as the Green cup is entering the dispenser. This overlap can sometimes help "smooth out" the layers, preventing the jagged edges that occur when pouring cups one by one slowly.
The "Pre-Loading" Technique
In Phase 2, while the final "Box Shatter" cup is processing, you can move your finger to the bottom row. You don't have to wait for the box animation to finish completely. As soon as the screen shakes (indicating the box is breaking), you can tap the first "Bottom-Left White" cup. This pre-loading shaves valuable seconds off your run and keeps the rhythm going.
Common Mistake: The "Premature White" Tap
The number one reason players fail Level 436 is tapping White too early. It is tempting to "finish the rabbit" when you see a White cup available. Resist this urge. If you pour White while the Blue Sky is at 50%, the White will act as a background filler. When you eventually pour the rest of the Blue, it will mix with the White, creating a light blue mess instead of a crisp White Rabbit on a Blue Sky. White is always the last color you pour.
Recovering from a "Soft Lock"
If you find yourself with a full tray (5/5) and the belt isn't moving, you are in a Soft Lock. Do not tap random cups. Look at the cups currently in the dispenser (the active processing slots). Wait for one to finish. Once one slot opens up, look for a "Column Shifter." A cup that, when tapped, will drop other cups down. Sometimes, simply waiting 5 seconds for the heavy sand to process will clear the jam automatically. Patience is the only cure for a Soft Lock; panic tapping guarantees a restart.