
Level 443
HARDHow to solve Sand Loop level 443? Get instant solution for Sand Loop 443 with our step by step solution & video walkthrough. Sand Loop 443 tips and guide.
Play Sand Loop Now
Experience the puzzle challenge firsthand
Game Screenshots
Sand Loop Level Guides
Level Overview: The Cyan Sky Challenge
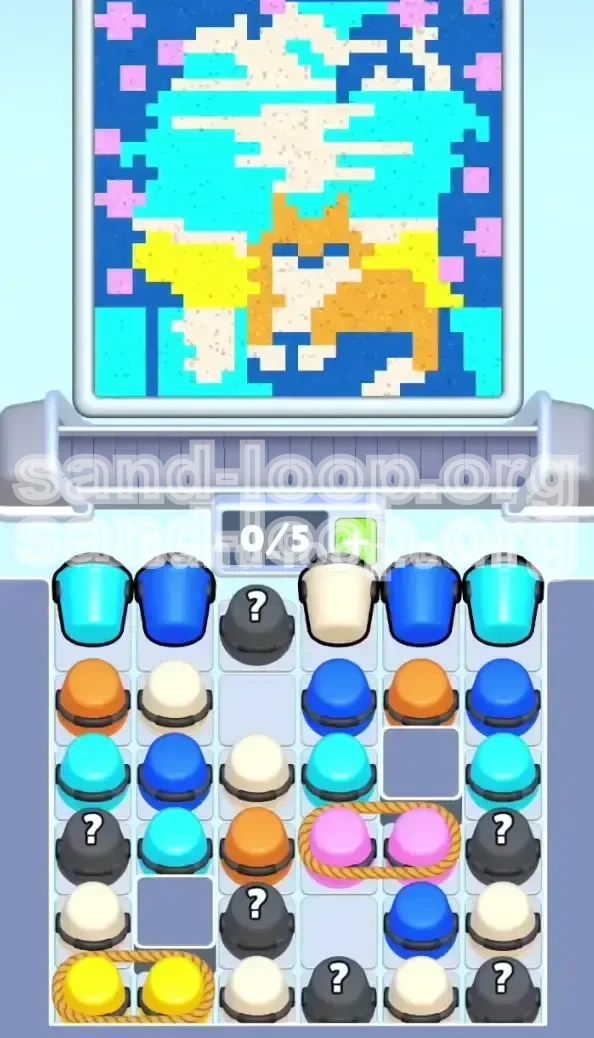
Welcome to the definitive walkthrough for Sand Loop Level 443. This stage stands out as a unique puzzle that prioritizes logic and spatial management over reflexes. The objective is to assemble a vibrant pixel-art scene featuring a relaxed orange cat sitting against a broad cyan sky, framed by white clouds and distinct yellow accents. Unlike standard levels where you can rely on auto-sorting or quick taps, this stage is a strict resource management test. The primary difficulty stems from a severely limited economy (only 5 active slots) combined with complex "Rope" mechanics that can instantly jam your board if triggered prematurely. Success here requires a methodical approach, treating every tap as a calculated move in a chess game rather than a frantic action sequence.
Visual Breakdown of the Target Canvas
Understanding the geometry of your target is the first step to victory. The image is constructed in a pyramid-like pour order. The base layer consists of a massive Cyan background which consumes the majority of the sand volume. Sitting atop this foundation is the White cloud layer and the large Orange body of the cat. The highest layers, which are the most difficult to hit without overflow, are the tiny Pink plus-signs floating in the sky and the Yellow blocks on the far periphery. Because the game's physics engine pours sand from top to bottom, you must prioritize the large background areas (Cyan/Orange) before attempting to place the small, high-altitude details (Pink/Yellow). Attempting to paint the pink "plus-signs" before the orange cat is fully formed will result in the sand sliding off the empty canvas and contaminating other color zones.
The Resource Economy Constraint
This level introduces a harsh bottleneck: you start with a maximum capacity of only 5 slots (0/5). This means your margin for error is incredibly slim. In standard levels, you might have 7 or 8 slots to play with, allowing for loose management. Here, every slot counts. You will frequently find yourself at 4/5 or 5/5 capacity. When your slots are full, you cannot generate new cups from the supply tray, stalling your progress. Therefore, efficient conveyor belt management—moving cups to the canvas quickly to free up slots—is just as important as selecting the right colors. You must constantly monitor the slot counter displayed on your active holder.
Understanding the Rope Mechanic
The most dangerous element in this level is the presence of "Tied Ropes." You will notice pairs of cups (specifically Pink and Yellow pairs) connected by a visual rope or knot. These are not single units; they are binary clusters. When you tap one cup in a tied pair, the game attempts to pull both cups into your active slots simultaneously. This consumes two slots at once. If you have 4/5 slots full and tap a roped pair, the game cannot fit two cups into one remaining slot. This causes a "Soft Lock," forcing you to waste time undoing moves or restart the level entirely. You must treat these pairs as "Double Cost" items that require a specific reservation of 2 empty slots before activation.
The Mystery Cup Variables
Scattered throughout the initial supply tray are Mystery Cups (marked with a question mark). These add a layer of RNG (Random Number Generation) to the level. While the core strategy remains consistent, the specific color revealed by these cups can alter your short-term queue management. For instance, if a Mystery Cup reveals a Dark Blue, you must immediately route it to the border, whereas a White cup needs to be reserved for the cloud layer. You cannot ignore these cups, as they often block access to critical layers below. The strategy involves tapping them early to reveal their color identity so you can integrate them into your filling plan without disrupting the flow.
Why Speed is Irrelevant
It is crucial to adjust your mindset for this level. Sand Loop Level 443 is not a race. The conveyor belt moves at a constant, leisurely pace, and there are no time bonuses for finishing quickly. In fact, rushing is the primary cause of failure. Tapping too fast leads to "fat-finger" errors where you might accidentally trigger a roped pair or overfill your slots. The "Soft Lock" caused by overfilling is a time penalty that negates any speed gains. Adopt a slow, rhythmic tapping style: Tap -> Verify Slots -> Watch Pour -> Repeat. This deliberate pace ensures that the complex color layering settles correctly before the next wave of sand arrives.
Clear Objectives and Strategy
To conquer Level 443, you must move away from random tapping and follow a strict architectural plan. The goal is not just to "fill the board," but to construct the image layer by layer, respecting the physics of falling sand. The following objectives outline the winning strategy from start to finish, ensuring that you never run out of slot space or miss a pixel target.
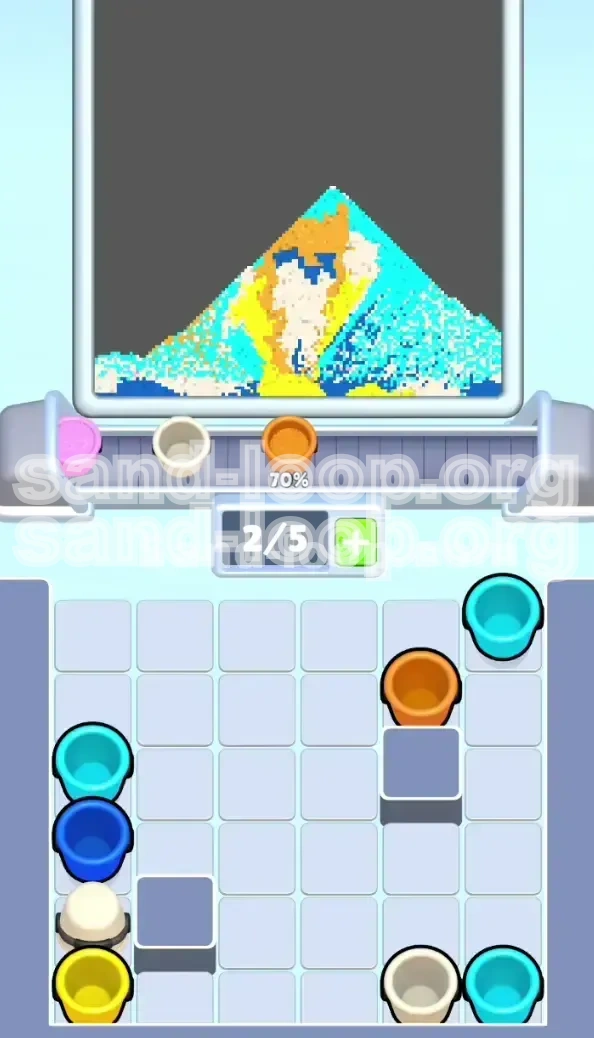
Primary Objective: The Base Layer Construction
Your immediate goal at the start is to establish the "Cyan Foundation." The background requires a significant volume of sand to set the stage for the rest of the image. By clearing the Cyan cups first, you achieve two things: first, you complete the largest section of the canvas, which minimizes the risk of overflow later; and second, you clear the vertical space in the supply tray to access the deeper layers of cups. You should aim to have the Cyan background at least 60% complete before you even think about touching the Pink or Yellow accents. This base acts as the "floor" that will catch the finer details later.
Secondary Objective: The Central Silhouette
Once the sky is partially established, shift your focus to the center. The Orange Cat and the White Clouds are the focal points of the image. You need to alternate between Orange and White cups to build up the central pyramid structure. This is critical because the game's collision physics rely on existing sand piles to stop subsequent flows. If you try to pour the White clouds before the Orange cat is there, the white sand will just slide down the "Cyan slope" and mix into the background, wasting the cup. You must build the central mound high enough to create a flat platform for the final details.
Tertiary Objective: The Border Definition
While the center is your focus, do not neglect the edges. The Dark Blue border outlines the entire canvas. If you ignore Dark Blue cups for too long, they will clog up your limited slots, preventing you from accessing the critical Pink and Yellow cups trapped beneath them. Make it a rule to process Dark Blue cups whenever your slot count drops below 3/5. This keeps the edges clean and ensures that the final image looks sharp and contained, preventing color bleeding into the UI areas.
Quaternary Objective: The High-Altitude Details
This is the final phase and the most dangerous. The Pink plus-signs and Yellow blocks are the "crown jewels" of the level. They must be placed last. The Pink targets are small and floating; if the canvas below them isn't perfectly packed with Orange and White sand, the Pink stream will overshoot or slide off. Similarly, the Yellow blocks act as bookends. They require the main structure to be stable so they can sit on the periphery without mixing into the Cat or Clouds. Do not trigger the tied pairs for these colors until the rest of the board is 90% complete.
Managing the 5-Slot Economy
A continuous objective throughout the level is slot management. You must maintain a rhythm of "Input -> Output." Never let your slots sit idle at 5/5 full. As soon as a cup is on the conveyor, your eyes should be scanning the board to see if it can be poured immediately. Ideally, you want to keep your slots hovering around 3/5 or 4/5. This leaves you with "Emergency Space" (1 empty slot) or "Rope Space" (2 empty slots). If you find yourself stuck at 5/5 with no pours available, you have mismanaged the queue and must prioritize pouring off the current cups immediately.
Strategic Pause Points
Identify moments to pause and assess. After clearing the first layer of Mystery Cups, pause. Check your slot status. Look at the position of the Roped Pink cups. Are they about to become a problem? Setting these "mental checkpoints" prevents the snowball effect of small mistakes. If you feel the board getting chaotic, stop tapping for 3-5 seconds. Let the current sand settle, watch the conveyor clear out, and then re-plan your next three moves. This level rewards the player who masters the "Pause" more than the player who masters the "Tap."
Step-by-Step Walkthrough
This section provides a turn-by-turn guide to navigating the supply tray. Follow these sequences in order to minimize the risk of deadlock and ensure a smooth flow of materials from the tray to the canvas.
Phase 1: The Initial Clear and Cyan Flush
Action: As soon as the level loads, identify the loose Cyan and Dark Blue cups at the top edges of the tray. Do not touch the Mystery Cups yet.
Execution: Tap the top-left and top-right Cyan cups first. Send them immediately to the conveyor. Follow up with the Dark Blue cups located on the periphery. By starting with the edges, you clear the "roof" of the supply tray, allowing you to see and access the second layer of cups beneath. Your goal in the first 30 seconds is simply to reduce the vertical height of the cup stack.
Result: You should have 2-3 cups on the belt, and your slots should be at 2/5 or 3/5. The first layer of Mystery Cups is now exposed.
Phase 2: The Mystery Cup Reveal
Action: You now see the dark grey Mystery Cups with question marks blocking the center.
Execution: Tap the Mystery Cup located at the top-center. This is usually the most accessible one. Watch it flip to reveal its true color.
Response: If it reveals White or Orange, treat it as part of your "Central Core" plan. If it reveals Cyan, add it to the background queue. If it reveals Pink, you must be extremely careful not to send it to the canvas yet (hold it in a slot if necessary until the canvas is ready, or pour it only if the target is open). However, the best strategy is to send it to the conveyor immediately only if you have a designated target. Otherwise, use it to fill a slot and keep the flow moving. Do not let Mystery Cups sit in the tray; they are blockers.
Phase 3: The Rope Trap Setup (Pink)
Action: As you clear the center, you will expose the roped Pink cups. They will be sitting tied together, likely in the middle-right section.
Warning: DO NOT TAP THEM YET.
Reasoning: The Pink targets are tiny plus-signs in the sky. At this stage in the game (roughly 40% completion), the canvas below these targets is likely still flat or empty. Pouring Pink now will result in the sand sliding down the "roof" of the cat or clouds and mixing into the white/cyan areas, creating a dirty gray mess that is impossible to fix.
Strategy: Note their position. You will return to them only after the Orange Cat is fully formed. Use the surrounding cups to continue building up the central sand pile.
Phase 4: Building the Central Core (Orange & White)
Action: Focus entirely on extracting Orange and White cups from the lower levels of the tray.
Execution: You may need to clear side cups (Cyan/Dark Blue) to reach the Orange/White clusters buried at the bottom. This is the "Digging" phase. Tap the side cups to free up the center.
Pouring: Send the Orange cups to the conveyor first to build the cat's body. Follow immediately with White cups for the clouds. The idea is to create a "Sandwich" effect—Orange on bottom, White on top. This raises the physical level of the pixels in the center of the screen, creating the platform needed for the final phase.
Phase 5: The Final Trigger (Roped Yellow & Pink)
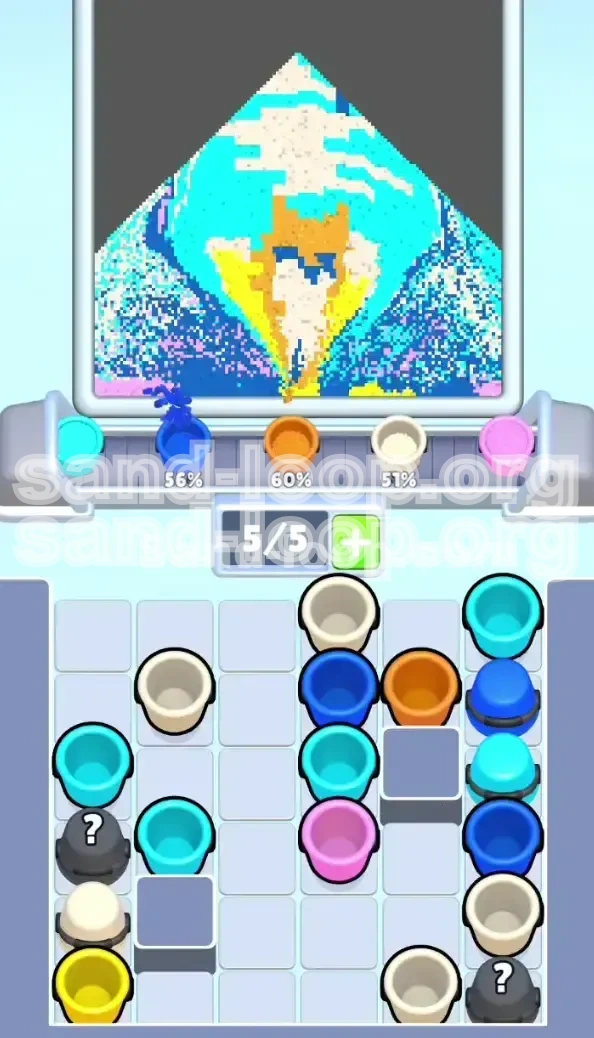
Action: The board is now 80% full. The Cyan background is done, the Cat is visible, and the Clouds are fluffy. You likely have the roped Yellow cups (bottom-left) and the roped Pink cups (middle-right) remaining, plus some loose Dark Blue border cups.
The Check: Look at your slot counter. Is it 0/5 or 1/5? If yes, proceed. If it is higher, pour off cups immediately until you have 2 empty slots.
Execution: Tap the Roped Pink cups first. Since the cat is high, the Pink sand will hit the plus-signs perfectly. Immediately after they clear the belt (or while they are pouring), tap the Roped Yellow cups. These will consume your final slots. The Yellow targets are on the far edges, which should be clear by now.
Finale: Pour any remaining Dark Blue cups to finish the frame. Watch the completion meter tick to 100%.
Color Order and Processing Logic
The "Cyan Sky and Orange Cat" puzzle relies on a specific chromatic hierarchy. Processing colors in the wrong order is the leading cause of failure. Below is the priority list for color extraction and pouring, ranked from most critical to least critical.
Priority 1: Cyan (The Background)
Cyan is the bedrock of this level. It has the largest surface area and the highest tolerance for error. Because it covers the "floor" of the canvas, it must be laid down first. If you try to pour Cyan on top of White or Orange, it will bury and obscure your detailed work, effectively ruining the image. Furthermore, Cyan cups are plentiful. Clearing them early opens up the supply tray for the more rare colors. Always prioritize Cyan cups when they appear in the top layer of the tray.
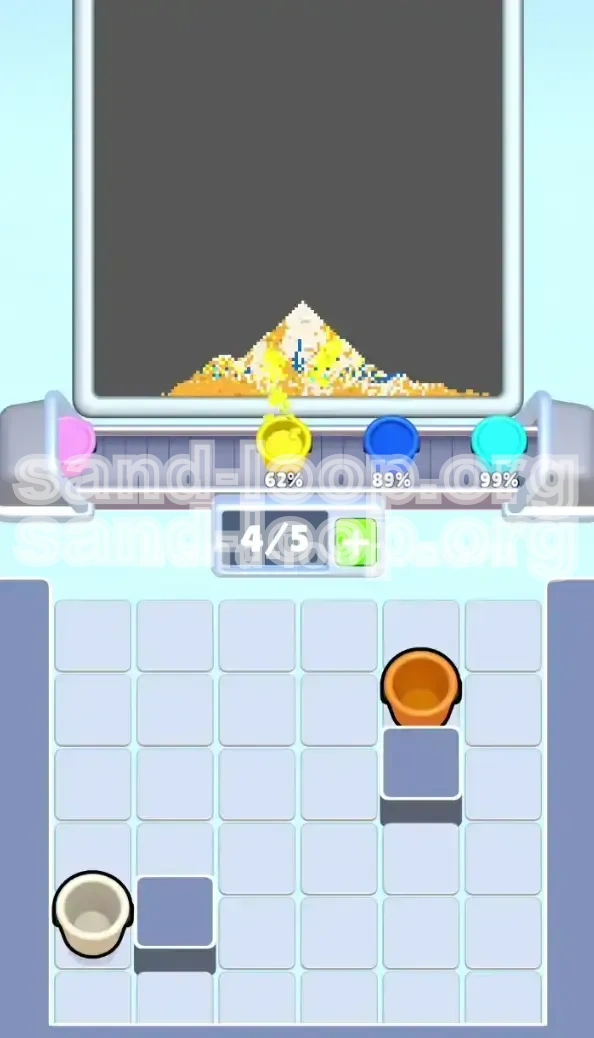
Priority 2: Orange (The Cat Core)
Orange serves as the "anchor" for the entire middle section of the image. The physics engine requires a substantial pile of sand to stop the lighter colors (White and Pink) from sliding off. Orange is heavy and voluminous. You want to build the Orange cat up to roughly 70-80% of its final height before you start layering the White clouds heavily on top of it. Think of the Orange cat as the "Mountain" and the clouds as the "Snow"—you can't put snow on a mountain that hasn't risen yet.
Priority 3: White (The Clouds)
White sand acts as the contrast layer. It is lighter visually and physically. It sits on top of the Orange cat and the Cyan sky. If you pour White too early, before the Orange mound is ready, the White sand will spread out thinly over the Cyan background, making the sky look milky and diluted instead of crisp and blue. Wait until the Orange "bump" is visible on the canvas before sending large volumes of White cups to the conveyor.
Priority 4: Dark Blue (The Frame)
Dark Blue is a utility color. It defines the boundaries but adds little to the central composition. It is safe to process Dark Blue at almost any time, provided you have the slot space. However, it is best used as a "filler" color. If you have 1 empty slot and no immediate Orange/White cups available, grab a Dark Blue cup to keep the conveyor moving. Do not let Dark Blue cups clog your tray in the early game, but do not prioritize them over the core image construction.
Priority 5: Pink (The Details)
Pink is the highest tier color because its targets are the smallest and highest. The Pink plus-signs are essentially floating targets. They require the "Mountain" (Orange Cat) and the "Snow" (White Clouds) to be in place to act as a backstop. Pink sand has low volume; if it misses the target, it disappears or contaminates the area below. Strict Rule: Do not process Pink cups until the Orange cat is visually complete on the screen.
Priority 6: Yellow (The Bookends)
Yellow is the final boss. It is always located in the roped pair at the bottom-left or bottom-right. The Yellow blocks are on the extreme edges of the canvas. They are isolated from the central chaos, making them safe to pour last, but they require the "Rope" mechanic to be executed perfectly. Save these for the very last seconds of the level. Once the Yellow sand is poured, the level should end immediately.
Key Tips and Common Mistakes
Even with a perfect strategy, small execution errors can derail a run. This section highlights the specific pitfalls in Level 443 and provides pro-tips to navigate them safely.
Common Mistake: The Premature Rope Tap
The Error: Seeing a roped pair of cups and tapping them out of habit or panic when the tray looks full.
The Consequence: If you have 3 or 4 slots full, tapping a roped pair will crash your economy. You will have 2 cups stuck in the tray, unable to enter the full slots, and the conveyor will be blocked. You will be forced to restart.
The Fix: Always count your slots before tapping a pair. If you see a knot/rope, count: 1, 2, 3, 4, 5. If you have 4 or 5 cups, you cannot tap the pair yet. You must pour off at least two cups first.
Common Mistake: The Early Pink Spill
The Error: Sending Pink cups to the conveyor before the Orange Cat is fully formed.
The Consequence: The Pink sand pours onto the canvas, but because the Orange Cat isn't high enough to block it, the Pink sand flows down the sides, sliding into the White Clouds or Cyan Sky. This turns the background pink and the clouds gray.
The Fix: Be patient. The Pink cups are safe in the tray; they won't expire. Let them sit there until you have built up the center of the board. Only tap them when the canvas looks like a mountain (Orange) with snow (White) on it.
Key Tip: Slot Banking
Strategy: Try to keep 2 empty slots whenever possible, even if it feels inefficient.
Why: This "Slot Banking" gives you the flexibility to instantly clear a Mystery Cup or a Roped Pair if the opportunity arises. If you play at 5/5 slots constantly, you are reacting to the board. If you play at 3/5 slots, you are controlling the board. Having that buffer space prevents the "Soft Lock" scenario and makes the level feel much slower and more manageable.
Key Tip: Conveyor Watching
Strategy: Do not look at the supply tray while a cup is pouring on the conveyor.
Why: If you are busy tapping new cups in the tray, you might miss that a cup on the conveyor has finished pouring. A finished cup takes up a slot space that you might need for the next tap. Watch the cup empty its sand, wait for the slot to open (indicated by the slot icon dimming or emptying), and then look back at the tray to find the next cup. This rhythmic focus prevents overfilling.
Common Mistake: Ignoring the Mystery Cup Reveal
The Error: Treating Mystery Cups like normal cups and tapping them without a plan for where the sand will go.
The Fix: When you tap a Mystery Cup, stare at it. The millisecond it flips, identify the color. If it's a color you aren't ready for (like early Pink), do not send it to the conveyor immediately if you can avoid it, or ensure you have a clear target. If it's a color you need (Cyan), send it up instantly. Awareness of the RNG element prevents nasty surprises.
Stuck Solutions and Speed Run Tips
If you find yourself retrying the level multiple times or if you are looking to optimize your time, these advanced strategies will help you break through the wall or achieve a top time.
Solution: Resetting the Board State
Scenario: You are 50% through the level, but you made a mistake—Pink sand mixed into the clouds, or you have a jammed slot situation that seems unrecoverable.
Action: Don't wait for the slow death of the run. Immediately hit the Restart button.
Reasoning: In Sand Loop, a contaminated color palette is nearly impossible to fix because you cannot "un-pour" sand. Trying to fix a pink cloud by pouring more white on top usually just uses up your limited White cups, leaving you with none for the rest of the level. Recognizing a "Dead Run" early saves time and frustration. Reset and apply the correct color order from the start.
Solution: The "Tap and Wait" Technique
Scenario: The board is chaotic, cups are piling up, and you feel overwhelmed.
Action: Stop tapping completely. Take your hands off the device/mouse for 5 seconds.
Effect: Watch the conveyor. Let the current cups pour out. Let the slots clear. Once the board is calm (0/5 or 1/5 slots), look at the tray. Identify the single most important cup to tap next. Tap only that one. Wait for it to process. Repeat. This "surgical" style of play is often required to stabilize a chaotic board state in Level 443.
Speed Run Tip: Pre-Planning the Path
Tip: Before you even tap the first cup, spend 10 seconds memorizing the location of the Roped Pairs.
Benefit: If you know exactly where the Pink and Yellow ropes are, you don't have to scan for them mid-game. You can aggressively clear the cups above and around them, creating a direct path to trigger them the moment the board is ready. This eliminates the "searching" time where you are staring at the tray wondering what to do next.
Speed Run Tip: Batch Processing
Tip: Group your pours by color.
Benefit: Instead of alternating Cyan -> Orange -> Cyan -> White, try to tap all accessible Cyan cups in a row, send them all to the belt, and then switch to Orange. While the Cyan cups are queuing up on the conveyor, you can use that time to dig for more Orange cups. Batching reduces the cognitive load of switching targets and allows the conveyor to act as a buffer, smoothing out the rhythm of the level.
Speed Run Tip: The Mystery Cup Gamble
Tip: In a speed run, you cannot afford to wait for Mystery Cups to flip and then decide.
Benefit: Assume the Mystery Cup will reveal the color you currently need most (usually Cyan or Orange). Tap it and immediately send it to the conveyor. If it reveals a "bad" color (like early Pink), you might have to restart the run. However, if it reveals a "good" color, you have saved seconds by not waiting. This is a high-risk, high-reward strategy valid only for players attempting to top the leaderboards, not for normal completion.