
Level 444
HARDHow to solve Sand Loop level 444? Get instant solution for Sand Loop 444 with our step by step solution & video walkthrough. Sand Loop 444 tips and guide.
Play Sand Loop Now
Experience the puzzle challenge firsthand
Game Screenshots

Sand Loop Level Guides
Sand Loop Stage 444: Ultimate Strategy & Walkthrough Guide
1. Introduction: The "Supply Chain" Challenge
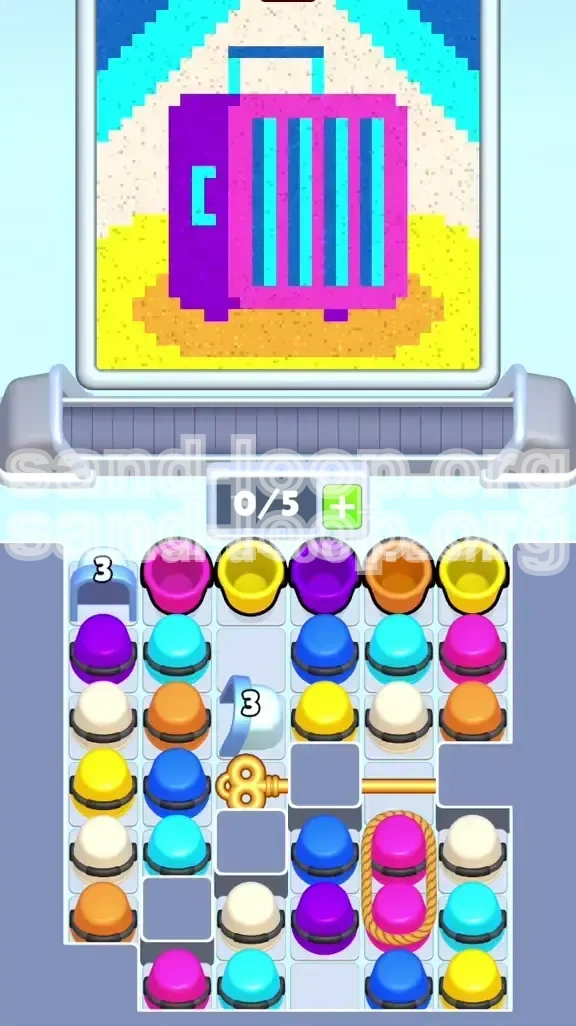
Welcome to the most complex logistical puzzle in Sand Loop: Stage 444. This level is not just about filling colors; it is a test of inventory management and spatial reasoning. You are presented with a vibrant beach scene featuring a "Tropical Luggage" suitcase resting on sand against a striped sky.
The core difficulty lies in the "Dependency Chain." You are restricted to a 5-slot conveyor belt, but the level requires managing 7 distinct colors (Purple, Pink, Orange, Yellow, Cyan, White, Dark Blue) that are locked behind Ice, Keys, and Ropes. If you tap cups randomly, you will fill your belt with useless colors, causing a deadlock that forces a restart. This guide focuses on "Slot Efficiency"—ensuring you always have space for the right cup at the right time.
2. Level Objectives & Victory Conditions
To secure the 3-Star rating on this level, you must optimize for accuracy and waste reduction. The game tracks your "Excess Liquid Percentage," meaning every drop of paint poured outside the lines counts against you.
- 100% Pixel Accuracy: The striped sky is unforgiving. You must alternate between Cyan, White, and Dark Blue without bleeding into the sand or the suitcase.
- Inventory Management: Never let your conveyor belt reach maximum capacity (5 slots) unless you are about to perform a massive "combo pour."
- The Golden Key Trigger: You must unlock the mid-section of the supply tray to access the background colors. Failure to do this efficiently is the #1 reason players get stuck.
3. Visual Breakdown & Color Priority
Understanding the anatomy of the pixel art is crucial for planning your pour order. We prioritize colors based on "Unlock Risk" and "Surface Area."
- Priority A: The Suitcase (Purple/Pink). This occupies 40% of the canvas. It is the safest "dumping ground" for excess liquid because it has thick borders and large blocks of color.
- Priority B: The Sand (Orange/Yellow). This requires shading. You must distinguish between the bright sand (Yellow) and the shadow under the luggage (Dark Orange).
- Priority C: The Sky (Cyan/White/Dark Blue). This is the "Danger Zone." It consists of thin diagonal stripes. Save this for the end when your inventory is stable.
4. Critical Constraints & Inventory Limits
Stage 444 introduces a hard constraint: The 5-Slot Bottleneck.
- The Slot Limit: You can only hold 5 cups. If you tap a new cup when 5 are already on the belt, the game ends or penalizes you heavily.
- The Rope Mechanic: In the late game, you will encounter "Roped Cups." Tapping one pulls a pair. If you have 4 cups on the belt and tap a rope, you instantly overflow. Always keep 2 slots empty before cutting ropes.
- Ice Block Physics: Breaking ice takes 3 hits. During these hits, the conveyor belt keeps moving. Plan your ice-breaking so the cup finishes shattering exactly when the belt has space.
5. Pre-Game Checklist
Before you tap "Start," visualize these three points to ensure a smooth run.
- Locate the Key: Identify the Golden Key's position in the tray immediately upon loading.
- Identify the Trash Color: Usually, Purple is abundant. Treat Purple as your "trash" color for cleaning the dispenser nozzle.
- Mental Map: Plan to clear the top-left Ice Block first. Do not touch the bottom-right ropes until the end.
Part 1: The Opening Phase - Breaking the Gridlock
1. The "Top-Left" Protocol
As the level begins, your conveyor belt is empty, and the tray is frozen. Do not tap randomly. The top-left corner holds a critical Ice Block trapping Cyan cups needed for the sky.
- Step 1: Tap only the top row cups. You will likely see a Purple and a Pink cup.
- Step 2: Pour these into the main body of the suitcase immediately. Do not hold onto them.
- Step 3: Tap the top-left cup 3 times rapidly to shatter the ice. Use the pours to fill the suitcase if the color matches, or use a "trash pour" on already filled areas to clear the cup.
2. Conveyor Belt Management: The 40% Rule
For the first 15% of the game, enforce a strict discipline: never let your belt exceed 40% capacity (2 cups filled, 3 empty).
- Reasoning: When the Top-Left Ice shatters, a new row of cups slides forward. If your belt is full, these new cups get blocked, or worse, you are forced to tap a cup you don't need.
- Action: If you have 2 cups and the next one in the tray isn't critical (e.g., another Purple when the suitcase is full), wait. Let the current cups cycle under the dispenser.
3. Managing the "Key Protectors"
The Golden Key is located in the center tray, blocked by a Gray Block and a Yellow cup.
- The Yellow Cup: Do not pour this into the suitcase. It is for the sand. If you tap it now, you risk contaminating the Pink luggage.
- The Gray Block: This requires adjacent matches to clear. Focus on draining the cups above it to let it drop down.
- Strategy: Ignore the Key section until your Top-Left Ice is broken and your belt is flowing smoothly.
4. Secondary Ice: The Center-Left Block
There is a smaller Ice Block on the center-left. It is less urgent but acts as a flow blocker.
- Timing: Break this while you are waiting for your belt to clear from the initial Top-Left shatter.
- Technique: Use a color you have in surplus (likely Purple or Pink) to hammer the ice. Even if you waste the liquid, keeping the flow moving is more important than conserving paint.
5. Preventing "Color Bleed" in Vertical Slats
The suitcase features thin vertical ribs (slats). These are traps for novice players.
- The Mistake: Holding the pour button while the dispenser is over a slat. The liquid spills into the background sand.
- The Fix: Use "Tapping." Tap the screen rapidly to release small dollops of paint into the slats. Stop the moment the slat is full.
6. Establishing the "Sand Shadow" Base
Before you unlock the sky, you need to prepare the foreground.
- Action: Look for Dark Orange or Brown cups. Pour these into the area directly underneath the suitcase first.
- Why: Game logic usually layers dark colors under light colors. If you fill the shadow with Yellow first, you can't overlay Dark Orange later without it looking muddy.
Part 2: The Mid-Game - Unlocking the Golden Key
1. The Key Unlock Sequence
Once the top section is cleared, the Golden Key becomes your primary focus.
- Trigger: You must clear the specific Yellow cup and Gray block guarding the key.
- Warning: The moment the Key is tapped, a "Cup Flood" occurs. A row of Blue, Pink, and White cups will slide down from the middle.
- Preparation: Ensure your belt has at least 3 empty slots before you tap the Key. If you tap the key with a full belt, the incoming White and Blue cups will bury you.
2. Processing the "Cup Flood"
When the mid-tray unlocks, you will be bombarded with colors.
- Prioritize White: The White cups are for the sky stripes. They are rare. Tap them immediately.
- Prioritize Pink: You likely need more Pink for the suitcase details. Tap these second.
- Delay Blue/Dark Blue: Unless the sky is the only thing left to fill, let the Blue cups sit in the tray for a moment. They are dangerous because they are easy to confuse with the darker background elements.
3. The "Filler" Technique for the Sky
Now that you have Cyan and White, it's time to tackle the background.
- Order: Fill the broad areas of the sky with Cyan first. White is for the thin stripes.
- Technique: Do not fill the White stripes completely. Leave a 1-pixel gap. Why? Because later, you will need to pour Dark Blue, and if the White is overflowing, the Dark Blue will mix with it, creating a muddy grey.
4. Avoiding the "Deadlock" Scenario
A deadlock is when your belt has 5 cups, but the image requires a color that isn't on the belt.
- Symptom: You are forced to pour a cup into the wrong place just to free up a slot.
- Prevention: Always glance at the "Next Up" cup in the tray. If the dispenser is hovering over the Sky (needs Blue/White), and the next cup is Orange (Sand), do not tap it. Wait for the tray to cycle or tap a different lane.
5. Layering the Sand Highlights
With the Key unlocked, you should have access to brighter Yellows.
- Action: Now that the Dark Orange shadow is down, apply the Yellow highlights to the rest of the sand.
- Tip: Be careful near the wheels of the suitcase. The pixels there are small. Use short bursts of liquid.
6. Correcting Color Bleed
If you accidentally poured Orange into the Cyan sky (it happens), don't panic.
- The Fix: You cannot "erase" paint. You must cover it.
- Action: Immediately pour the correct color (Cyan) over the mistake. The game judges the final pixel color. Covering the mistake counts as a correction, but it wastes liquid. Try to be precise to avoid wasting the limited Cyan supply.
Part 3: The End-Game - Ropes and Final Details
1. The Rope Trap: Bottom-Right Protocol
This is the final hurdle. In the bottom-right corner, there are two cups linked by a rope.
- The Mechanic: Tapping one pulls both onto the belt simultaneously.
- The Risk: This adds 2 units to your inventory instantly.
- The Rule: You must have 3 or fewer cups on your belt before cutting the rope. If you have 4 cups and cut the rope, you hit 6 cups -> Game Over.
2. Executing the Rope Cut
Assuming you have space, cut the rope.
- Scenario A (Same Color): If both are Pink, you are safe. Pour them into the suitcase details.
- Scenario B (Mixed Colors): If one is Pink and one is Blue, prioritize the one that matches the area under the dispenser. Pour the other one into a "safe zone" (an already completed area) to get it off the belt.
3. Precision Pouring: The Diagonal Stripes
The sky features diagonal stripes of Cyan, White, and Dark Blue.
- Challenge: The dispenser moves horizontally, but the stripes are diagonal. This means the dispenser hits the "corner" of the stripes.
- Technique: Use the "Stop-and-Go" method. Pour while the dispenser moves over the center of the stripe, lift your finger as it crosses the boundary. This requires rhythm, not speed.
4. The "Ghost Pixel" Hunt
You are at 98% completion. The game says you are missing something. Where is it?
- Common Hiding Spots: Check the shadow under the suitcase handle. Check the thin gap between the sand and the suitcase wheels.
- Tool Use: If you have excess liquid of a specific color, pour it slowly over these areas. If the liquid "absorbs," you found an empty pixel.
5. Inventory Dumping Strategy
At the very end, you might have 1 or 2 cups left on the belt that don't match any empty spots.
- Solution: Pour them into the largest area of matching color. It is better to slightly overfill a zone (which the game tolerates) than to restart the level.
- Exception: Never pour Dark Blue into the sand. The contrast is too high and will drop your accuracy rating below 3-star level.
6. Final Polish: The Dark Blue Accents
Dark Blue is the final color to apply.
- Usage: It is used for the thinnest, lowest-opacity stripes in the sky.
- Tip: Ensure your hand is steady. Since Dark Blue is often the last color available, running out of it means you can't finish the level. Every drop counts.
Part 4: Speed Run & Pro Tactics
1. The "Pre-Load" Visualization
Speed running Stage 444 starts before the timer begins.
- Mental Snapshot: While the level is loading, memorize the exact location of the Golden Key and the first Ice Block.
- Benefit: This eliminates the 1-2 seconds players usually spend scanning the screen at the start.
2. Color Batching for Efficiency
Switching between colors (e.g., Sand -> Sky -> Sand) wastes movement time.
- Strategy: Group your taps. Tap all available Purples -> Pour all Purples. Tap all Oranges -> Pour all Oranges.
- Constraint: Only do this if you have the belt space to hold the batch. A full batch of 3 Purples + 2 Oranges fills a 5-slot belt perfectly.
3. The "Slot Reserve" Doctrine
To maintain high speed, you must be reactive.
- The Rule: Keep 1 slot permanently empty.
- Why: This allows you to instantly tap a critical cup (like the Key or a Roped pair) without first playing a mini-game of "Tetris" to clear space.
4. Optimal Path Analysis
Based on top-tier runs, here is the percentage timeline for a perfect game:
- 0% - 20%: Break Top-Left Ice. Fill Purple Suitcase Body.
- 20% - 45%: Unlock Golden Key. Clear Yellow Guard. Fill Sand Base.
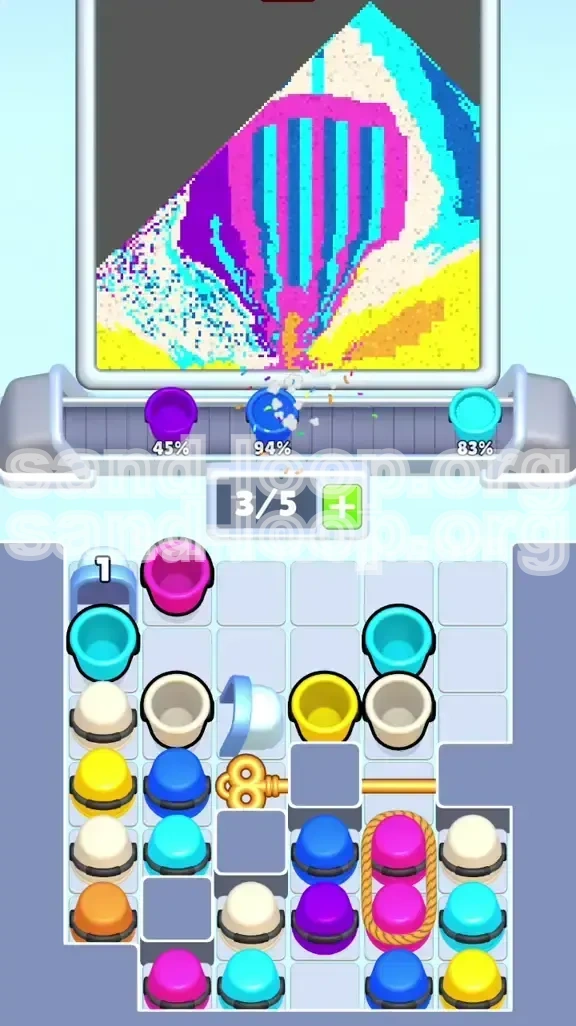
- 45% - 75%: Process Mid-Tray Flood (White/Blue/Cyan). Fill Sky Base.
- 75% - 95%: Cut Bottom-Right Ropes. Finalize Suitcase Details.
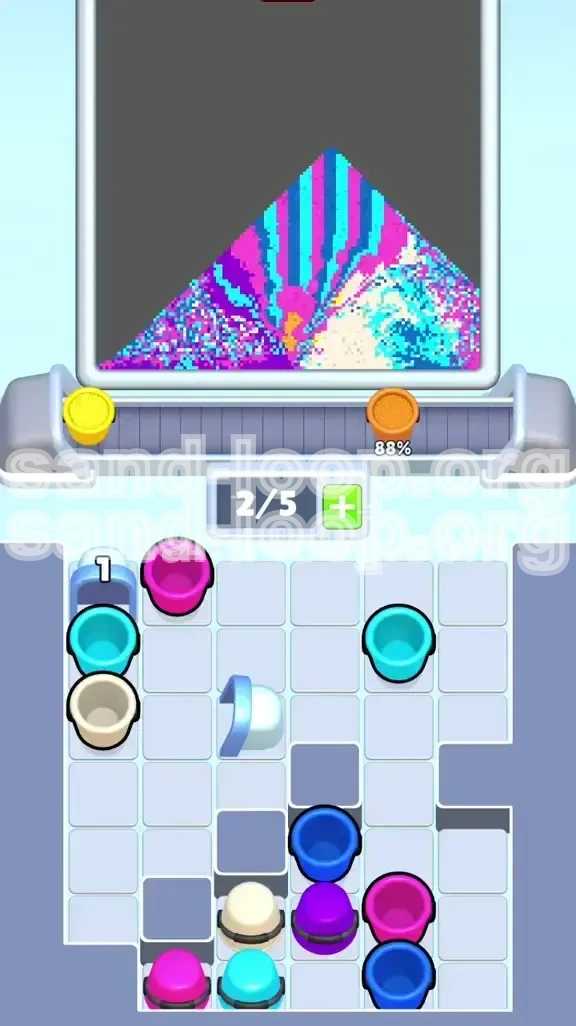
- 95% - 100%: Final Sky Polish and Shadow Correction.
5. Advanced Troubleshooting
If you are failing consistently, analyze the failure point.
- Stuck at 50%: You likely didn't unlock the Key fast enough, or you ran out of belt space and had to waste moves pouring "trash" colors.
- Stuck at 80%: You probably cut the rope too early, flooding your belt and forcing you to waste liquid to clear space.
- Low Score (1 Star): You are bleeding colors. Specifically, check if you are pouring Sky colors into the Sand or vice versa.
6. Managing "Waste Liquid"
Sometimes you have to pour a cup into a full area just to get rid of it.
- The "Overflow" Penalty: The game penalizes you less for overfilling a large area (like the Pink suitcase) than for spilling into a wrong color area.
- Tactic: If you have a useless cup and need to clear it, pour it into the center of the largest block of the same color family (e.g., pour light pink into dark pink). This minimizes the score penalty compared to cross-color contamination.