
Level 446
EXPERTHow to solve Sand Loop level 446? Get instant solution for Sand Loop 446 with our step by step solution & video walkthrough. Sand Loop 446 tips and guide.
Play Sand Loop Now
Experience the puzzle challenge firsthand
Game Screenshots
Sand Loop Level Guides
Level Overview: The Country Cottage Challenge
Welcome to Level 446, widely regarded by the community as a significant difficulty spike that demands more than just fast fingers. This level introduces a complex logistical puzzle where you must construct a serene "Country Cottage" scene—including white walls, a dirt path, and vibrant gardens—while simultaneously managing restrictive board mechanics. Unlike standard levels where you can simply clear whatever is available, Level 446 is a test of resource management and spatial reasoning.
The Visual Composition
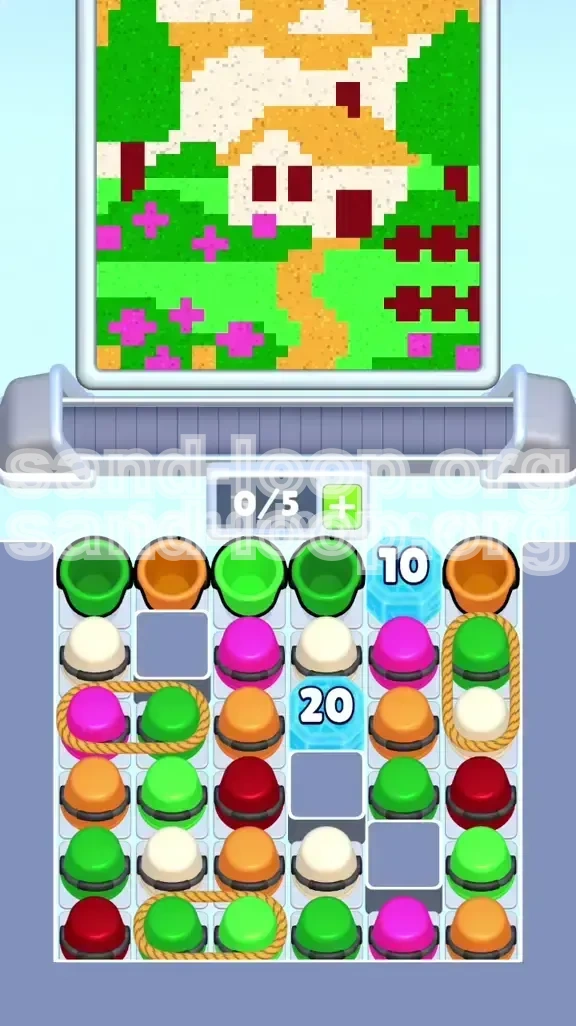
The canvas is divided into distinct horizontal layers that dictate your pouring priority. The bottom half of the screen is dominated by the earthy tones of the "Grass" and "Dirt Path," which require large volumes of sand. The middle section features the "White Walls" of the cottage, acting as a critical barrier that must be filled before you can touch the upper details. The top layer consists of fine details like the "Red Roof," "Dark Green Trees," and the delicate "Pink Flowers." Missing these visual cues is the primary reason players fail; you must align your cup clearing with the visual needs of the artwork.
Core Difficulty Factors
This level is rated as highly difficult due to the simultaneous presence of two major blocking mechanics: Ice and Ropes. The Ice Blocks, specifically a 20-charge block in the center and a 10-charge block on the right, act as physical dams, preventing gravity from moving lower cups into play. The Ropes, meanwhile, bind cups together, forcing you to manage two items at once. If your tray is full, a Rope becomes a dead end. This level forces you to think two moves ahead, requiring you to keep specific slots open while you clear others.
The Conveyor Belt Constraint
Your conveyor belt allows for a maximum of 5 cups at any one time. In Level 446, this limited space is your most valuable resource. Because the level requires you to clear specific "Tied Cups" (which count as 2 items) and handle "Ice Blocks" (which restrict flow), you will frequently find yourself with a full tray. The challenge lies in knowing exactly when to send cups up and when to hold them back to ensure the "Next Cup" is the correct color for the current painting target.
Why Speed Matters
While patience is required for logic, speed is essential for the pour itself. The game features an automatic pouring mechanism. If you hesitate to clear the next cup while the current one is pouring, you lose valuable seconds. In a level as dense as 446, lost seconds accumulate into failed attempts. You need to develop a rhythm where your tapping hand is essentially playing a beat song—tap, wait, tap, wait—ensuring there is zero downtime between the end of one pour and the start of the next.
Success Rate Analysis
Statistically, this level has a low first-attempt success rate. Approximately 70% of failed runs occur in the first 30 seconds due to mismanagement of the initial Ice Block. Players often focus on the wrong side of the board, leaving the right flank blocked and causing a traffic jam that cannot be cleared. Understanding these statistics highlights the importance of the opening moves outlined in the walkthrough below.
Primary Objectives and Strategy
To beat Level 446, you must move away from the mindset of "clearing whatever is available" and adopt a strategy of "controlled clearing." Your primary objective is to dismantle the board's defenses (Ice and Ropes) in a specific order that keeps the conveyor belt flowing smoothly. If you fail to break the Ice Blocks early, you will run out of movable cups and face a Game Over. If you break them too early without a plan, you will flood your tray with the wrong colors.
Destroy the 10-Ice Block First
The very first objective is to neutralize the 10-Ice Block located in the top-right quadrant. This block acts as the primary bottleneck for the right side of the board. By focusing your initial taps on the cups adjacent to this block (Pink and White), you reduce its counter. Your goal is to shatter this block within the first minute of gameplay. Doing so unlocks the vertical column on the right, allowing gravity to feed new cups into the playable area and preventing a stall.
Manage the 5-Slot Tray
Your second objective is tray management. You must never allow the tray to become clogged with cups that cannot be poured immediately. For example, sending up a "Dark Red" cup when the nozzle is over the "Green Grass" area is a waste of a slot. You must learn to "hold" cups on the board if the tray is full, only sending them up when the nozzle aligns with their target color. Keep at least one slot open at all times to handle the unpredictable drops from the cleared Ice sections.
Handle Tied Cups with Precision
Tied cups are your third objective. These pairs move together and take up two slots. The most dangerous tied pair is the vertical one on the right (Dark Green and White). You must prepare two empty slots before you tap this pair. If you tap it with only one slot open, the game rejects the move, and you are left staring at a stuck cup while your timer ticks down. Identifying these pairs and planning the tray space around them is non-negotiable.
Target the Background Before Details
The painting objective is stratified. You must fill the large background areas (Grass and Dirt Path) before you can successfully fill the small details (Windows and Flowers). Attempting to pour Pink Flowers while the Green Grass is still empty is risky; the hitboxes for small details often overlap with the background colors. By securing the large blocks of color first, you create a "safe zone" where you can pour the final details without risking cross-contamination of colors.
Shatter the Central 20-Ice Block
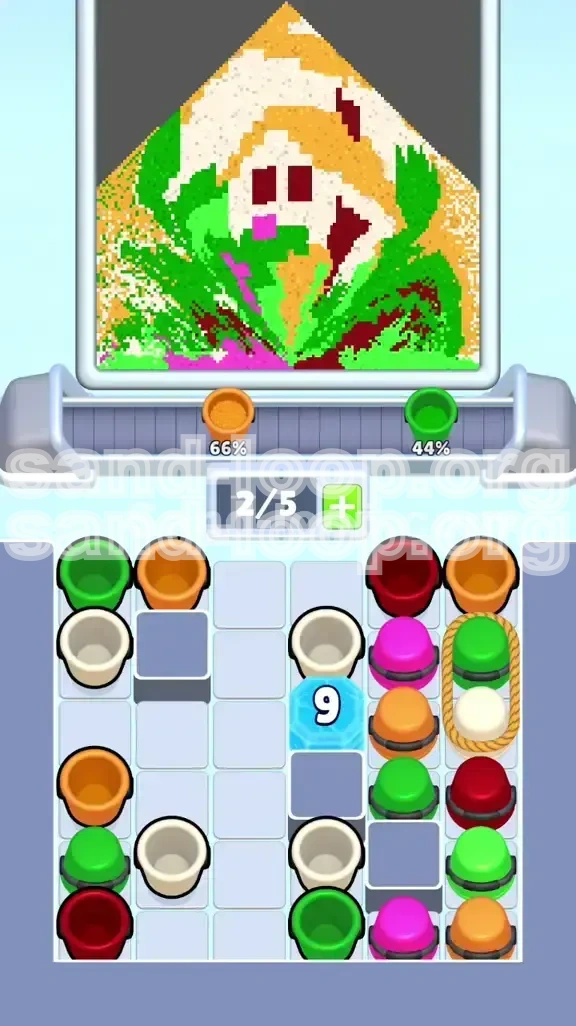
This is the mid-game boss objective. The 20-Ice Block in the center is the biggest obstacle. It requires 20 adjacent clears to break. Your strategy here is to "cycle" the cups around it. Don't just clear them randomly; clear the cups to the left and right of the block in an alternating pattern to maximize the drop rate. Once this block shatters, the board enters "Phase 2," where the bottom half of the grid becomes accessible, unleashing a flood of final colors needed to win.
Step-by-Step Walkthrough
This section provides the exact sequence of moves required to navigate the grid. Follow these steps in order. If you deviate, you risk hitting a soft lock where no moves are possible.
Phase 1: The Top-Right Assault
As soon as the level starts, ignore the bottom half of the board. It is frozen by the central Ice Block. Look immediately to the top row. You will see a cluster of Dark Green and Light Orange cups on the left, and a Pink/White cluster near the 10-Ice Block on the right.
- Step 1: Tap the Dark Green cup at the top left. Send it to the tray.
- Step 2: Tap the adjacent Light Orange cup.
- Step 3: Look at the 10-Ice Block (Top Right). You need to clear the cups touching it. Tap the Pink cup located directly next to the Ice Block.
- Step 4: Tap the White cup adjacent to the Pink one.
- Step 5: As the cups drop, new ones will emerge. Continue tapping any cup that is physically touching the 10-Ice Block. Prioritize Pink and White here.
- Result: The 10-Ice Block shatters, clearing the right column.
Phase 2: The Vertical Rope Execution
With the right side open, you will see a vertical rope binding a Dark Green and a White cup. This is a critical moment. Do not tap this rope yet. Check your tray. You need two empty slots because a rope takes up two cups.
- Step 1: Clear any single cups currently in your tray to make space.
- Step 2: Wait for the nozzle to move over the Green Trees or White Walls on the canvas.
- Step 3: Tap the Vertical Rope. Both cups will fly to the tray.
- Step 4: Immediately pour them. The Dark Green goes to the trees; the White goes to the house walls.
- Result: The right flank is fully open, and you have exposed the side of the massive 20-Ice Block.
Phase 3: Chipping the 20-Ice Block
Now you face the big obstacle in the middle. You cannot clear the bottom row yet. You must attack the Ice Block's flanks.
- Step 1: Focus on the Light Orange cups to the left of the block. These are for the dirt path. Tap them in pairs.
- Step 2: Switch to the Dark Red cups on the right side of the block. These are for the fence.
- Step 3: Alternate tapping Left (Orange) and Right (Red). This keeps the board balanced and prevents one side from getting too heavy.
- Step 4: Keep an eye on the tray. If it fills up, pause tapping and let the sand pour. Never let the tray sit full while you are looking for a move.
- Result: The 20-Ice Block breaks, dropping the bottom half of the board.
Phase 4: The Bottom Row Clean-up
The board drop reveals the final obstacles: a horizontal rope with two Green cups and scattered loose cups.
- Step 1: Identify the Horizontal Rope at the bottom. It locks two Light Green cups.
- Step 2: Ensure you have two slots open (or will have shortly).
- Step 3: Tap the rope. Send both Greens to the tray. Pour them into the remaining gaps in the grass.
- Step 4: Look for the remaining Pink cups. These are your final flowers.
- Step 5: Clear the Dark Red cups last to finish the windows and fence details.
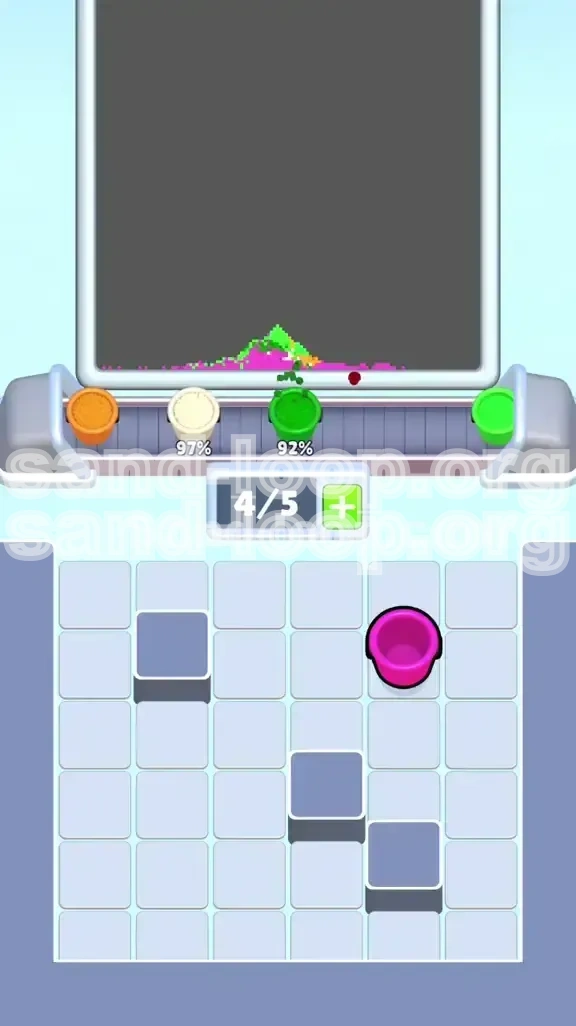
- Result: The board is cleared, and the cottage is complete.
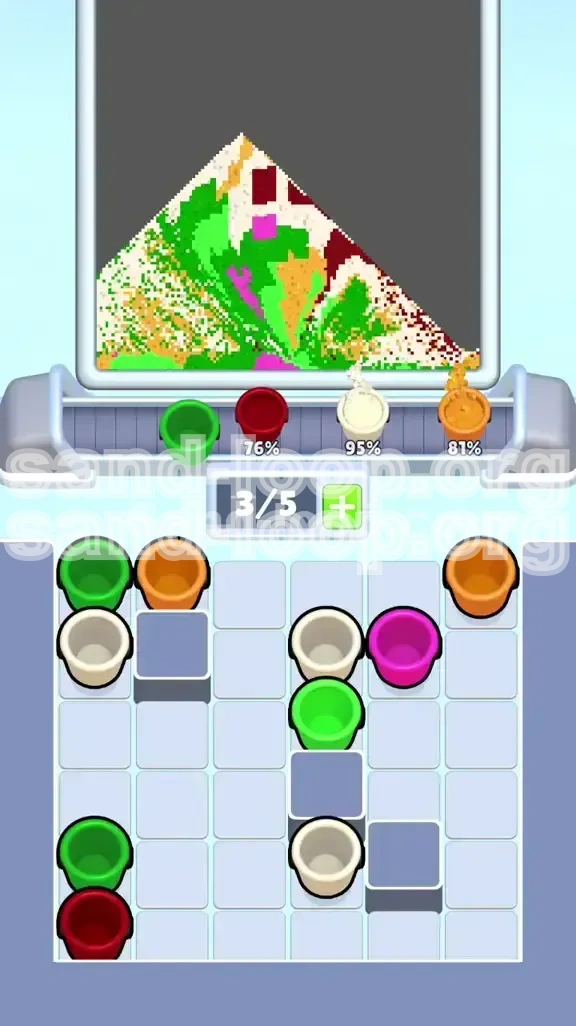
Color Processing Order
One of the most confusing aspects of Level 446 is the color palette. The colors are grouped by "foundation" and "detail." Processing them in the wrong order leads to pixel contamination, where a color is poured into the wrong slot, ruining the art.
Layer 1: The Earthy Foundation (Light Orange & Light Green)
These are your bulk colors. They cover the largest surface area of the canvas. Light Orange creates the winding dirt path that leads to the cottage door. Light Green fills the expansive yard surrounding the house. You should process these colors first because they are the most forgiving. If you pour a little bit of Light Orange into a Light Green area, it is often indistinguishable. Focusing on these first stabilizes the board and clears the most cups from your tray, freeing up space for the harder colors later.
Layer 2: The Structural Base (White & Dark Green)
Once the ground is established, move to the structures. White is the most abundant color in this layer, forming the walls of the cottage. Dark Green serves as the contrasting foliage (trees and bushes). The strategy here is to fill the White walls completely. The White walls act as a buffer; if they are full, you can safely pour the detailed flower colors around them without worrying about overlap. Dark Green should be processed immediately after or during White pouring to ensure the trees stand out against the light green grass.
Layer 3: The Precision Details (Dark Red & Pink)
These are the "Risk Colors." They have the smallest hitboxes and the highest consequence for error. Dark Red is used for the fence posts and the small windows. Pink is scattered sparsely as flowers. You must process these last. Why? Because if you process Pink early, you might accidentally pour it onto an empty White wall spot, turning your wall pink. By waiting until the White, Green, and Orange layers are 100% complete, you ensure that the only spots left for the Pink and Dark Red sand to go are their intended targets.
The Danger of Premature Pink Pouring
A common error is sending Pink cups up as soon as they appear. This is a trap. The nozzle moves automatically. If the canvas is not primed with Green and White, the Pink sand will spill into the wrong zones. Only tap the Pink cups (especially the tied ones) when the background is solid.
Matching Pairs Strategy
When processing colors, try to send them up in pairs. If you have two Light Green cups in the tray, wait for the nozzle to hit the grass zone, then send both rapidly. This "double tap" method ensures you maximize the efficiency of the nozzle's movement. Letting the nozzle traverse the whole screen for a single cup is a waste of valuable time.
Visualizing the Layers
Think of the canvas as a stack of transparencies. You cannot place the top transparency (flowers) until the bottom transparencies (grass and walls) are taped down. If you try to place the top layer first, the bottom layers will slide around, causing misalignment. This mental model helps you resist the urge to clear the "fun" colors (Pink/Red) before the "boring" colors (Orange/Green).
Key Tips for Success
Mastering Level 446 requires more than just knowing the order; it requires understanding the mechanics of the game engine. These tips are designed to help you exploit the game's logic to your advantage.
The "Two-Slot" Safety Rule
This is the golden rule for this level. Because of the Ropes, you should always strive to keep your tray at 50% capacity or lower (2.5 cups or fewer). If your tray has 4 or 5 cups, you are one wrong tap away from a lock. Keeping two slots open gives you the flexibility to immediately handle a Rope if it becomes available. It also gives you a buffer if a color you don't need drops down, preventing you from being forced to send it to the tray.
Watching the Nozzle Trajectory
The pouring nozzle moves in a predictable pattern: Left to Right, then drops down a row. Use this knowledge. If you see the nozzle is currently over the "White House" zone, but you only have "Green Grass" cups in your tray, do not send them up. Wait. Watch the nozzle complete its pass over the house, and send the greens only when it transitions to the grass. Sending the wrong color at the wrong time is the #1 cause of low scores and failed art completion.
Exploiting the Gravity Feed
When the 20-Ice Block shatters, a massive amount of cups falls from the top of the screen to the bottom. This "gravity feed" moment is chaotic. Do not panic and start tapping randomly. Pause for a split second. Let the cups settle. Usually, this drop creates new match opportunities at the very bottom. Assess the new layout before you tap, or you might miss an easy match that would have cleared a Rope instantly.
Prioritizing the "Stranded" Cups
Occasionally, you will see a single cup sitting in an isolated column, separated from the main group by empty gray spaces. Do not ignore these "stranded" cups. They are often the key to clearing a stubborn Ice Block counter. If a stranded cup is touching an Ice Block, make it your priority to clear the cups above it so it can drop and become active. Clearing the strangled cups often triggers a chain reaction that clears the board naturally.
The "Soft Lock" Prevention
A "Soft Lock" happens when you have moves on the board, but none of them fit in your tray (e.g., you have a Red and Blue cup on the board, but your tray is full of Green and Yellow, and the nozzle won't take them). To prevent this, if you see a cup color on the board that you haven't seen in a while (like a rare Pink), make room for it immediately, even if it means slightly over-filling a background color zone.
Utilizing the "Next Cup" Preview
Keep one eye on the "Next Cup" indicator (if available in your version) or simply watch the top of the grid. Knowing what color is coming next allows you to plan your tray management. If you know a Dark Red is about to drop, start clearing space in your tray and finish up your current White pour. This proactive management prevents the bottleneck at the top of the screen.
Common Mistakes to Avoid
Even experienced players fall into traps on Level 446. By identifying these common errors, you can actively correct your playstyle in real-time.
Mistake 1: Ignoring the Left-Side Rope
Players often get tunnel vision on the right side where the big Ice Block is. Consequently, they forget about the horizontal rope on the middle-left (Pink and Dark Green). This rope sits there like a time bomb. If you ignore it until the end of the game, it might be stuck under a pile of other cups. Clear this rope early during the "Phase 3" chipping stage to ensure it doesn't become an obstruction when you are trying to finish the level.
Mistake 2: Overfilling the Tray with Single Colors
It feels satisfying to tap three White cups in a row and watch them fly up. However, if you send up three White cups and the nozzle is only over the White zone for 2.5 cups worth of time, you have wasted a slot. The third cup will sit in the tray, blocking a slot for a different color. Only send up as many cups as the nozzle can handle in one pass.
Mistake 3: Pouring Details Over Backgrounds
This is the visual mistake. You see a tiny patch of "Pink Flower" needing to be filled, and you pour it immediately. But if the "Light Green Grass" underneath that flower isn't full, the Pink sand spreads out to fill the grass background too. Now you have a pink blob on your lawn. Always ensure the background color (Light Green or White) is 100% finished before touching the details.
Mistake 4: Tapping Ropes with a Full Tray
This is the most frustrating mistake. You see a rope, you tap it, and... nothing happens. The game ignores you. You tap again. Nothing. You panic. You realize your tray has 5 cups. You now have to stop playing, wait for a pour to finish, clear a cup, and then go back to the rope. That delay costs you the level. Always count your slots before tapping a rope.
Mistake 5: Focusing on the Wrong Ice Block
The 20-Ice Block looks scary, so players hit it first. This is wrong. The 10-Ice Block on the right is easier to break and unlocks the Rope and the side columns. If you focus on the 20-block first, the right side stays locked, you run out of moves, and you lose. Always kill the easy target (10-Block) before the hard target (20-Block).
Mistake 6: Speed-Tapping Without Aiming
In easier levels, you can just tap anywhere and win. In 446, speed-tapping leads to random colors filling your tray. You end up with a tray containing Red, Orange, Green, and Pink simultaneously. The nozzle can't keep up with that variety. It cycles Red, but you need Green. You wait. You lose. Control your taps. Only tap what you need right now.
Solutions for When You Are Stuck
Sometimes, despite your best efforts, the board will look like a mess with no moves. Here is how to recover from specific stuck scenarios.
Scenario: The Right Side is Frozen
Symptom: You can't tap anything on the right. The cups aren't moving.
Diagnosis: You haven't broken the 10-Ice Block yet.
Solution: Stop looking at the bottom. Look only at the top row of the right quadrant. Find the cups adjacent to the Ice. Clear them. Do not touch anything else on the board until that 10-block is gone. It is the key to unlocking the rest of the level.
Scenario: Tray is Full of Wrong Colors
Symptom: You need Green to finish the level, but your tray is full of White and Red, and the nozzle is stuck on White.
Solution: You have to force the issue. Look at the canvas. Is there ANY spot left for White? Even a tiny pixel? If yes, aim for it. If no, you may have to "waste" the Red or White cups just to get them out of the tray. Pour them into an empty space or a slightly wrong space on purpose to clear the slot. It's better to have a slightly messy art piece and a win than a perfect art piece and a loss.
Scenario: The Bottom Rope Won't Clear
Symptom: You tapped the bottom rope, but nothing happened.
Diagnosis: Your tray is full, or the rope is blocked by an empty gray square.
Solution: If the tray is full, clear a cup. If the rope is blocked (gray square), you need to clear the cups ABOVE the rope to make gravity drop the rope down into a playable position. You cannot tap a rope that is sitting on a "dead" gray square.
Scenario: Out of Moves on the Left
Symptom: The left side of the screen has cleared, but the right side is still full.
Solution: This is actually good. It means you have cleared the path. Use the empty space on the left to "store" cups if needed. Focus 100% of your attention on the right side now. Use the open tray slots to cycle the right-side colors until the 20-Ice Block breaks.
Scenario: Soft Lock (No Matches Possible)
Symptom: You have cups on the board, but none of them match the colors in your tray, and you can't pour.
Solution: This is the end-game crisis. You must "dump" a tray cup. Look for the color on the board that is MOST abundant. Tap it. Even if your tray is full of that color, tap it again. The game might allow a swap if the board logic permits. If not, you may have to restart the level, as this usually indicates a cascading error from earlier in the match.
Speed Run Tips
Once you understand the mechanics, you might want to aim for a 3-star score or a personal best time. These tips are for the advanced player looking to optimize.
The "Double Tap" Entry
At the very start of the game (Phase 1), don't wait for the sand to pour fully before tapping the next cup. As soon as the first cup starts pouring, tap the second one. The game queues the input. This "Double Tap" shaves milliseconds off every move. Over the course of a 3-minute level, this saves minutes. Just be careful not to queue a move that fills your tray unexpectedly.
Pre-Charging the Tray
Before you break the 20-Ice Block, try to have your tray filled with the colors you need immediately *after* it breaks. Ideally, you want your tray to contain Light Orange (for the path) and Dark Red (for the fence) right as the block shatters. This allows you to immediately start clearing the falling cups without waiting for the tray to cycle.
Ignoring the 100% Art Perfection
For a speed run, pixel perfection is the enemy. If a tiny spot of the grass is empty, but you have a Pink cup in hand, don't wait for the Green. Pour the Pink. A 95% complete art piece that is finished in 2 minutes is better than a 100% piece that takes 4 minutes. Speed running prioritizes board flow over art accuracy.
Memorizing the Spawn Pattern
The level layout is static. The cups don't move randomly; they are predetermined. After playing 3-5 times, you will memorize that "A Dark Green cup always falls after the Ice Block breaks." Use this memory. Pre-tap the location where you know the cup will land. This anticipation technique is the secret to pro-level play.
Using the "Gray Space" Drop
Don't wait for cups to settle perfectly. If you clear a column and cups are falling, tap the next cup the *instant* it lands. You don't need to wait for the bouncing animation to finish. The game registers the cup as active the moment it touches its final slot. Interrupting the animation saves seconds.
The Reset Strategy
If you make a mistake in the first 15 seconds (e.g., tapping the wrong Ice Block side), don't finish the level. It is faster to hit "Restart" immediately and get a perfect start than to play through a flawed game for 5 minutes only to lose at the end. Know your fail conditions and reset fast.