
Level 472
HARDHow to solve Sand Loop level 472? Get instant solution for Sand Loop 472 with our step by step solution & video walkthrough. Sand Loop 472 tips and guide.
Play Sand Loop Now
Experience the puzzle challenge firsthand
Game Screenshots

Sand Loop Level Guides
Level Overview: The Alpine Mountain Valley Challenge
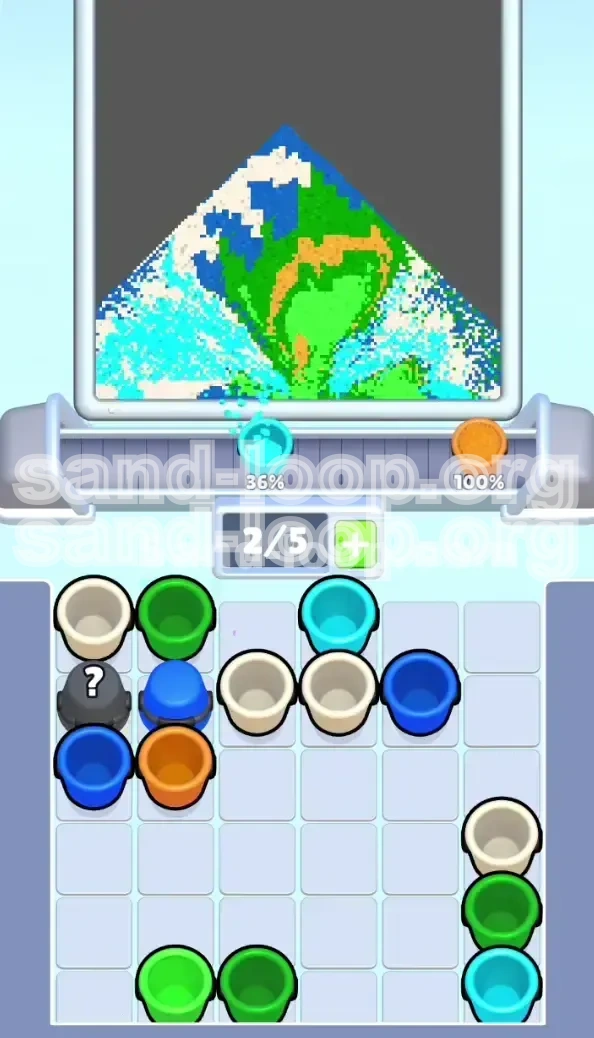
Welcome to Level 472, a stage that deceives players with its serene pixel-art visuals. Beneath the calm surface of jagged alpine peaks and winding paths lies a logistical nightmare designed to test your queue management skills. Unlike earlier levels where rapid reflexes suffice, the Alpine Mountain Valley forces you to play a game of "Spatial Tetris." The primary antagonist here is not the clock, but the "Slot Capacity" mechanic. With only 5 slots available on your conveyor belt and an aggressive spawn rate of "Roped Pairs," this level will punish anyone who taps without thinking.
The visual composition of the level creates a "Resource Trap." The canvas is dominated by large, open areas of Cyan sky and Green meadows, yet the supply tray insists on clogging your limited inventory with small-quantity detail colors like Tan and White. If you treat this as a simple painting task, you will fail. You must approach this level as an inventory management puzzle. The difficulty spikes significantly at the 60% mark, where the "Mystery Cup" mechanic introduces a gambling element that can either save your run or instantly clog your belt with useless colors.
The Mechanics of Constraint
The defining feature of Level 472 is the strict 5-slot limit combined with the "Roped Pair" mechanic. You will frequently encounter two cups tied together with a digital rope. Tapping this pair sends both cups to the belt simultaneously. If you have 3 occupied slots and tap a pair, the game will buffer the input but fail to spawn the cups, effectively freezing your supply chain. You must maintain a "Safety Zone" of at least 2 empty slots at all times to accommodate these double-spawns without creating a deadlock.
Visual Analysis and Volume Distribution
Success depends on understanding the pixel volume of the image. The Alpine Mountain is not a flat surface; it is a topographical map of color demand.
- Cyan (Sky): Accounts for ~40% of the total volume. This is your "bread and butter."
- Lime Green (Meadows): Accounts for ~25% of the volume.
- Dark Blue (Mountains): Accounts for ~20% but requires high precision.
- White (Snow/Clouds): Accounts for ~10% but is the most scarce resource.
- Tan (Paths): Accounts for less than 5% but causes 80% of the errors due to spill-over.
The "Mystery Cup" Algorithm
Grey cups marked with a question mark appear randomly in the supply tray. In Level 472, these are not purely random; they are algorithmic "mercy" drops. The game detects which color you have run out of and prioritizes spawning it in the Mystery Cup. However, the reveal takes 3 valuable seconds. Using a Mystery Cup while your belt is full is a critical error, as it locks a slot for the duration of the reveal animation, potentially blocking incoming essential colors.
Environmental Hazards
The "Shred Zones" (jagged edges) of the pixel art pose a unique risk. The sand physics engine in Sand Loop calculates impact splashes. When pouring Dark Blue onto the jagged mountain peaks, a steady stream will splash "blue dust" into the adjacent Cyan sky. This contamination is permanent and prevents 100% completion. You must learn to "pulse" your pours rather than holding the stream, specifically when working on the borders between high-contrast colors.
Clear Objectives: Strategic Logistics
Your goal is not merely to fill the canvas, but to unclog the supply pipeline. To beat Level 472, you must shift your objective from "Color Matching" to "Belt Management." You have three distinct phases of objectives that must be executed in order. Failing to prioritize the first objective will make the third impossible.
Objective 1: The "Blocker Clear" Protocol
The supply tray is stacked like a layer cake. The top layer consists of "Blocker Colors" (Lime Green and Tan) that sit atop the "Essential Colors" (Cyan and Dark Blue). If you focus solely on painting the picture, you will leave the Green cups in the tray, preventing the Cyan cups from spawning. Your first objective is to aggressively clear the Green and Tan cups from the tray, even if it means over-pouring these colors slightly, to open the pipeline for the sky colors.
Objective 2: Roped Pair Neutralization
You must identify and neutralize Roped Pairs immediately. A Roped Pair taking up space on your belt reduces your reaction time to zero. You must create a tactical opening (2 empty slots) to receive the pair, process them instantly, and eject them. Do not let a Roped Pair sit on the belt while you are working on a different section of the image. They are "Slot Vampires" that must be slain the moment they arrive.
Objective 3: The "Sky Sweep" Operation
Once the blockers are gone, the tray will begin spewing Cyan at a high rate. Your objective here is "Macro Pouring." You must fill the vast sky areas quickly to lower the water level of the tray. If you dawdle on small details during this phase, the tray will overflow, and the game will force a "Trash Cup" into your inventory, wasting a slot. You must process Cyan with speed and aggression.
Objective 4: Conservation of White
White sand is the currency of the final 10%. It is required for both the clouds (high altitude) and the snow caps (low altitude). If you waste White sand on the clouds early in the level, you will fail to finish the snow peaks. Your objective is to hold onto White cups until the very end, using Dark Blue to define the mountain shapes before applying the White "snow" overlay.
Step-by-Step Walkthrough: The Victory Sequence
This walkthrough provides a turn-by-turn script for the first 60% of the level, followed by the tactical adjustments needed for the finish. Follow these inputs precisely to avoid the common deadlock scenarios.
Phase 1: The Start-Up Burst (0-15%)
The level begins with a mix of single cups and one Roped Pair.
- Step 1: Immediately tap the single Lime Green cup at the top of the tray.
- Action: Pour it into the bottom meadow. Do not aim for perfection; just empty the cup.
- Step 2: Tap the single White cup.
- Action: Pour into the largest cloud cluster (top left).
- Step 3: Check your belt. You should have 2-3 cups moving. Wait until the belt has 3 empty slots before proceeding.
Phase 2: The Rope Maneuver (15-30%)
The tray will now reveal a Roped Pair (Tan + Lime Green).
- Condition: Ensure you have cleared the previous cups. You must have 4 empty slots visible.
- Input: Tap the Roped Pair.
- Immediate Action: Two cups drop. Grab the Tan first.
- Technique: Use "Tap-Tap-Tap" pouring into the winding path. Do not hold the stream.
- Follow-up: Grab the Lime Green. If the meadow is full, pour the excess into the "treeline" area (the edge of the mountain).
Phase 3: The Cyan Pipeline (30-60%)
With the top layers cleared, Cyan cups will begin to spawn rapidly.
- Strategy: Tap Cyan cups as soon as they enter the activation zone.
- Pouring: Move the dispenser to the center of the sky. Hold the pour until the cup is 80% empty.
- Flow Control: While pouring the last 20% of a Cyan cup, tap the next Cyan cup in the tray. This "Lead Tap" ensures the next cup arrives the instant the current one expires.
- Warning: Ignore the Mystery Cups that appear on the side. They are distractions. Focus on clearing the Cyan wave.
Phase 4: The Mountain Definition (60-85%)
As the sky fills, the tray will shift to Dark Blue and White.
- Target: Pour Dark Blue into the mountain body. Avoid the edges for now.
- Edge Handling: Leave a 1-pixel gap between the Dark Blue and the Cyan sky. You will fill this gap later.
- White Usage: If a White cup spawns, pour it into the snow caps first. Ignore the clouds for now. The snow caps are harder to hit and require the precision of a full cup.
Phase 5: The Pixel Hunt (85-100%)
The tray is now emptying out, and spawns are slow.
- Stop Tapping: Do not tap new cups unless you have 3 empty slots.
- The "Trash" Maneuver: If a Mystery Cup gives you a color you already finished (e.g., Green), drag it to the furthest slot and let it expire. Do not pour it.
- Final Polish: Use any remaining White to touch up the clouds. Use Dark Blue to sharpen the mountain edges.
Color Order: The Strategic Hierarchy
Processing colors in the wrong order is the primary cause of failure. You must process colors based on their "Queue Priority," not their visual position on the canvas.
Priority 1: Lime Green (The Unblocker)
Status: High Volume / High Obstruction.
Why First: Lime Green cups are stacked at the very top of the digital tray. They physically prevent the Cyan, White, and Blue cups from spawning.
Method: You must clear Green aggressively. Even if the green meadow looks 90% full, keep pouring Green into the "safe zones" (edges) to empty these cups. Your goal is to decimate the Green stack in the tray to unlock the level.
Priority 2: Tan (The Buffer)
Status: Low Volume / High Risk.
Why Second: Tan is almost exclusively found in Roped Pairs with Green. You cannot clear the Green without dealing with the Tan.
Method: Treat Tan as a waste product. Pour it only to clear the cup. Because the path is so thin, you will likely finish the path with 50% of the Tan cup remaining. Pour the excess Tan into a corner of the Green meadow (it resembles dirt) or simply dispose of the cup to free the slot.
Priority 3: Cyan (The Bulk)
Status: Massive Volume / Low Risk.
Why Third: Once the Green/Tan blockers are removed, Cyan becomes the dominant spawn. It requires the most time to pour.
Method: Switch to an aggressive filling style. Ignore the tiny pixels. Focus on filling the broad blue void. This is the "Safe Phase" of the level where you can relax your hand and let the sand flow. Do not stop for details.
Priority 4: Dark Blue (The Definition)
Status: Medium Volume / High Precision.
Why Fourth: Dark Blue defines the shape of the mountain. If you pour it too early, you risk pouring Cyan over it later, blurring the contrast.
Method: Save Dark Blue for the "Definition Phase." Use it to draw the line between the mountain and the sky. If you pour it and it spills, you can usually correct it with Cyan, but it is messy. Better to do it when the sky is already full.
Priority 5: White (The Finisher)
Status: Low Volume / Critical Resource.
Why Last: White is the most unforgiving color. It sits on top of both Blue (snow) and Cyan (clouds).
Method: White must be last. If you pour White and then pour Blue over it, the White gets muddy. Save your White cups for the final "cleanup" pass to sharpen the snow caps and fill in the cloud density.
Key Tips and Advanced Techniques
Master these mechanical nuances to turn a frustrating level into a manageable rhythm game.
Tip 1: The "Tap-Release" Rhythm for Thin Lines
The Tan path is the hardest part of the level visually. If you hold down the pour button, the sand builds up and splashes over the edges, creating a muddy brown mess on the green grass.
The Technique: Instead of holding, use a rhythmic Tap-Tap-Pause method. Tap the screen, let a small mound of sand fall, release. Let it settle. Tap again. This "staircase" pouring method keeps the edges sharp and prevents color bleed by 90%.
Tip 2: The "Conveyor Lead" Calculation
The conveyor belt has a travel time of approximately 2.5 seconds from the tap-zone to the dispenser.
The Trick: Never wait for a cup to arrive before starting your work. If you are pouring a Cyan cup and you see a Dark Blue cup behind it, tap the Dark Blue cup while you are still pouring the last 10% of the Cyan cup. By the time you finish the Cyan, the Dark Blue will have just arrived at the dispenser, maintaining 100% uptime.
Tip 3: Mystery Cup Gambling
Mystery Cups are a double-edged sword. They reveal a color, but that reveal takes time.
When to use: Only tap a Mystery Cup when you have 3 empty slots and the main tray is empty of useful colors.
When to ignore: If the tray is full of colors you need (e.g., Cyan), do not tap the Mystery Cup. It will just add a cup you don't need to your belt. However, if you are stuck at 98% and need a specific pixel of White, the Mystery Cup is your best bet as the game detects your shortage.
Tip 4: The "Trash Cup" Sacrifice
Sometimes, despite your best planning, you will end up with a cup you absolutely cannot use (e.g., a Green cup when the meadow is 100% full).
The Move: Drag that useless cup to the very end of the conveyor belt (the furthest slot from the dispenser). Let it sit there until it expires and disappears. Sacrificing one slot capacity for 10 seconds is better than pouring the wrong color and ruining your 98% completion rate.
Common Mistakes to Avoid
Level 472 is specifically designed to trigger impulsive mistakes. Here is what to watch out for.
Mistake 1: The "Full Belt" Trap
The Error: You have 4 cups on the belt. You see a color you need at the top of the tray, and you tap it instinctively.
The Consequence: If that cup is part of a Roped Pair, the game engine will block the input. You will stare at the screen wondering why the cup didn't drop, wasting precious seconds. By the time you clear a slot, the tray might have refreshed, and you miss your window.
The Fix: Adopt the "3-Cup Rule." Never tap if you have 3 or more cups on the belt unless you are 100% sure it is a single cup.
Mistake 2: Imprecise "Shredding" on Borders
The Error: Pouring a continuous stream of Dark Blue directly onto the jagged border between the mountain and the sky.
The Consequence: The sand physics engine creates "splash dust." This dust lands in the Cyan sky, creating a permanent blue haze that prevents 100% completion. The game registers those pixels as "mixed," not "Cyan."
The Fix: Always leave a 1-pixel gap when filling borders. Fill the main body of the mountain first, then zoom in (if supported) or use micro-taps to carefully fill the edge pixels last.
Mistake 3: Early Game Mystery Cup Obsession
The Error: Tapping Mystery Cups as soon as they appear in the first 10 seconds of the level.
The Consequence: Early in the level, you need Green and Tan. A Mystery Cup at this stage will likely give you Dark Blue or White (colors you can't use yet). Now you have a useless cup clogging your belt while you desperately need to clear Greens.
The Fix: Treat Mystery Cups as "Endgame Tools." Ignore them completely until the sky is mostly filled. Focus on the deterministic single cups first.
Mistake 4: Mismanaging the White Reserve
The Error: Using your White sand to fill the clouds at 50% completion.
The Consequence: You reach 90% completion, and the only thing left to fill is the snow peaks. But you are out of White sand. The tray gives you Green and Blue, but no White. You are stuck.
The Fix: Prioritize the Snow Caps over the Clouds. The Snow Caps are harder to hit and require White specifically. The Clouds can sometimes be "filled" by the visual proximity of the Cyan sky, but the Snow Peaks need direct White application.
Stuck Solutions: Troubleshooting the 90% Plateau
It is common to reach 85-90% and suddenly stall. The belt is full of trash, and the tray is empty. Here is how to recover.
Solution 1: The "Emergency Queue Flush"
If you have a belt full of colors you don't need (e.g., 3 Green cups but the meadow is full):
- Step 1: Stop tapping the supply tray entirely.
- Step 2: Drag the useless cups to the end of the line to expire.
- Step 3: Wait. Creating a vacuum in the tray forces the game to spawn a new wave of cups, which are more likely to be the colors you actually need.
Solution 2: The "Pixel Hunt" Scan
At 99%, finding the last pixel is agonizing.
- Check the Cloud Edges: Run your dispenser along the border of the clouds. Often, a semi-transparent pixel needs just a grain of sand.
- Check the Tan/Green Intersections: Where the path crosses the meadow, the colors often bleed, leaving a gap that needs Tan.
- Check the Mountain Base: Sometimes the Dark Blue doesn't go all the way to the bottom edge of the screen.
Solution 3: The "Mystery Cup Fishing" Strategy
If you are stuck at 96% needing Dark Blue, and the tray only shows Green:
- Technique: Tap a Mystery Cup.
- If it's wrong: Drag it to the trash slot immediately.
- Retry: Tap the next Mystery Cup.
- Why it works: The game's algorithm detects you are "stuck" and increases the drop rate of needed colors in Mystery Cups during the final phase of the level.
Speed Run Tips: The Sub-45 Second Run
Once you have mastered the survival mechanics, you can optimize for a sub-45 second speed run.
Shortcut 1: The "Stream" Technique
Do not wait for the dispenser to stop moving over a target. Start pouring while the dispenser is still moving towards the cloud or meadow. The momentum of the sand will spread the color faster than stopping and starting. This saves milliseconds per cup, which adds up to seconds over the course of the level.
Shortcut 2: Ignoring the Tan Path
On a speed run, do not aim for 100% accuracy on the Tan path in Phase 2. Splash a rough amount of Tan to clear the cup, even if it looks messy. Leave the path "dirty." Return to the Tan path only at the very end (Phase 5) to clean up the edges. This prevents you from stalling your main color flow (Cyan) for the sake of a minor detail.
Shortcut 3: Pre-Tap Roped Pairs
As soon as you see the "Rope" icon on a pair in the tray, check your belt. If you have 2 slots open, tap it immediately. Do not wait for the cups to settle. Pre-emptive tapping ensures the cups enter the queue cycle instantly, minimizing the downtime between color swaps.