
Level 486
HARDHow to solve Sand Loop level 486? Get instant solution for Sand Loop 486 with our step by step solution & video walkthrough. Sand Loop 486 tips and guide.
Play Sand Loop Now
Experience the puzzle challenge firsthand
Game Screenshots
Sand Loop Level Guides
Level Overview: The Abstract Heart Challenge
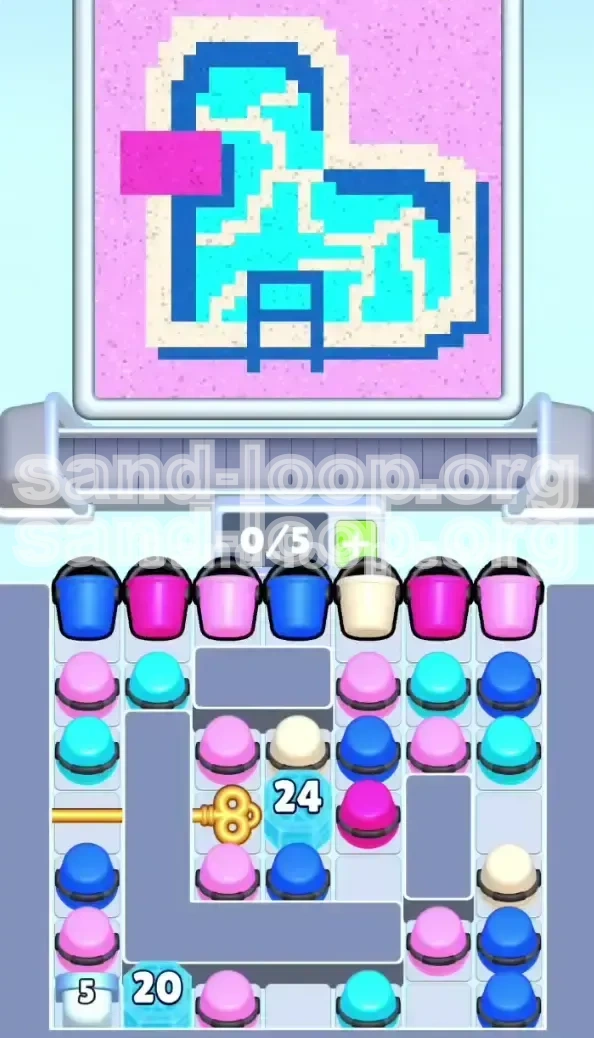
Welcome to the definitive guide for Sand Loop Level 486. This stage introduces the "Abstract Heart" challenge, a puzzle that prioritizes structural logic over quick reflexes. The core difficulty of this level lies in managing a heavily restricted inventory (0/5 slot capacity) while navigating a complex series of physical obstacles, specifically two massive Ice Blocks that lock away essential resources.
The visual canvas is dominated by a large, geometric heart segmented by an intricate grid. The challenge is not just artistic but architectural; you must construct the heart's skeleton before you can flesh it out. Players often fail here because they prioritize the wrong colors, leading to "deadlocks" where the supply tray becomes clogged with unusable paints. This guide breaks down the exact physics of the sand pour to ensure you clear the board efficiently.
Board Layout Analysis
The board is divided into two distinct zones: the active upper canvas and the restricted lower supply tray. The canvas features a heart shape divided into Cyan (interior), Dark Blue (outline), Off-White (grid), and Magenta (left accent). The background is Light Pink. The supply tray is cluttered with obstacles, creating a logistical bottleneck that requires careful navigation.
The Inventory Constraint
You are limited to a 0/5 capacity, meaning you can only load five cups of sand onto the Conveyor belt at any one time. This limitation is the primary cause of failure. If you fill your slots with the wrong colors (e.g., loading up on Pink before the grid is built), you will block the conveyor, preventing you from accessing the necessary cups to break the ice blocks.
The Ice Block Obstacles
Two major impediments control the flow of the game: a central 24-HP Ice Block and a bottom-left 20-HP Ice Block. The central block guards the Golden Key, which is the only way to access the left quadrant of the tray. The secondary block hides the final Off-White cup required to complete the heart's internal grid.
Physics and Pouring Mechanics
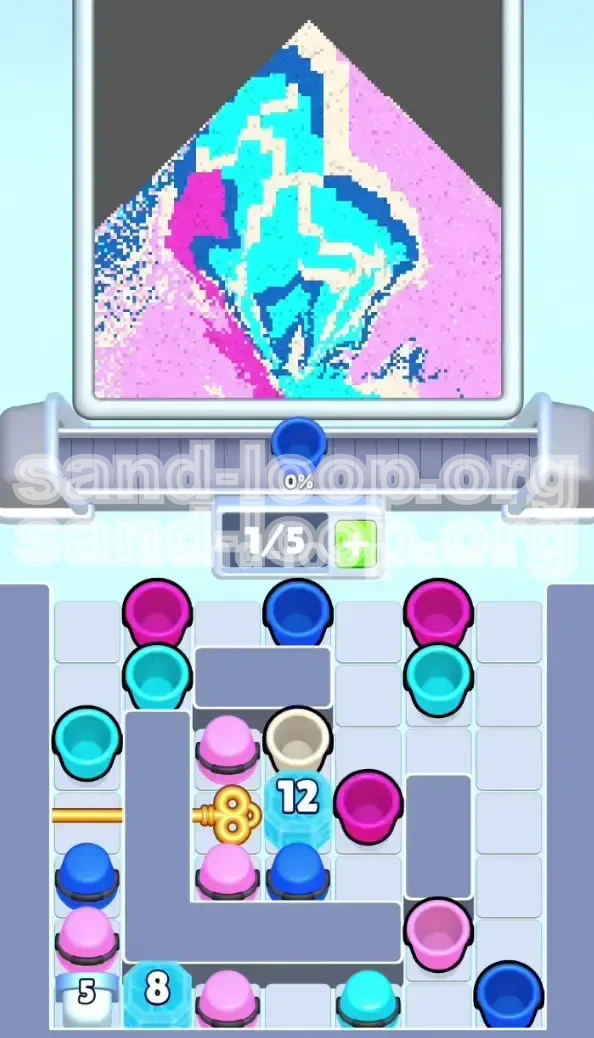
Sand in Sand Loop 486 follows realistic piling physics. Sand poured into a container forms a pyramid. If you attempt to pour the Cyan interior before the Off-White grid lines are established, the Cyan sand will cascade over the empty grid spaces, ruining the crisp lines required for completion. You must treat this as a 3D construction project.
Visual Guide to the Canvas
Imagine the canvas as a layered cake. The bottom layer is the Light Pink background. On top of that sits the Dark Blue outline. Inside that is the Off-White grid structure, and finally, the Cyan center. You must build in this reverse order: Outline -> Grid -> Accents -> Background. Pouring out of order results in color contamination that cannot be fixed.
Clear Objectives: The Structural Build Order
To complete Level 486, you must adhere to a strict build order. Your goal is not simply to "empty the tray" but to "paint the canvas in layers." This section outlines the four phases of the level and the specific logic required to execute them. Ignoring this order is the fastest way to a Game Over screen due to supply tray gridlock.
Phase 1: The Skeleton (Outline and Grid)
Your immediate priority is to establish the boundaries of the heart. This involves securing Dark Blue for the perimeter and Off-White for the cross-hatching. Without these borders, the subsequent colors have no container to hold them. You must resist the urge to fill the center until the walls are built.
Phase 2: The Accent (Magenta)
On the left side of the heart, there is a distinct Magenta rectangle. This is a small but critical component. Because it is isolated from the main heart structure, it can be completed early once the Dark Blue border separates it from the background. Completing this early frees up inventory space for the heavy lifting later.
Phase 3: The Core (Cyan)
Only after the grid is fully rendered in Off-White should you introduce the Cyan. The Cyan volume is high, and it will naturally spread. If the grid isn't there, the Cyan spreads into the background area, forcing a restart. Think of the grid as a dam; you cannot pour the water (Cyan) until the dam is built.
Phase 4: The Fill (Light Pink)
The Light Pink background is the largest area by volume, comprising approximately 60% of the canvas. It is also the most dangerous color to manage early on because spilling it ruins the contrast of the heart. This must be your absolute final step, once all other colors are permanently locked into their correct positions.
Unlocking the Supply Chain
A sub-objective throughout all phases is the destruction of the 24-HP Ice Block. Every move you make in the first two minutes should indirectly or directly damage this block. It is the gateway to the Golden Key, which in turn unlocks the rest of your supply tray. If you ignore the ice block to focus on painting, you will run out of moves.
Step-by-Step Instructions: From Start to Finish
This is the actionable portion of the guide. Follow these steps in sequence. Do not skip ahead. The game state in Level 486 changes dynamically, so these instructions account for the shifting board layout.
Step 1: The Top Row Assault
Start the level by examining the top row of the supply tray. You will see a sequence: Dark Blue, Magenta, Light Pink, Dark Blue, Off-White, Magenta, Light Pink. Action: Ignore the Light Pink cups. Tap the first Dark Blue cup and send it to the conveyor. Immediately follow with the Magenta cup. This begins the outline and clears space near the top of the Ice Block.
Step 2: Targeting the 24-HP Ice Block
With the top row cleared, you now have access to the cups adjacent to the massive central Ice Block. Action: Identify cups that are physically touching the Ice Block. You need 24 hits to break it. Prioritize Off-White and Dark Blue cups here. You are killing two birds with one stone: building the grid/outline and clearing the path to the key.
Step 3: The Golden Key Retrieval
Once the 24-HP Ice Block shatters, the Golden Key will be exposed. Action: Tap the cup directly blocking the Key. Do not worry about the color of the blocking cup; just clear it. When the Key activates, the horizontal barrier in the bottom-left quadrant retracts. This opens the floodgates for the next phase.
Step 4: Managing the 0/5 Slot Limit
As the barrier drops, the conveyor will attempt to auto-fill. Action: Maintain a strict 4/5 or 3/5 slot load if possible. Do not let the conveyor fill to 5/5 with random colors. You need to control the flow to ensure you can reach the 20-HP Ice Block in the corner. If the conveyor is full, you cannot manipulate the cups sitting on top of the second block.
Step 5: Breaking the 20-HP Ice Block
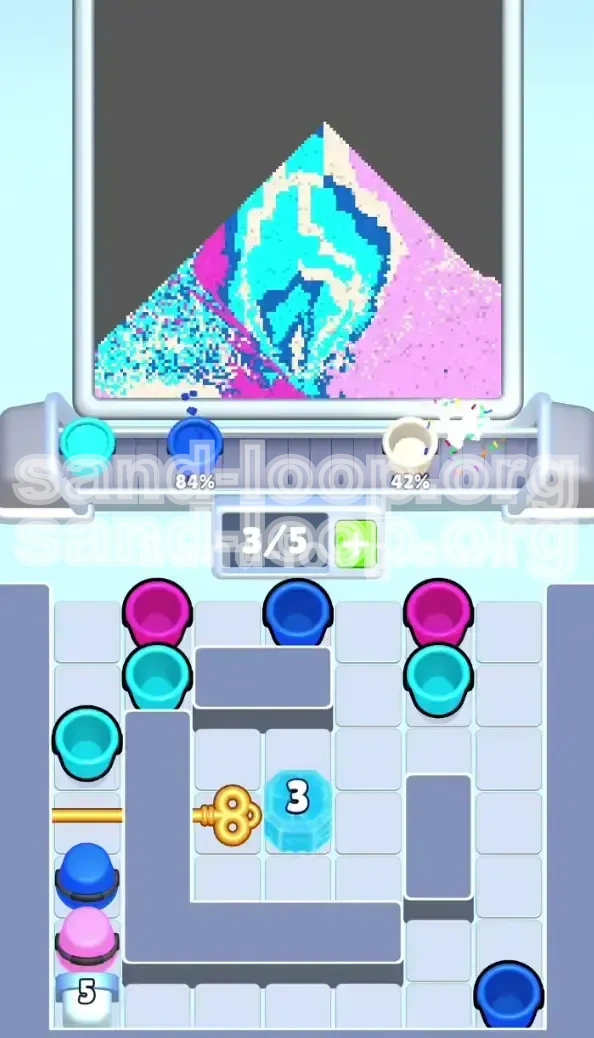
Now focus on the bottom left. A 20-HP Ice Block hides the final Off-White cup. Action: Use the newly accessible cups on the left side to make matches adjacent to this block. Since you have already established the grid with the Off-White from Step 2, you can afford to wait, but prioritize breaking this block to free up the tray's circulation.
Step 6: The Final Fill
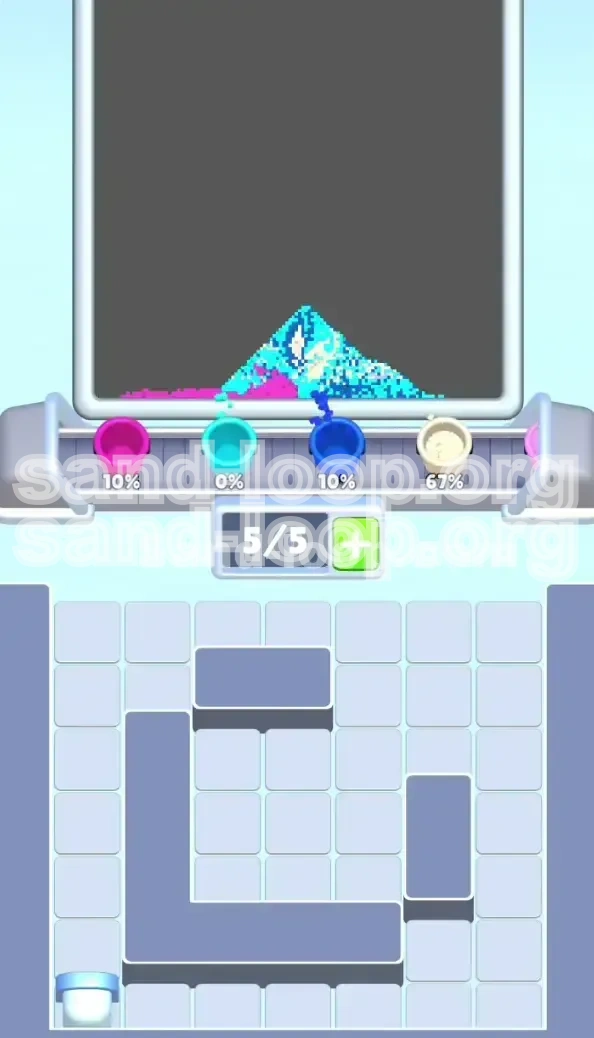
With the blocks gone and the heart skeleton complete, the tray should be mostly full of Light Pink and Cyan. Action: Flood the interior with Cyan first to top off the heart center. Finish with a continuous stream of Light Pink. Pour the Pink around the perimeter, letting it rise up to meet the heart edges. This fills the background without bleeding into the center.
Color Order: The Physics of the Pour
Understanding *why* colors must be ordered this way is crucial for adapting if the RNG (Random Number Generator) gives you a bad cup distribution. This section explains the logic based on the game's sand physics.
Priority 1: Dark Blue (The Container)
Dark Blue creates the perimeter walls. In sand physics, a wall prevents sand from falling off the edge. If you pour background colors first, they will spill over the edges where the heart is supposed to be. Dark Blue is the foundation.
Priority 2: Off-White (The Veins)
The internal grid acts as a splitter. Without these lines, the Cyan center is just a shapeless blob. By pouring Off-White early, you create segmented compartments. This ensures the Cyan stays in the center and doesn't bleed into the Magenta section or the background.
Priority 3: Magenta (The Accent)
The Magenta block is an outlier. It is surrounded by Dark Blue on one side and Light Pink on the other. It must be poured *after* the Dark Blue border exists but *before* the Light Pink background floods the area. If you pour Pink first, the Magenta rectangle will disappear into the background color.
Priority 4: Cyan (The Fill)
Cyan is a "filler" color. It seeks the lowest point. By the time you pour Cyan, the Off-White grid should have created a "bowl" or "basin" effect inside the heart. The Cyan will settle nicely into these compartments. Pouring it too early causes it to spread flat across the board, contaminating the lighter background zones.
Priority 5: Light Pink (The Background)
Light Pink is the highest volume color. It acts as the ocean that the heart sits in. Because it covers everything that isn't the heart, it must be last. If there are any gaps in your Dark Blue border, the Light Pink will rush into them, ruining the heart's definition. Pouring this last effectively "erases" the empty space and completes the picture.
The Contamination Risk
Mixing order is fatal in this level. For example, if Cyan spills into the Light Pink zone, it creates a purple mess that cannot be covered up. The game's detection algorithm is strict; even a 5% contamination of the background can result in a "Level Failed" verdict. Precision in ordering is non-negotiable.
Key Tips and Common Mistakes
Even with a plan, things can go wrong. This section highlights the specific pitfalls of Level 486 and provides pro-tips to keep your run smooth.
Tip 1: The "Rhythm Tap" for Ice Blocks
Don't just tap randomly. When breaking the 24-HP Ice Block, try to establish a rhythm. Tap a cup, watch it hit the block, wait for the animation, then tap the next. Rapid tapping can cause the game to lag or misregister a hit, costing you precious seconds.
Tip 2: Conveyor Slot Management
Keep an eye on the 0/5 counter. A pro strategy is to leave one slot open (4/5) whenever possible. This "buffer slot" gives you the flexibility to immediately grab a Key or a crucial color if it pops up, without having to wait for a cup to finish pouring.
Common Mistake: Premature Pink Pouring
The most common error is seeing a cluster of Light Pink cups and sending them up immediately because they are easy matches. This is a trap. Pink is the most abundant color, so it will always be there. Sending it up early clogs your conveyor and risks spilling over your unfinished grid. Ignore Pink until the very end.
Common Mistake: Ignoring the Grid
Players often focus on the big Cyan area because it looks like the "main" part of the heart. However, the Off-White grid is what actually defines the heart. Without it, the level looks unfinished. Do not bypass the Off-White cups even if they are in inconvenient locations.
Stuck Solution: The Board is Full
If you reach a point where no moves are possible and the Ice Block isn't breaking, you likely have a conveyor deadlock. Solution: Look for the "lowest value" move. Is there a single cup of a color you don't need? Send it just to clear the slot. You must cycle the conveyor to get to the cups touching the block.
Stuck Solution: Out of Moves
If you are running low on moves and the 20-HP Ice Block is still intact, you have been too slow on the first block. Solution: Stop trying to paint the canvas perfectly. Switch purely to "Attack Mode." Tap *anything* that touches the remaining Ice Blocks to break them, even if it means temporarily holding a cup you don't need. You can fix the painting later, but only if you have the moves to do so.
Speed Run Tips and Shortcuts
For players looking to achieve a high score or a 3-star rating, efficiency is key. This section is for advanced players who are comfortable with the mechanics and want to optimize their time.
Shortcut: Pre-loading the Conveyor
While waiting for the 24-HP Ice Block to shatter, you can pre-load the conveyor with the colors you *will* need. If you know you need Cyan next, load a Cyan cup into the slot while the block is at 1 HP. The moment the block breaks, the conveyor is already moving the correct color into position.
Speed Run: The "Ghost Pour"
You don't need to watch the entire sand pour animation. Once the cup tips and the sand starts flowing consistently into the correct area, you can immediately tap the next cup or the next area of the supply tray. This "ghosting" of actions can shave 10-15% off your total time.
Optimization: Combo Taps
Try to chain your taps. If breaking a cup on the Ice Block causes a cascade that clears a cup on the top row, immediately tap that new cup. Combos generate a small score bonus and, more importantly, keep the board in a state of flux, preventing stagnation.
Analysis of Move Efficiency
Statistically, you have approximately 25-30 "wasted" moves in this level before you risk running out of steps. A perfect run minimizes waste by ensuring every cup tap serves a dual purpose: painting the canvas AND breaking an obstacle. Never tap a cup that only paints if there is a cup available that paints AND breaks ice.
Final Sprint Strategy
Once the final Ice Block is gone, stop being tactical. The "Final Sprint" involves mashing the Light Pink cups as fast as the game allows. With the structure complete, you can no longer fail. Pouring speed is the only metric that matters here. Fill that 0/5 slot to the brim and let the conveyor fly.