
Level 489
HARDHow to solve Sand Loop level 489? Get instant solution for Sand Loop 489 with our step by step solution & video walkthrough. Sand Loop 489 tips and guide.
Play Sand Loop Now
Experience the puzzle challenge firsthand
Game Screenshots
Sand Loop Level Guides
Sand Loop Level 489 Complete Walkthrough: Mastering the Pixel Goose
Welcome to the ultimate strategy guide for Sand Loop Level 489. This stage is a significant difficulty spike, testing your ability to manage strict color dependencies and diagonal fill mechanics. Unlike previous levels where speed was the primary factor, Level 489 is a puzzle of patience and precision. You are tasked with painting a serene pixel-art scene of a white goose, but the serenity ends there. The board is designed to trap you with false options, specifically the early temptation of the Orange Beak color. To succeed, you must adhere to a rigid build order, manage a severely limited 5-slot tray, and overcome a massive 25-hit bottleneck. This guide will break down every move you need to clear the stage efficiently.
1. Level Overview and Strategic Analysis
Before you tap a single cup, it is vital to understand why this level causes so many players to fail. The difficulty in Level 489 stems from the combination of a restrictive 5-slot conveyor tray and a diagonal fill pattern that starves you of options if you mismanage the early game.
The Diagonal Fill Constraint
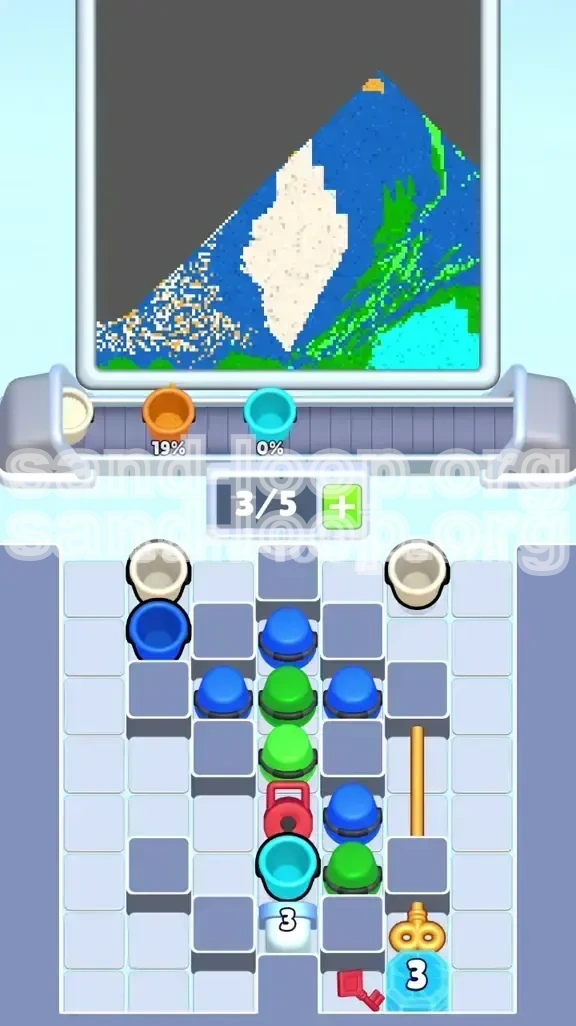
The sand on this level does not fill randomly; it moves in a strict diagonal trajectory from the bottom-left corner (Water) upwards towards the top-right corner (Beak). This means that colors located at the start of the line (Light Blue, White) are needed immediately, while colors at the end (Orange) are useless for the first 60% of the level. If you clog your tray with late-game colors early, you will create a deadlock that forces a restart.
The Slot Economy Crisis
You begin with a 0/5 Slot Tray. In theory, five slots sound like enough, but when the board begins to cascade, it fills up fast. A "Full Tray" state is the most common way to lose. You must keep at least one slot open at all times to allow cups to shift and reveal the pieces hidden underneath. We recommend keeping 2 slots open for the first 30% of the level to handle the initial cascade of Ice block debris.
The 25-Hit Ice Bottleneck
Sitting in the bottom-right of your supply area is a 25-Hit Ice Block encasing a Light Blue Cup. Adjacent to it is the Red Key. This entire section is a chokepoint. You cannot access the Red Key to unlock the Green Reeds until you break this ice. Furthermore, the ice itself blocks critical movement paths on the board. Your opening moves are not about painting; they are entirely about demolishing this block.
The False Start: The Orange Trap
The Orange Cup, required for the goose's beak, is often visible or accessible early in the supply grid. This is a trap. The beak is the very last thing the diagonal sand touches. Pulling the Orange Cup into your tray too early will occupy 20% of your limited capacity for the entire duration of the level, drastically increasing the likelihood of a jam. Ignore it completely until the late game.
The Reed-Sky Interlock
During the mid-game, you will face a complex logistical challenge. The Dark Blue Sky and the Green Reeds are located on the right side of the board and are needed in roughly equal quantities. The game will alternate demands between these two colors rapidly. You cannot send all Greens and then all Blues; you must alternate them to match the painting speed of the canvas, or your conveyor will overflow.
2. Essential Objectives and Color Order
To achieve a 3-star finish and avoid the frustration of a stalled board, follow this priority list. Do not deviate from this order unless you are sure of your calculated risk.
Primary Objective: Shatter the Ice
Your first and only goal for the opening phase is to reduce the 25-Hit Ice Block counter to zero. Every match you make should ideally be adjacent to this block. Clearing this block releases the Red Key, which is the gateway to the rest of the board. Do not focus on painting perfect lines yet; focus on explosions and clearings near the bottom right.
Secondary Objective: Unlock the Green Reeds
Once the ice breaks and you have the Red Key, use it immediately. The Red Padlock sits in the center of the board and seals the majority of your Green cups. You cannot paint the background without these. Prioritize unlocking this over finishing the White Goose body.
Color Priority Phase 1: Light Blue and White
Start by pulling Light Blue (Water) and White (Goose Body). These are the lead colors in the diagonal fill. If you have excess Whites, you can store them, but prioritize pouring Light Blue first as it forms the base layer of the image.
Color Priority Phase 2: Dark Blue and Green
As the fill line moves up, you will enter the "Mid-Game Alternation." Here, you must balance Dark Blue (Sky) and Green (Reeds). Check your active supply tray. If you have 3 Greens and 0 Blues, stop tapping Greens until a Blue is available. Maintain a 1:1 ratio on the conveyor belt to prevent overflow.
Color Priority Phase 3: The Orange Finisher
Only when the canvas is roughly 85% full—meaning the water, body, sky, and reeds are mostly done—should you touch the Orange Cup. It requires very little sand to finish, so pull it down only when the fill line is approaching the top-right pixel.
3. Step-by-Step Opening Strategy (Phase 1)
This phase covers the first 25% of the level. The margin for error here is low. Mistakes in the first 10 moves often compound into an unsolvable board state by move 40.
Targeting the Right-Side Flank
Do not start tapping cups on the far left. The left side contains the Orange Cup and the bottom Golden Key, neither of which helps you right now. Instead, focus your taps exclusively on the right-most columns. You need to create a vertical funnel to reach the Ice Block.
The Opening Sequence
Tap the right-most Light Blue Cup and the right-most White Cup from the top row. Sending these to the conveyor serves two purposes: it feeds the starter paint required by the canvas, and it clears the top layer, exposing the Dark Blue cups hidden in the second row. This exposure is critical for chain reactions.
Managing the 6-Hit White Cup
You will notice a large White Cup marked with "6" at the bottom center. While important, do not make this your primary focus. It will take care of itself as you clear the center columns to feed the Goose body. If you deliberately try to clear this early by pulling irrelevant colors, you will clog your tray. Let it break naturally as you clear vertical lines for the Ice Block.
Preventing Tray Deadlocks
As you pull initial cups, your tray will fill up. If you have 4 cups and none match the immediate needs of the canvas, stop tapping. Wait for the current nozzle to clear. The biggest mistake is pulling a "filler" cup just to keep your fingers moving. In this level, idle hands are better than a full tray.
Breaking the 25-Hit Block
Once you have cleared the top right layers, you will have direct access to the Ice Block. Prioritize matches that touch this block. You may need to pull a color you don't strictly need yet (like a spare Dark Blue) just to trigger a match adjacent to the ice. The goal is to get that counter to 0 as fast as possible.
4. Mid-Game Tactics and Unlocking (Phase 2)
The moment the Ice Block shatters, the board state changes dramatically. You transition from a digging phase to a logistics phase. This is where the level is usually won or lost.
Immediate Action: The Red Key
When the ice breaks, the Red Key becomes accessible. Tap it immediately. Do not wait. The Red Padlock in the center of the grid is blocking a massive cluster of Green Cups. You need these cups flowing into your tray immediately to prepare for the upcoming Green/Blue section of the painting.
Controlled Chaos: Managing the Flood
Unlocking the Red Padlock drops a stack of Green Cups. This can be overwhelming. Do not tap them all at once. If you flood your tray with 5 Green Cups, but the canvas is currently asking for Dark Blue (Sky), you will lose. Tap one Green, tap a Dark Blue, then tap another Green. Space them out.
The Golden Key Shift
With the Red Padlock open, look to the bottom right for the Golden Key. Tapping this drops the vertical Golden Rods. This action is crucial because it shifts the middle rows downward. This shift often connects isolated cups on the left side of the board to the main group, allowing you to finally clear the bottom-left stragglers.
The Alternation Strategy
For the next 2 minutes of gameplay, your brain needs to act like a metronome. Left-Right, Left-Right. Blue-Green, Blue-Green. Look at the sand pour. If it is painting the sky (Blue), pull a Green cup onto the belt so it is ready for when the sand switches to the reeds. Always be preparing the next color, not the current one.
Secondary Objectives Cleanup
During this Blue/Green juggling act, you will likely clear the remaining White Cups needed for the Goose's neck and head. Keep an eye on the 6-Hit White Cup mentioned earlier; it should be clearing now. If it lingers, use a spare move to clear it, but never sacrifice a Blue or Green combo to do so.
5. Endgame Execution and Closing (Phase 3)
You are in the home stretch. The canvas is nearly full, and your tray should be thinning out. Now you must execute the final steps with precision to avoid a "silly" loss on the finish line.
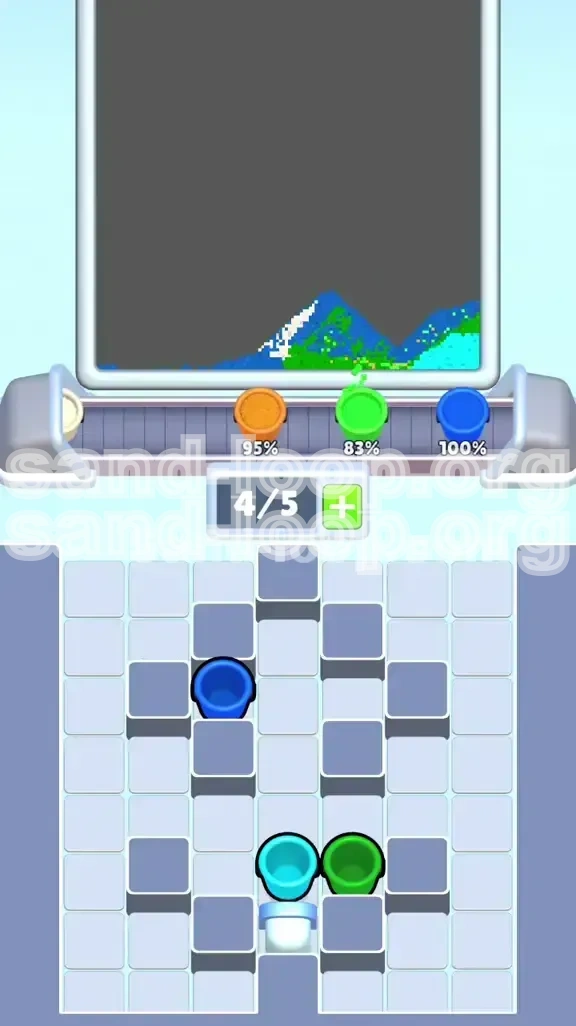
Triggering the Orange Beak
The fill line is now entering the top-right corner. The massive White body and Blue/Green background are done. Now, and only now, do you look at the Orange Cup. It is located on the bottom left or top left depending on your board shifts. Pull it down immediately. The beak requires very little sand to complete, so once it hits the nozzle, it will disappear quickly.
Finalizing the Top Corners
With the beak painted, you might have stray pixels of Green or Dark Blue remaining in the extreme corners. The sand will likely be skipping back and forth rapidly now. Feed the remaining cups of these colors to finish the job.
The Empty Tray Protocol
As the final pixels fill, stop pulling new cups. If your tray has 3 cups left and the canvas is at 99% full, let it run dry. Do not pull a new cup and risk a jam. Let the remaining sand in the chute finish the level. An empty tray at the end is a sign of a masterful efficiency run.
6. Speed Run and Pro Tips
For players looking to achieve a high score or complete the level under the time limit for bonus rewards, these advanced techniques will shave seconds off your run.
The "Pre-Pull" Technique
While the sand is pouring a specific color (e.g., White), use that downtime to pull the *next* required color (e.g., Dark Blue) onto the conveyor belt. Do not wait until the current color is finished to look for the next one. If you can queue the next color while the current one is pouring, you minimize idle time and prevent the sand flow from stopping.
Chain Reaction Focus
In the opening, look for moves that clear multiple rows or columns simultaneously. A single vertical match on the right side can drop three or four new cups into position, often triggering automatic matches. These automatic matches count toward your Ice Block damage without costing you a manual tap. Maximize these cascades.
Ignore Perfection
Do not try to clear the whole board of cups. You only need to clear enough cups to feed the painting. Leaving 4 or 5 stray cups in the tray is fine as long as they aren't blocking essential columns. Obsessive clearing slows you down. Focus only on the "Critical Path" colors: Light Blue -> White -> Red Key -> Green/Dark Blue -> Orange.
Recovery from a Near-Full Tray
If you mess up and have 4 cups with a 5th cup about to fall, look at the color of the falling cup. If it matches a cup in your tray, let it fall to create a match and clear space instantly. If it doesn't match, you have milliseconds to tap a matching pair in your tray to manually clear space before the board jams. Practice this "panic tap" to save runs.