
Level 488
HARDHow to solve Sand Loop level 488? Get instant solution for Sand Loop 488 with our step by step solution & video walkthrough. Sand Loop 488 tips and guide.
Play Sand Loop Now
Experience the puzzle challenge firsthand
Game Screenshots

Sand Loop Level Guides
Sand Loop Level 488 Strategy Guide: Mastering the Cyan-Spotted Maple Leaf
Introduction to the Maple Leaf Puzzle
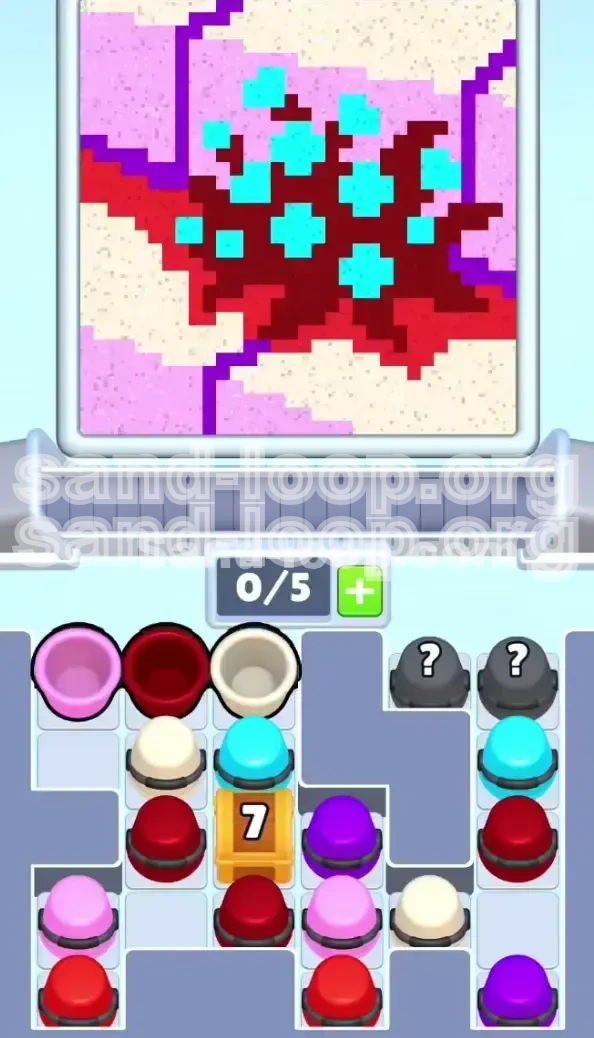
Sand Loop Level 488 is a pure test of logic and resource management, stripping away the speed-based gimmicks of previous levels to focus on a gridlocked, spatial puzzle. The objective is to recreate a pixel-art image featuring a dark red maple leaf stamped with bright cyan dots, set against a background of beige and light pink. The challenge here is not about rushing, but about precise execution. The level introduces a strict "slot economy" mechanic, limiting your conveyor belt to just five active cups. This limitation turns every tap into a critical decision, as a single wrong move can clog your queue and create an unrecoverable dead end.
Core Challenges and Obstacles
The primary difficulty in Stage 488 stems from the physical separation of color supplies. The colors you need to start with—light pink and beige—are buried at the bottom of the grid, while the "trap" colors, cyan and purple, are prominently displayed at the top. Furthermore, the grid is sliced by gray, unplayable walls that segment the board, preventing you from accessing certain areas until specific blockers are removed. You must navigate these physical constraints while managing the countdown mechanics of the central crate, all without the luxury of extra inventory space.
Understanding the Countdown Mechanic
At the heart of this level sits a wooden crate stamped with a "7" in the center column. This crate acts as a hard lock on the most crucial supply of cups, including a vital cyan cup needed for the final details. The crate only shatters after you have successfully cleared exactly seven cups from the board to the conveyor. The challenge lies in the fact that your conveyor only holds five cups. This means you cannot simply spam clicks to lower the counter; you must strategically select cups that you can immediately process and pour, or you risk filling your belt and halting your progress entirely.
The Importance of Pour Order
Sand physics is the underlying engine of this puzzle. Because sand flows and settles, pour order dictates success. If you pour the heavy dark red leaf base before establishing the light pink and beige background, the red will simply bury the bottom layers. Similarly, pouring the bright cyan dots too early will result in the cyan sand rolling down the slopes of the red leaf and contaminating the background. You must adhere to a strict construction sequence: Background first, structure second, details last.
Level Objectives and Strategy Overview
Analyzing the Target Image
Before you tap a single cup, analyze the target. The image is dominated by large negative space. Approximately 60% of the canvas is the beige and light pink background. The dark red maple leaf takes up about 30% of the center space. The cyan dots are minute, making up perhaps 5% of the total area, but they are the highest risk element. Your strategy must prioritize clearing the large areas first to establish a "base" that prevents the smaller, brighter colors from spreading uncontrollably.
Conveyor Belt Management
Your conveyor belt is your lifeline, but it is also your choke point. With a limit of 5 slots, you have zero margin for error. If you pull a cup you cannot use immediately, it sits on the belt, taking up a slot. If you pull 5 wrong cups, the game locks up. You must constantly cycle "safe" colors—those you are ready to pour immediately—to keep slots open. Never pull a color just to "see what happens"; every pull must be part of an active pour chain.
Dealing with Color Contamination
Contamination is the silent killer in Level 488. Cyan and Purple are the culprits. The purple veins act as dividers between the background chunks. If poured while the background is unsettled, they will bleed into the beige or pink, ruining the 100% completion requirement. The cyan dots must sit perfectly inside the red leaf. To achieve this, the red leaf must be fully formed and flat, creating a "cup" or depression for the cyan to land in, preventing it from rolling off onto the background.
Resource Prioritization
You are fighting against the game's UI. The game offers you Cyan and Dark Red first because they are accessible. However, your priority is Beige and Light Pink. You must ignore the "easy" taps in favor of digging out the harder-to-reach background colors. This often means making moves that don't immediately fill the canvas but clear the necessary grid space to access the resources you actually need.
The "Dependency Chain" Concept
Think of the level as a chain of dependencies. You cannot pour the Cyan (Goal C) until the Dark Red is set (Goal B). You cannot set the Dark Red until the Background is poured (Goal A). You cannot access the Background cups until the Center Crate is destroyed (Step 1). You cannot destroy the Center Crate until you feed the conveyor 7 safe cups. Understanding this chain prevents you from panic-tapping cyan cups when the crate counter is at "1".
Step-by-Step Walkthrough: The Sequence
Phase 1: Ignoring the Traps (Moves 1-3)
As the level loads, you will see Cyan cups tantalizingly close on the right side. Ignore them completely. Do not tap them. If you pour cyan now, you lose. Instead, look to the top row of the grid. Locate the Light Pink cup at the top left. Tap it. It is safe. Immediately follow up by tapping the Dark Red cup located in the top middle section. Then, tap the Beige cup adjacent to it. These three cups are your "burners"—they are safe to load onto the belt and pour to start ticking down the counter without clogging your queue.
Phase 2: Digging for the Countdown (Moves 4-5)
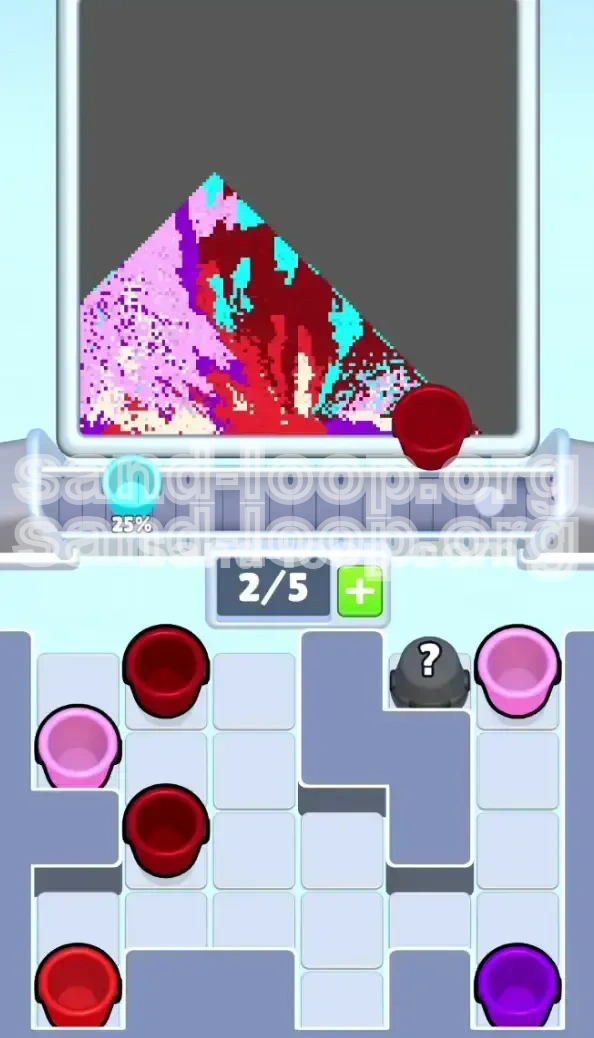
With three safe cups processed, the crate counter drops to 4. Now you must dig deeper. Look at the lower left section of the grid, buried behind a stack of red cups. You will find a Light Pink cup and a Beige cup. You may need to tap a blocking Dark Red cup to access them. Carefully maneuver to tap these two background colors. Getting them to the conveyor is a high priority. Once these are poured, you have 5 successful moves. The crate is now at 2 hits remaining. You are halfway there.
Phase 3: The Critical Center Strikes
This is the most dangerous moment of the countdown. You need 2 more hits to break the crate, but the remaining accessible cups are risky. Look for a Dark Red cup in the middle-left section. This is usually a safe bet as you will need a lot of red soon anyway. Tap it. For the final hit, identify a Purple cup on the middle right. Purple is risky this early, but if your background base has started to form, it is manageable. Tap the Purple cup. The crate shatters, opening the center column and revealing the stockpile beneath it.
Phase 4: Background Construction
Now that the center is open, your goal is to fill the bottom 40% of the canvas. The lower grid is congested with red cups. You must clear them to reach the Beige and Pink cups hidden at the very bottom row. Tap the bottom-left Pink and bottom-right Purple to clear the path. Now, aggressively feed all remaining Beige and Light Pink cups into the machine. Don't worry about the red leaf yet; just focus on creating a solid, flat foundation of beige and pink. This layer acts as a catch basin for the rest of the level.
Phase 5: The Leaf Structure
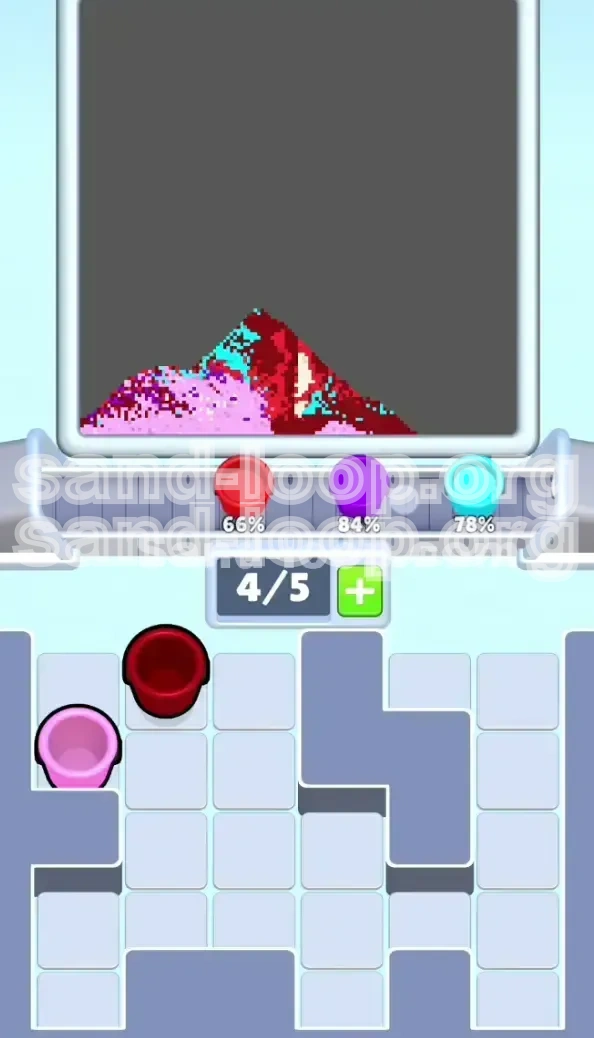
With the background established, the grid should be mostly free of debris. Now, unleash the Dark Red. You likely have a stockpile of red cups from the center crate and the sides. Tap them in a sequence that allows the sand to pile up in the center. The dark red sand will settle on top of the beige/pink base, forming the body of the maple leaf. Ensure the leaf is fully formed and the edges are defined before moving to the next step.
Phase 6: The Cyan Dots Finale
The canvas is mostly full. The background is set, and the leaf is formed. Now, and only now, do you touch the Cyan. Grab the specific Cyan cup that was trapped under the crate, followed by the Cyan cup on the far right. Pour them. Because the red leaf is already there, the cyan sand will land on top of the red or settle in the "valleys" of the leaf texture. It will not roll down to the bottom because the heavy red leaf blocks its path. This completes the image.
Key Tips for Success
The "Slot 3" Rule
Maintain a mental rule of thumb: never let your conveyor belt fill past 3 slots unless you are 100% sure of the next two colors. Always keep at least 2 empty slots as a buffer. This buffer allows you to maneuver a "bad" color (like a stray purple) to the front of the line to pour it, or to pull a necessary background color without getting soft-locked. If you hit 5 cups, you lose control of the board.
Visualizing the Sand Stack
Don't just look at the cups; look at the canvas. Visualize the pyramid of sand. Beige is wide. Red is a smaller pyramid on top of beige. Cyan is a tiny cap on top of red. If you try to place the red pyramid before the beige one is wide enough, the red will spill over the edges of the background. Always ensure the base layer is wider than the layer above it.
Handling the Question Marks
After the crate breaks, you might encounter black "?" cups. Treat these as unstable. Do not tap them if your belt has 3 or more cups. Wait until you have a clear, empty belt. Tap the question mark, wait for it to reveal the color, and then decide if it fits your current phase (Background vs. Detail). If it reveals Cyan early, leave it on the belt and pour other colors around it until the Red leaf is ready.
Purple Line Precision
The purple lines are dividers, not fillers. You don't need a lot of purple sand. You just need enough to draw the veins. Pour purple slowly and stop as soon as the veins connect. Over-pouring purple is a common way to lose precious percentage points on the score, as the purple will bleed into the adjacent light pink zones.
Pause and Assess
Sand Loop 488 rewards patience. If you feel stuck, take a moment to stop tapping. Look at the crate counter. Look at your belt slots. Identify the one specific color you need next to unclog the grid (usually Beige). Find that color, map out the taps needed to reach it, and only then execute the move. Panic-tapping is the fastest way to a Game Over.
Common Mistakes to Avoid
The Early Cyan Tap
This is the number one killer. Players see the Cyan cup available on the right side of the grid and tap it early, thinking they need to "get it out of the way." The result is cyan sand pouring over an empty canvas, rolling into the corners, and making it impossible to form a clean beige background later. Avoid Cyan until the very end of the match.
The Conveyor Deadlock
Players often tap cups matching the "current" target color without checking their belt capacity. For example, tapping 5 red cups in a row because they see red in the image. If you tap 5 reds and the belt fills up, and the *next* cup you need is a Beige cup to fix the base, you can't pull it. You are stuck with 5 reds you can't pour. Always cycle the belt.
Ignoring the Countdown Physics
The crate requires 7 *valid* moves. Some players try to cheat by tapping a cup and then canceling, or tapping cups that are blocked by gray walls. This does not tick the counter. You must tap a cup that successfully reaches the conveyor. Wasting taps on blocked cups is a loss of time and momentum.
Over-pouring the Red Leaf
It is easy to get excited when the crate opens and unleash all the Dark Red at once. However, if you pour too much red, the mound becomes too steep. When you eventually pour the cyan dots, they will roll right off the steep red slope and onto the floor. You need a relatively flat top on the red leaf to catch the cyan.
Misreading the Grid Walls
The gray walls segment the supply. A common mistake is trying to pull a Beige cup from the bottom right when the path is actually blocked by a wall, requiring you to clear a Purple cup from the top right first. Always trace the path of the cup to the conveyor exit before tapping to ensure it can actually reach the belt.
Solutions for When You Are Stuck
Stuck with a Full Belt
If your conveyor is full (5 cups) and none of them are useful right now (e.g., you have Cyan but need Beige), you are in a deadlock. The only solution is to "sacrifice" a pour. Look at your canvas. Is there a tiny section, perhaps a corner, that can accept one of the colors on your belt without ruining the main image? Pour just enough of that color to clear the slot, then pull the correct color you actually need.
Stuck at Countdown 1 or 2
If the crate is at 1 or 2, but you have no safe cups left to tap, you are forced to tap a "trap" color. Identify the color that is least damaging. Usually, Purple is the best sacrifice because it is a thin line in the image. Pour a thin vein of purple to clear the slot and break the crate. Do not tap Cyan; Cyan is too destructive to use as a sacrifice.
Stuck on Color Separation
If your colors are mixing (e.g., the red is bleeding into the pink), you have likely poured the wrong order. You cannot fix mixed sand. The solution here is preventive: restart the level and be more aggressive with the background colors. Ensure the pink and beige are poured to 100% completion in their respective zones before touching the red.
Stockpile Depletion
If you run out of a specific color (e.g., you need more Beige but the grid is empty), check the "?" cups or look for cups trapped under the shattered crate debris. Sometimes cups don't immediately appear reachable; you may need to pour adjacent cups to shift the physics and reveal a hidden stockpile at the bottom of the grid stack.
Speed Run Tips
Pre-Loading the Tap Queue
While the intro animation plays or while sand is pouring, you can visually locate the next 3 cups you need. Don't wait for the sand to finish settling to find the next cup. Know that your sequence is Top-Left Pink -> Top-Middle Red -> Beige. Having your taps ready milliseconds before the previous pour finishes saves valuable seconds.
The "Fast Fill" Background
Don't aim for 100% pixel perfection with the background during a speed run. The beige and pink zones are large. Pour quickly to get 90% coverage. The remaining 10% will be covered by the red leaf anyway. Focusing on "good enough" coverage rather than perfection allows you to move to the crate-breaking phase faster.
Bulk Tapping After Crate Break
The moment the crate breaks, the center of the grid is a goldmine of colors. Instead of tapping one, waiting, tapping another, rhythmically tap the center column in a rapid sequence (Red, Red, Beige, Pink) to flood the belt. Since you just cleared the crate, your slots should be empty. This bulk tap shaves seconds off the mid-game transition.
Skipping the "Perfect" Cyan Placement
In a normal run, you carefully place cyan in the dots. In a speed run, pour the cyan in a general zig-zag pattern over the red leaf. Because the volume of cyan is low compared to the red, it will settle into the general shape of the leaf. The game's hit detection is forgiving enough that you don't need to pixel-hunt the cyan dots as long as the red base is solid.
Memorizing the Safe Zones
Speed running Level 488 is a memory test. Memorize that the Left Side is "Safe" (Pink/Beige) and the Right Side is "Trap" (Cyan/Purple) in the early game. Train your eyes to ignore the right side of the screen entirely until the crate is gone. This reduces visual processing time and prevents accidental bad taps.