
Level 492
HARDHow to solve Sand Loop level 492? Get instant solution for Sand Loop 492 with our step by step solution & video walkthrough. Sand Loop 492 tips and guide.
Play Sand Loop Now
Experience the puzzle challenge firsthand
Game Screenshots


Sand Loop Level Guides
Sand Loop Stage 492: The Floral Trio Master Guide
Introduction to the "Potted Plants" Challenge
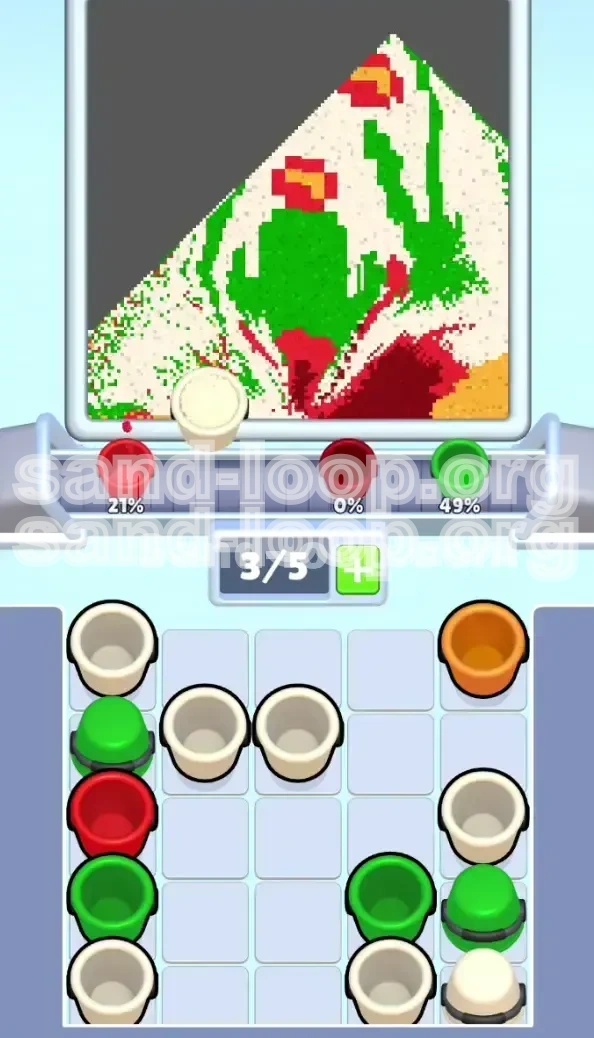
Sand Loop Level 492, titled "The Potted Plants challenge," represents a significant jump in difficulty from previous stages. This is not a level where you can simply tap colors at random; it is a strict resource management and logic puzzle. The level features a pixel-art composition of three distinct plants: a wide, barrel-shaped cactus in the center, a leafy flowering plant on the left, and a tall, thin flowering stalk on the right. All three sit in individual red pots against a sandy floor.
The core challenge of Level 492 lies in the "Grid Lock" mechanic. Your Supply Tray (the 5x5 grid containing your sand buckets) is tightly packed with colors in a specific order. If you fail to manage the top rows of the grid, you will block access to the colors you need later in the level. Specifically, the massive amount of White sand needed for the background is your biggest obstacle. If you pull the White sand too early, your conveyor belt will become clogged, preventing you from dispensing the Red and Green sand required for the plants themselves.
Statistically, this level requires a 98% to 100% fill rate to pass. This means that even a few misplaced pixels of sand can cause a failure. The "Zones" of the image are layered such that the background (White) surrounds the foreground plants (Red/Green). If you mess up the foreground, you cannot fix it with background sand. Therefore, this guide focuses on a "Bottom-Up" strategy: filling the pots and plants first to secure the anchor points, and only then filling the vast white background.
Level Objectives and Success Metrics
To clear Level 492, you must achieve a 100% fill accuracy. The game will not let you proceed even if you are at 99%. Your primary objective is to clear the Red, Green, and Orange zones without contaminating the White background zones. Secondary to this is the "Economy" objective: you must keep at least 2 slots open on your 5-slot conveyor belt at all times to avoid a deadlock.
- Primary Goal: Fill the three Red Pots completely (Bottom Layer).
- Secondary Goal: Fill the Green Cactus and Plant Stems (Middle Layer).
- Tertiary Goal: Place the Orange Flower Centers (Precision Layer).
- Final Goal: Flood the remaining space with White Background Sand (Cleanup Layer).
The Strategy: Why Order of Operations Matters
Analyzing the Supply Grid Dependencies
Before you tap a single bucket, you must understand the layout of the 5x5 Supply Tray. The tray is not random; it is organized in "Dependency Chains." The colors you need first (Orange and Red) are physically blocking the colors you need later (Green and White).
The Dependency Chain works like this: Row 1 (Orange/White) must be cleared to access Row 2 (Red), which must be cleared to access Row 3 (Green). If you tap the White buckets in Row 1 prematurely, you will fill your slots with White sand, leaving no room for the Red sand in Row 2. Since the White sand is for the background (which is the largest area), it takes the longest to pour. Tapping it early is the fastest way to fail.
The "Slot Economy" Explained
Your conveyor belt has exactly 5 slots. This is your "Inventory." In Level 492, you have 25 buckets in the Supply Tray. You cannot carry them all at once. The key rule here is: Never let the conveyor belt reach 5/5 capacity unless you are 100% sure of the order.
We recommend maintaining a 3/5 or 4/5 capacity. This gives you "buffer room" to maneuver if the supply tray reveals a color you weren't ready for. If you are at 5/5 capacity and a critical Green bucket appears, you have nowhere to put it, and you are forced to use a bucket you didn't want to use yet, causing a chain reaction of failure.
The "Pots-First" Logic
Why do we focus on the pots first? There are two main reasons: Physical boundaries and Grid access. The pots act as containers. If you pour the sand for the pots correctly, the sand stays inside the pot. It is safe. However, if you try to pour the thin stems or the background first, any mistake spills over into the "Pot Zone," meaning you have to waste more sand to fix it later.
Furthermore, the Red buckets are located in the second row of the grid. They are "heavy" consumers. By clearing the Red buckets early, you collapse the Supply Tray downward. This brings the Green buckets (Row 3 and 4) into play. If you wait too long to clear Red, you might find yourself with a grid full of Green buckets but no Red buckets left to finish the pot bases, leading to a soft-lock.
Step-by-Step Walkthrough: Phase 1 (The Foundation)
Step 1: The Orange Floor Setup
As soon as the level starts, look at the top row of your Supply Tray. You will likely see a mix of White and Orange buckets. Your very first action is to isolate the Orange buckets.
Tap exactly three (3) Orange buckets. Do not tap four. By tapping only three, you keep your conveyor belt at 3/5 capacity. This leaves two slots open. Watch the pour. The Orange sand will fill the sandy floor at the very bottom of the image. This is a wide, safe zone. While these are pouring, assess the grid. Usually, this initial action clears the space needed to reveal the Red buckets in the next row.
Step 2: The Red Pot Extraction
Once the Orange sand is flowing, immediately shift your focus to the Red buckets. You will see them in the second row of the tray.
Tap two (2) Red buckets. Place them on the belt. Now, look at the screen. You need to fill the three pots: Left (Small), Center (Medium), Right (Tall). The Right Pot is the deepest. It requires almost 1.5 buckets of sand. The Left Pot is the shallowest.
Action: As the Red buckets reach the dispenser, align them with the pots. Use the first Red bucket to fill the Left Pot and start the Center Pot. Use the second Red bucket to finish the Center Pot and make a significant dent in the Right Pot. The key here is to keep the Red sand flowing. Do not let the Red buckets stack up on the belt while you work on other colors, or you will run out of slot space.
Step 3: Managing the White Blockade
At this stage, you will see White buckets available in the top row. DO NOT TAP THEM YET. This is the critical moment where most players fail. The White buckets are "blockers." They are sitting in the tray preventing the Green buckets (which you need next) from falling into the accessible rows.
If you tap the White buckets now, they will clog your conveyor belt for 30-40 seconds while the background slowly fills. Instead, ignore them. Let them sit in the tray. By leaving them there, they act as a placeholder, keeping the tray structure stable while you hunt for Green in the lower rows.
Step 4: Securing the Grid for Green
Continue tapping Red buckets until the three pots are 100% full. You may need to dip into the third row to find them. As you clear the Red buckets, the grid will shift. The heavy White buckets in Row 1 might stay put, but the Green buckets in Row 3 and 4 will slide up or become accessible.
Once the pots are full, do not worry if you have a few pixels of red missing near the rim. You can fix that later. Your goal is to clear the "Red Tier" of the grid entirely. Once Red is gone, you are ready for Phase 2.
Step-by-Step Walkthrough: Phase 2 (The Flora)
Step 5: The Green Cactus "Pulse" Technique
With the pots filled, the Green buckets should now be accessible in your Supply Tray. The main feature is the Center Cactus. This is a large, forgiving target, but it has two narrow arms.
Tap two (2) Green buckets. When the Green sand reaches the nozzle, position it over the center cactus. Technique: Use a "Pulse" method. Tap the dispenser to start the flow, then release it for a split second, then tap again. This prevents the sand from piling up too high and spilling over the narrow arms of the cactus. Fill the main body of the cactus first. The arms are secondary and can be touched up later.
Step 6: The Delicate Side Stems
After the cactus is roughly 80% full, you need to address the stems of the left and right flowers. These are 1-pixel wide lines. This is high-precision work.
Ensure you have at least one Green bucket on the belt. Action: Align the nozzle directly over the base of the stem. Give it a quick tap (burst) of sand. Stop immediately. Watch the sand settle into the line. Do not hold the button down. If you over-pour here, the sand will bleed into the white background, creating a permanent mess that is very hard to clean up. patience is key. Fill the stems 90% of the way, but stop just short of the flower head.
Step 7: The Orange "Flower Center" Snipe
Remember that single Orange bucket we left in the tray back in Step 1? Now is its time to shine. The flower heads (the center of the red petals) require tiny 2x2 pixel dots of Orange sand.
Retrieve that last Orange bucket. If it's buried under new buckets, you must clear the blockers to get to it. Once it is on the belt, wait until the flower heads are under the dispenser. Warning: The nozzle is wide. If you try to fill a tiny flower center, you might accidentally hit the red petals or the green stem. To mitigate this, try to time your pour when the conveyor belt movement is minimal. A quick "tap-and-release" is essential here. Do not waste this orange sand on the floor; the floor should already be done.
Step 8: Topping Off the Red Petals
Now that the stems and centers are done, look at the Red Petals. These are the leaves at the top of the plants.
You might have some residual Red buckets on the belt, or you might need to tap more from the tray. Use the Red sand to finish the flower petals. Since the petals are surrounded by White background (which is empty), be careful not to overfill. The petals are small, cup-shaped areas. Fill them to the brim. If you accidentally spill red sand into the white area, don't panic yet. We will deal with "clean up" in Phase 3, but try to minimize it now.
Step-by-Step Walkthrough: Phase 3 (The Cleanup)
Step 9: The Great White Flood
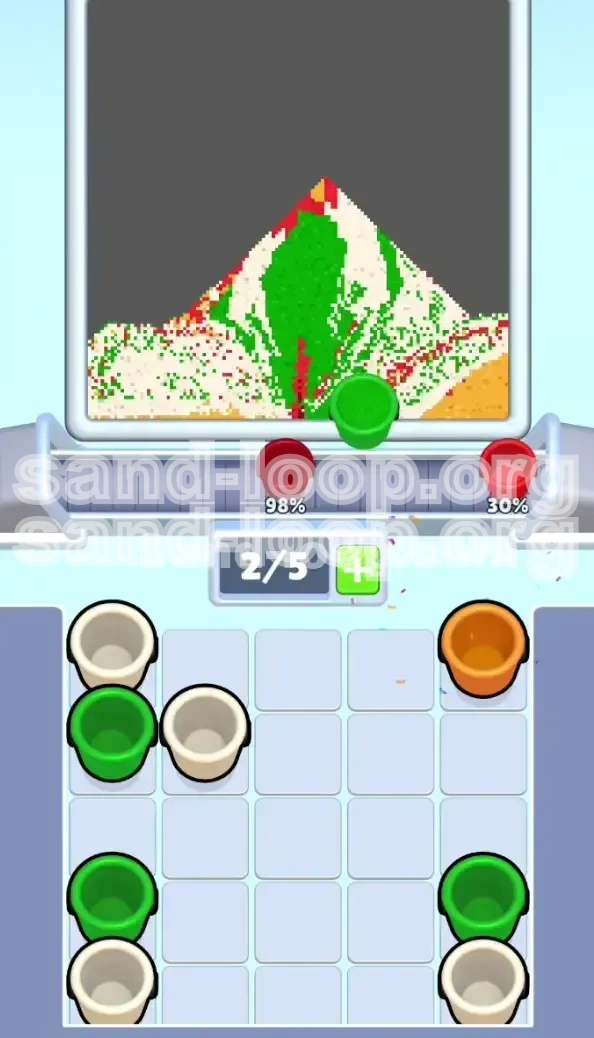
The foreground (Pots, Plants, Stems, Flower Centers) is now 95% complete. The Supply Tray is likely mostly empty of Orange and Red. It is now time to unleash the White buckets.
Tap four (4) White buckets in rapid succession. You can fill your belt to 4/5 or 5/5 capacity here because we are in the final stretch. Position the nozzle over the largest empty area of the background. Let the sand flow. Since the background is a massive connected area, you don't need to be precise. You just need to volume-fill.
Step 10: Corner Management and Edge Detection
As the White sand pours, you will notice it flowing around the plants. This is good. However, the sand might not reach the top corners of the image immediately.
Once the main floor is white, quickly move the nozzle to the Top Left Corner and the Top Right Corner. These areas are notorious for trapping small air pockets. If you are at 98% completion, it is usually because of a 4-pixel gap in the top corner. Direct your white stream into these corners to force the fill percentage up.
Step 11: Precision Fixes (The 98% - 100% Gap)
You are likely sitting at 98% or 99% now. You have a few stubborn pixels left. How do you find them?
The Scanner Method: Slowly move the empty nozzle (or a white stream) over the plants. Look for tiny black dots inside the Green Cactus arms or on the rim of the Red Pots. If you see a gap, switch to the appropriate color (Green or Red) if you have any left on the belt. If you don't have any color left, you can try to use a tiny bit of White sand to fill a hole in a Red pot, but this looks messy. It is better to have kept 1 Red and 1 Green bucket in reserve during Phase 2 for this exact purpose.
Step 12: Final Clear
If you followed the steps, your Supply Tray should be emptying out. The game will trigger the "Level Complete" animation as soon as the last pixel locks into place. The key to the final stretch is speed. Don't admire your work until the counter hits 100%. Keep the belt moving until the very end.
Pro Tips, Common Pitfalls, and Speedrunning
Common Mistakes to Avoid
- The "Whiteout" Error: Tapping all 5 White buckets at the start. This guarantees a loss. The belt jams, and you can't access Red/Green.
- The "Spillover" on Stems: Pouring Green sand too fast on the thin stems. This creates green blobs in the white background that are impossible to clean up without wasting white sand.
- The "Tall Pot" Oversight: Forgetting that the Right Pot is deeper than the others. If you treat it like the Left Pot, you will underfill it, and you won't be able to fix it later because the nozzle won't reach past the Green Cactus.
- Ignoring the Floor: Skipping the Orange floor in Phase 1. If you save the floor for the end, you have to carefully pour Orange sand around the full plants, which is much harder than pouring on an empty canvas.
Speedrun Strategy (For Fast Completion)
If you are trying to top the leaderboards, you can modify the strategy slightly. The bottleneck in this level is the Green Cactus. It is slow to fill.
The Shortcut: After filling the Red Pots, do not wait for the Green buckets to perfectly align. As soon as the first Green bucket hits the belt, tap it. While it is pouring, immediately tap the second Green bucket. This creates a "Chain Pour" where the sand flow is nearly continuous. This is risky (spillage chance is higher), but it saves about 5-10 seconds on the clock. You can afford to be messy with the Green sand because the White background covers a large area, but you cannot afford to be messy with the Red sand.
What to Do If You Get Stuck
Scenario: You are at 95% fill, you have no White sand left, but there are still visible gaps in the background.
Solution: You likely wasted White sand on overlaps earlier. Check your Supply Tray. Is there any Orange left? Use it to top up the floor—every bit helps. Is there any Red left? Use it to slightly overfill the pots. Sometimes, filling a pot 1 pixel higher "pushes" the fill percentage up because the game counts that volume as complete. If you are truly out of sand and stuck at 99%, you may need to restart the level and be more conservative with your White sand usage in Phase 3.
Advanced Techniques: The "Sand Drift"
Advanced players use the physics of the sand to their advantage. When filling the Cactus, if you pour on the left side of the cactus body, the sand will naturally drift and pile up on the right side due to the pixel physics. Use this drift to fill the nooks and crannies of the cactus arms without moving the nozzle. Mastering this "Drift" allows you to keep the nozzle stationary, which saves time and reduces the risk of accidental spills.