
Level 66
HARDHow to solve Sand Loop level 66? Get instant solution for Sand Loop 66 with our step by step solution & video walkthrough. Sand Loop 66 tips and guide.
Play Sand Loop Now
Experience the puzzle challenge firsthand
Game Screenshots
Sand Loop Level Guides
Level Overview: The Frozen Flamingo Challenge
Welcome to Level 66, often referred to by veterans as the "Inventory Management" nightmare. On the surface, this stage appears to be a relaxing art project involving two pink flamingos and a sunset. However, beneath this aesthetic lies a complex logistics puzzle defined by severe space constraints and a dual-layered locking mechanism. Your primary antagonist here is not the lack of paint, but the lack of space to hold it. You start with a heavily restricted tray capacity, and the bulk of your essential paints are locked behind Blue Ice blocks with high durability thresholds.
The Dual Lock Mechanism
Unlike previous levels where you might have had immediate access to all colors, Level 66 gates your progress behind two distinct frozen keys. This creates a "bottleneck" effect where you must carefully micromanage your early moves to ensure you are breaking the ice without clogging your tray with unusable paint.
Visual Analysis: The Canvas
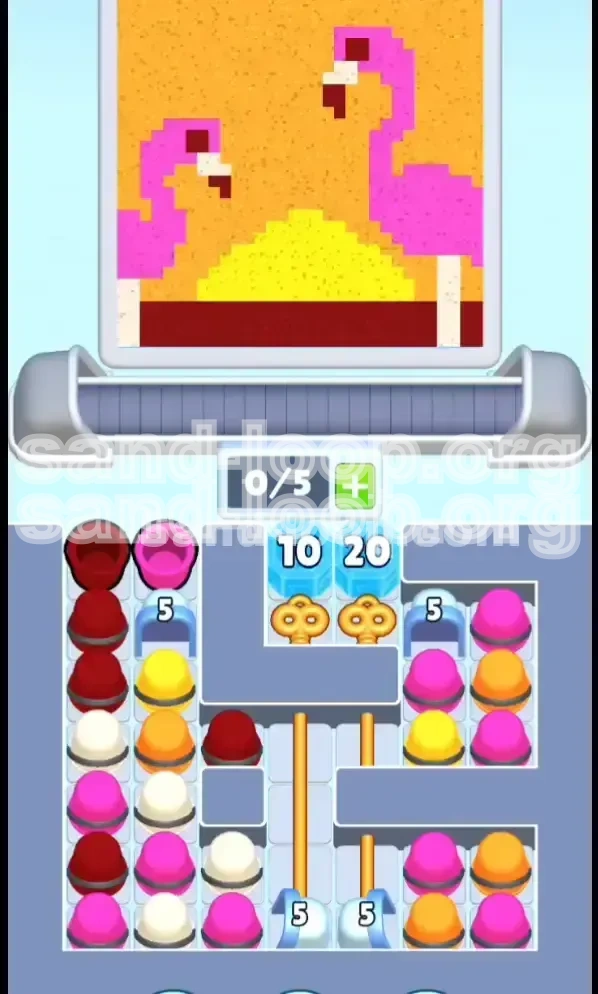
The target image is deceptively complex. It features a large orange background (taking up roughly 60% of the canvas), a central golden sun or mound (15%), two detailed flamingo bodies in pink (20%), and fine details for legs and beaks in white and dark red (5%). The challenge is that the large background areas require high volume, while the small details require high precision.
Ice Block Durability Stats
The obstacles are quantified by specific hit points. The Left Key is encased in '10' Ice, requiring you to process exactly 10 units of paint to free it. The Right Key is significantly tougher, trapped in '20' Ice. This means 30 total units of paint must be processed before you have full access to the board, forcing you to play a defensive game until that threshold is met.
The Slot Capacity Crisis
One of the biggest hurdles is the '0/5' slot capacity warning. You cannot simply hoard cups. Every time you pick up a cup, you are committing to using it or storing it in the limited reserve slots at the bottom. Improper storage leads to game overs, so knowing what to hold and what to discard is vital.
The "Clumping" Risk
The physics engine in this level punishes rapid tapping. If you queue up too many of the same color in a row (a "clump"), they will merge on the conveyor belt. This is disastrous for the flamingos, as it causes overfilling in one section while leaving other sections empty. You must learn to pace your inputs.
Clear Objectives: Your Roadmap to Victory
To conquer Level 66, you need to stop thinking like a painter and start thinking like an engineer. Your goal is not just to fill the canvas, but to optimize the flow of materials from the tray to the conveyor. Here is exactly what needs to be done to clear the stage.
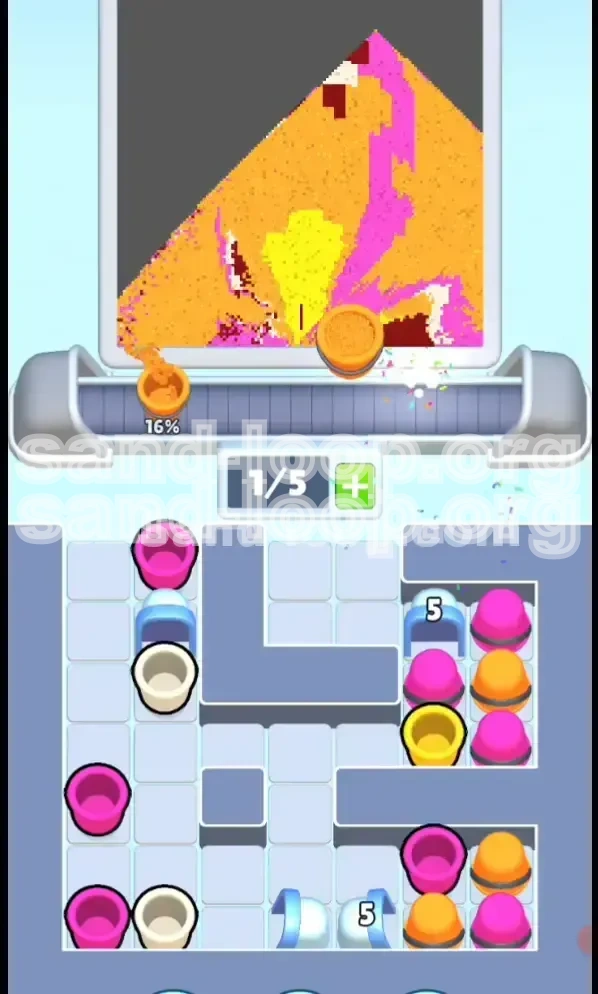
Phase 1: The Thaw (0% - 33% Progress)
Your immediate goal is to break the '10' Ice block on the left. This requires processing Dark Red and White cups from the left column. You are not trying to finish the art here; you are trying to mine the key. Treat the left column as a resource generator for ice-breaking points.
Phase 2: The Breach (33% - 66% Progress)
Once the left key is obtained, the pressure increases. You now face the '20' Ice block. Your objective shifts to surviving the mid-game without filling your tray. You must prioritize Yellow and remaining Dark Red cups to build up the 20 points needed for the second key while keeping the reserve slots available for Pink.
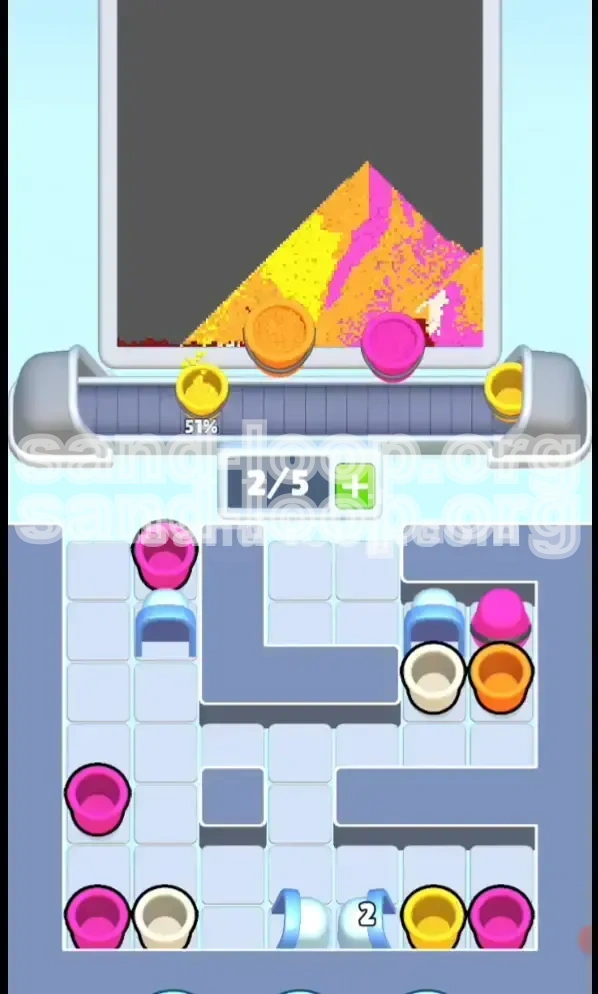
Phase 3: The Flood (66% - 90% Progress)
After the Right Key is freed, the '5' gate on the right opens, unleashing the Pink cups. Your objective here is rhythmic execution. You must paint the flamingo bodies without over-polluting the belt. This is the highest APM (Actions Per Minute) phase of the level.
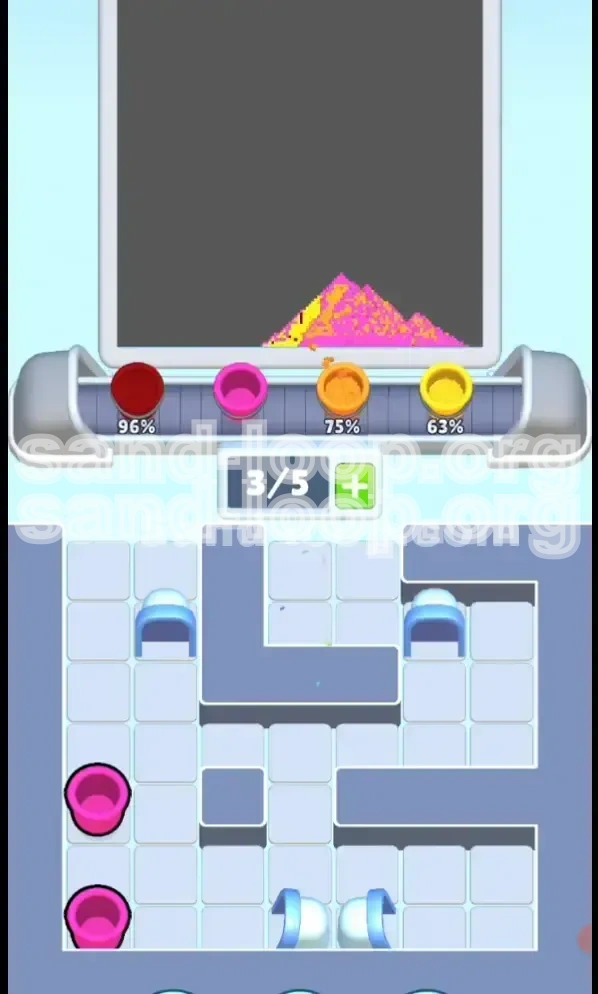
Phase 4: The Cleanup (90% - 100% Progress)
The final objective is the Orange Background. This is the "victory lap" but also a danger zone. You must clear any remaining detail cups (Red, White) from your tray and finish the level with large volume pours of Orange to fill the sky and ground.
Efficiency Metric
Aim for a "Trash Rate" of under 5%. Every time you are forced to send a cup to the bin because you have no space, you lose efficiency. In this level, a single wasted move can mean the difference between shattering the ice or getting stuck.
Step-by-Step Instructions: The Walkthrough
Follow this sequence exactly. Deviating from the order often leads to a clogged tray and a failed attempt.
Step 1: Initiate the Left Column Breaker
Start the level by immediately tapping the Dark Red cup at the top of the far-left stack. Do not touch the center column yet. You need to clear the Dark Reds to access the White cups underneath. Tap 3-4 Dark Reds in succession. This will start filling the bottom progress bar of the canvas (the dark ground) and add points to the ice breaker.
Step 2: Manage the White Cup Risk
As the White cups appear from under the Dark Reds, do not tap them immediately unless the scanner is currently over the flamingo legs (bottom center). If the scanner is elsewhere, drag the White cup to the "Reserve Slot" at the bottom of the screen. Never leave a White cup in the active tray if it risks blocking a Dark Red pour.
Step 3: The Left Key Collection
After processing approximately 10 cups from the left stack, the '10' Ice will shatter. The game will automatically drop the Left Golden Key into the '5' gate on the left. This opens the path, but don't relax yet. The hardest part is coming up. Immediately check your tray slots. You should have 2-3 empty slots available.
Step 4: The Yellow Bridge Strategy
Shift your focus to the center column. Start tapping the Yellow cups. The central sun is large, so it can absorb a lot of yellow paint quickly. Tap Yellow cups in pairs (wait for the scanner to pass, tap two, wait). This builds up your count towards the '20' Ice block safely. Avoid mixing in the Pink cups from the right just yet.
Step 5: Surviving the '20' Ice Block
Keep an eye on the ice counter. You need 20 points. Alternate between Yellow (Center) and any remaining Dark Red (Left). If you run out of safe colors and are forced to tap a Pink cup before the gate is open, you must tap it slowly—once every 3-4 seconds—to prevent it from clogging the line before the Right Key is even free.
Step 6: The Pink Explosion
Once the '20' Ice breaks, the Right Key unlocks the right-side gate. Now, spam the Pink cups. The Flamingo bodies are the largest feature. Tap 3 Pink cups, then pause. Let them flow onto the belt. Repeat. Do not stop tapping Pink until the Flamingo bodies are at least 80% full.
Color Order: The Processing Priority
The order in which you process colors is the mathematical solution to this puzzle. Process them out of order, and the math will not add up.
Priority 1: Dark Red (The Enabler)
Dark Red is your highest priority color at the start. It blocks the White cups and contributes to ice breaking. Even though the red ground area at the bottom is small, you must overfill it slightly if necessary to clear the stack. This is the "Key Color" for the first half of the level.
Priority 2: Golden Yellow (The Stabilizer)
Yellow is your safe space. The sun in the center is large, and the Yellow cups are plentiful in the middle column. Use Yellow to pad your count when the Left stack is congested or when you need to buy time for the scanner to move to a new area.
Priority 3: White (The Hazard)
White is the lowest priority until the end. The legs are thin and require very little paint. Processing White too early is the most common cause of failure. Treat White cups as obstacles until the very end of the level.
Priority 4: Pink (The Payload)
Pink is your primary volume color, but it is locked until the mid-game. Once the right gate opens, Pink becomes Priority #1. Do not mix Pink with Orange. Finish Pink completely before moving to Orange.
Priority 5: Orange (The Finisher)
Orange is the final color. It covers the background. If you start Orange too early, it will mix with the Pink or Red on the conveyor, creating muddy colors on the canvas. Save Orange for the final 15% of the level.
Key Tips: Pro Strategies for Level 66
These tips separate the beginners from the experts. Master these to consistently beat the level with three stars.
Reserve Slot Management
Do not view the bottom reserve slots as permanent storage. View them as a "Waiting Room" for exactly one or two high-value cups (like a White cup needed for the beak). If your reserve is full, you have failed the logistics test. Keep one slot empty at all times for emergency swaps.
The "Scanner Lag" Technique
There is a slight delay between when you tap a cup and when it pours onto the canvas. Use this to your advantage. Tap a cup just *before* the scanner enters the correct zone. If you tap while the scanner is *in* the zone, you might be too late and miss the spot, leading to a waste of paint.
Ice Block Counting
Count your taps out loud if you have to. "One, two, three..." Keeping a mental counter of how many cups you have sent towards the ice blocks prevents the frustration of thinking you are one tap away when you are actually five taps away.
The 2-Cup Rule
Never queue more than 2 cups of the same color onto the belt at once unless you are 100% sure of the canvas size. For example, the sun can take 3 yellows, but the beaks can only take 1 red. Stick to the 2-cup rule for 90% of the level to maintain control.
Visualizing the Stack
Look at the stack preview on the left. You can see the next 3-4 cups coming. If you see a White cup coming up, prepare your reserve slot or clear space in the main tray immediately. Never be surprised by a White cup.
Common Mistakes: What to Avoid
90% of failed runs on Level 66 are caused by one of these three specific errors. Learn them so you don't have to suffer through them.
The Premature Pink Panic
Players see Pink cups available in the next column and want to start tapping them immediately. This is fatal. If you flood the belt with Pink before the '20' Ice is broken, you will have no room to break the ice. The Pink cups will pile up, your tray will lock, and you will lose. Wait for the gate!
The "Trash" Mistake
Never, ever send a Pink or Yellow cup to the trash/bin unless it is an absolute emergency. The volume of paint required for the flamingos and sun is very high. If you trash a Pink cup early, you might run out of Pink paint later, forcing you to wait for a slow regeneration cycle.
Ignoring the Dark Red Ground
Some players try to be too precise with the Dark Red, waiting for the perfect pixel. While precision is good, the ice block timer is unforgiving. It is better to slightly overfill the bottom red ground section to break the ice faster than to wait for the perfect pour and run out of time.
Stuck Solutions: Troubleshooting Guide
Feel like you've hit a wall? Here is what to do when things go wrong.
Scenario: The Tray is Full and Locked
You have 5 cups in the tray, none are usable, and the ice isn't broken.
- Solution: Look at your reserve slots. If they are full, take one cup out and put it into the active tray. This might cause a "Game Over" if you aren't fast, but if you are lucky, you can quickly tap two usable cups to clear space. The goal is to cycle the cups.
Scenario: Out of Pink Cups
You unlocked the gate, tapped all the pinks, but the flamingo is only half-colored.
- Solution: You likely trashed a pink earlier or missed a tap. The only fix is to wait. The game will slowly regenerate Pink cups in the right column. While waiting, focus on perfecting the Yellow sun or the Orange background. Do not idle; keep clearing other colors.
Scenario: The White Cup Glitch
You have a White cup, but the scanner won't paint the legs.
- Solution: The legs (White) are often "covered" by the Red Ground or Pink Body in the logic. You must ensure the Red and Pink sections of the legs are fully finished first. If the leg isn't painted, finish the Red base of the leg, then try the White cup again.
Speed Run Tips: Beating the Clock
If you are chasing a high score or a time record, aggression is your friend.
The "Burn" Strategy
Don't wait for the scanner to settle. As soon as the level starts, tap the Dark Reds as fast as humanly possible. Break the '10' Ice within the first 10 seconds. This gives you a massive time buffer for the rest of the puzzle.
Pre-Loading the Queue
While the Left Key is being collected (the animation plays), you can still tap cups. Tap the next Yellow cup immediately. The game queues inputs during animations. Learning to input during these animations saves valuable seconds.
Batching the Orange
Once the details are done, don't tap Orange one by one. Tap 4, wait, tap 4. The background is huge and can absorb the paint. Batching is faster than rhythmic tapping for the final 10% of the level.