Level Overview: The Precision Challenge of Stage 74
The Visual Layout and Design
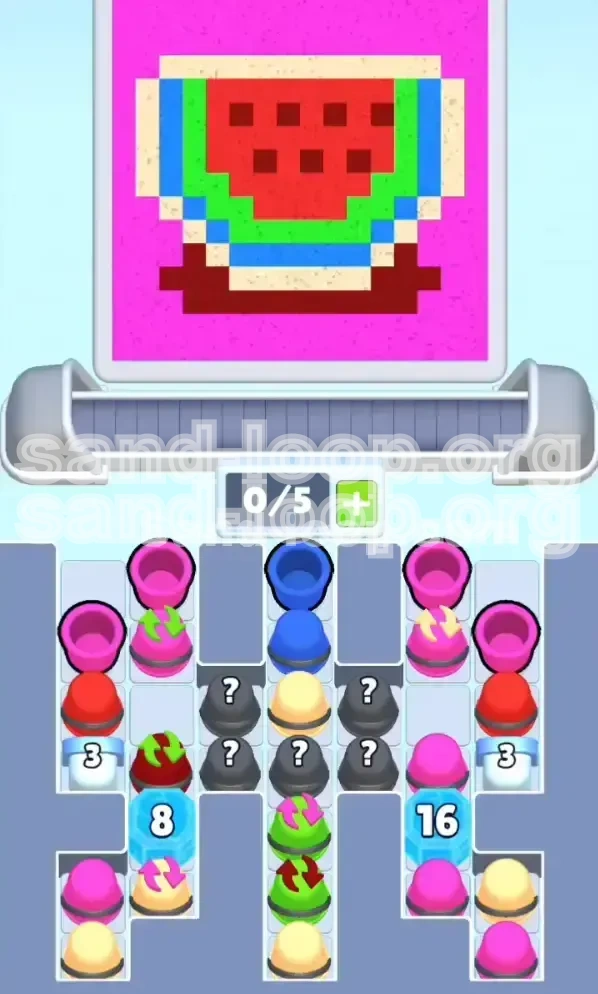
Sand Loop Level 74 is not just a puzzle; it is a test of your ability to manage limited space under pressure. The level features a complex, symmetrical pixel art design set against a vibrant magenta background. Visually, the canvas is divided into distinct regions requiring Red, Green, Blue, Cream, and Dark Brown. The high contrast between the background and the foreground elements means that "bleeding" colors—accidentally pouring sand into an adjacent area—will visually ruin the symmetry and likely result in a failed attempt. The design is dense, leaving very little empty buffer space between color zones.
Core Mechanics: The Slot Economy
The defining feature of this level is the strict constraint on conveyor slots. Unlike earlier levels where you could load cups freely, Level 74 forces you to manage a "Slot Economy." You start with 0 occupied slots, but the cup tray is deep and stacked. The challenge arises because the game forces you to make decisions about what to load *before* you actually need it. You cannot simply wait for a color to run out before loading more; you must predict your needs 2 to 3 cups in advance. If you fill all 5 slots indiscriminately, you will find yourself in a deadlock where the cup you need is trapped behind three cups you don't want.
The Timing Delay Mechanism
Understanding the "Lead Time" is the secret to beating this stage. There is a perceptible delay between the moment a cup enters the conveyor belt and the moment it sits under the dispenser. In Level 74, this delay is manipulated by the game speed to force errors. You must train yourself to recognize the "Point of No Return"—the specific spot on the belt where tapping the dispenser will ensure the sand lands exactly in the center of the cup. Tapping too early results in spilling over the rim; tapping too late leaves the cup partially empty, causing you to tap again and risking an overfill.
Win Conditions and Success Metrics
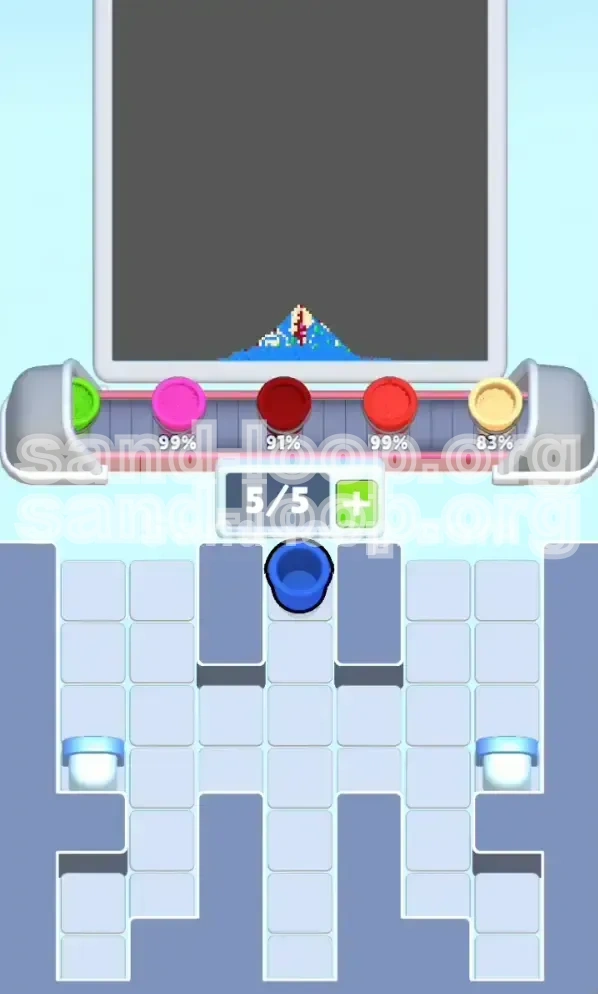
To achieve a 3-star rating on this level, you cannot merely fill the colors; you must optimize your flow. Success is measured by your efficiency: minimizing the number of "dry passes" (letting a cup go under the dispenser without pouring) and avoiding any "overflow" events (filling a cup past 100%). The game's internal logic triggers a fail state if any single color exceeds its capacity by more than 10-15%, meaning you have a very small margin for error. Precision is prioritized over speed.
Phase 1: The Opening Strategy (First 30 Seconds)
Step 1: The Initial Load Order
Do not start by loading random cups. The most successful opening sequence involves a specific triage of colors. Begin by loading **one Red cup** (Position 1), **one Blue cup** (Position 2), and **one Magenta cup** (Position 3). Leave the two slots at the end of the conveyor (Positions 4 and 5) empty. This setup is critical because it gives you the flexibility to receive a new cup from the tray while the first three are processing, without causing a bottleneck at the dispenser.
Step 2: Establishing the Heartbeat
Once the first cup hits the dispenser, establish a rhythm. Watch the movement of the belt. For the first three cups, your goal is not to fill them to the brim, but to reach **50-60% capacity**. Use short, controlled taps. Do not hold down the pour button. By stopping at half-full, you prevent the "slosh" effect where excess sand piles up on one side, which can confuse the game's collision detection and cause spills when the belt jerks forward.
Step 3: Unblocking the Cream Reserve
The Cream cups are located deep in the stack, often buried behind other colors. Around the 20-second mark, you need to start clearing a path to them. If you ignore this until the mid-game, you will find yourself needing Cream for the final details but unable to access it because your conveyor is clogged with primary colors. Actively load and discard—or "burn through"—the cups blocking the Cream stack to ensure it is accessible when the canvas is 40% complete.
Step 4: Handling the First Mystery Cup
A "?" cup will appear early in the cycle. Do not panic and do not load it immediately unless you have a clear slot. Let it cycle through the tray availability once. Observe if it is a color you critically need (like Dark Brown) or a surplus color (like Magenta). If it is a surplus color, let it sit in the tray. Loading it onto the belt just to "get it out of the way" will waste a valuable slot that should be used for a color you are actively running out of.
Phase 2: Color Management and Processing Order
The Primary Triad: Red, Blue, Magenta
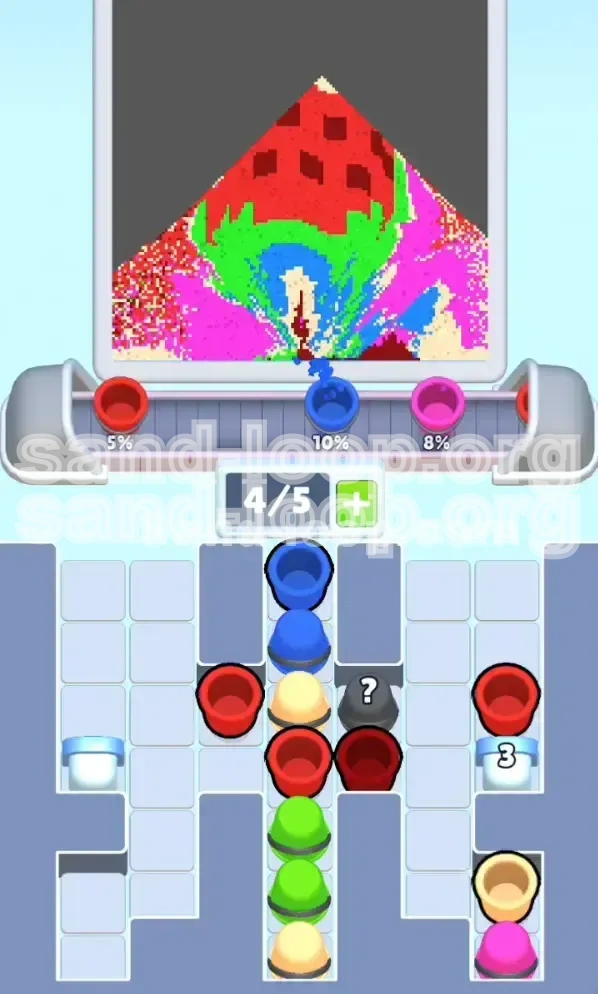
These three colors form the backbone of the image and account for approximately **75% of the total sand volume**. You must process them in a rotation: Red -> Blue -> Magenta. Do not focus on one until it is finished; instead, keep their progress bars relatively even. If Red is at 80% and Blue is at 40%, stop loading Red immediately. An unbalanced progress bar is the number one cause of game overs in Level 74 because it forces you to desperately hunt for a specific color while the timer ticks down.
Secondary Colors: Cream and Dark Brown
Treat Cream and Dark Brown as "Detail Colors." They are used sparingly, often for outlining or small pixel clusters. Only load these cups when your primary colors are stabilizing. A common mistake is loading a Cream cup too early and then forgetting it on the belt, leading to an accidental overfill when you instinctively tap the dispenser for a different color. Keep these in the tray until the canvas is about **60% filled**.
The Critical Pouring Thresholds
To avoid overfill, you need to know the exact numbers. For Large Cups (Red, Blue, Magenta), stop pouring when the meter reaches **85%**. The game's physics engine often adds a "settling" amount of sand after you stop tapping, which can push an 88% fill to 101% (failure). For Small Cups (Cream, Brown), stop at **75%**. These cups have smaller mouths and overflow faster. It is always better to have two cups at 90% than one cup at 100% and another at 10%.
Managing the Progress Meters
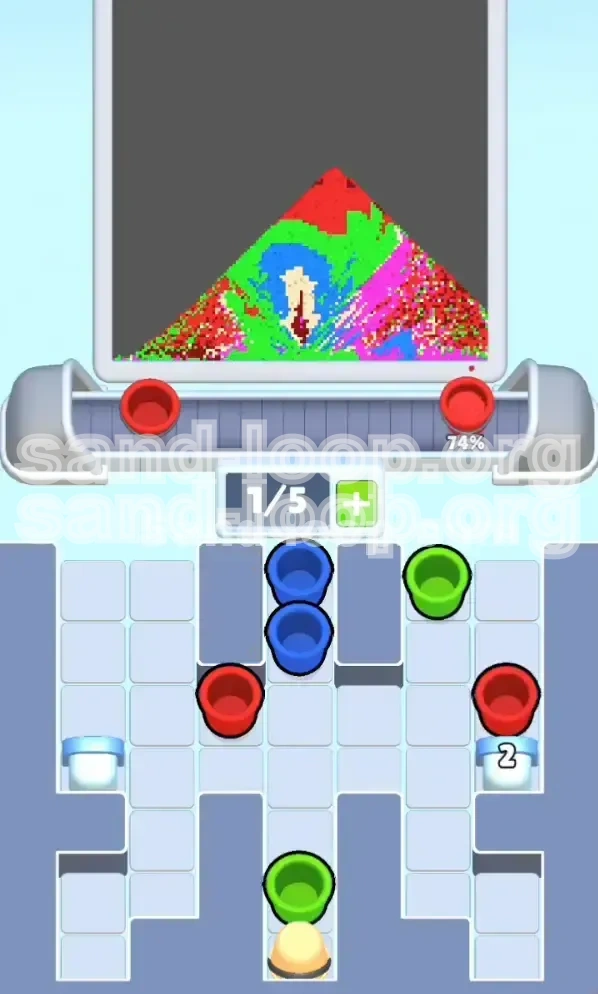
Glance at the top progress meters every **5-7 seconds**. Do not obsess over them, but do not ignore them. If you see a meter climbing rapidly (jumping by 10% in one pour), immediately switch context. That rapid climb indicates a concentrated area of the canvas that is almost full. Pouring into that same area again is inefficient. Shift your focus to a color with a lower percentage to balance the load on the conveyor.
Phase 3: Advanced Tactics and Problem Solving
Recovering from a Jammed Conveyor
It happens to the best of us: you load five cups, and suddenly the belt stops because you can't make a match. This is a "Soft Lock." To recover, identify the cup currently under the dispenser. If you don't need it, **let it pass without pouring**. This is painful but necessary. As it exits, the belt will shift, bringing a new cup forward. If the new cup is also useless, let it pass too. By cycling 2-3 cups without pouring, you free up visual space and often shuffle the queue enough to unblock the color you actually need.
Dealing with "Zombie" Cups
A "Zombie Cup" is a cup that you filled to 99%, but refuses to clear because the game needs one more grain of sand to register it as complete. Do not try to force a tiny pour; you will likely overshoot. Instead, load that specific color again. Pour into the *new* cup. The game will often deduct from the "Zombie Cup" to fill the new one, or sometimes the act of loading a fresh cup triggers the logic to clear the old one. If it remains stuck, let the Zombie Cup fall off the end of the belt; the game usually refunds the progress or auto-completes it if it was close enough.
What to Do If You Overfill a Color
If you accidentally push a color to 105%, you are in "Recovery Mode." Immediately stop all pouring of that color. If the color is critical (like Red), you might have to restart the level. However, if it is a secondary color (like Cream), you can sometimes salvage the run. Focus entirely on the remaining colors. The game's fail condition is usually based on the *average* completion or total waste, so if you max out one color but perfectly fill the others, you might still scrape a victory. Do not rage-quit immediately; play it out.
Strategic Use of the "?" Cup
By the mid-game, the "?" cups become a strategic resource rather than a nuisance. If your conveyor has a gap and you are waiting for a specific color to refresh in the main tray, load a "?" cup. If it turns out to be the color you are currently processing (e.g., Magenta), pour into it immediately. If it is a color you don't need, let it ride the belt as a "dummy cup"—a placeholder that keeps your rhythm going without forcing you to pour. This prevents you from standing idle while waiting for the tray to replenish.
Key Tips for a Perfect Run
Visualizing the Sand Arc
The sand in Sand Loop Level 74 has a physics arc. It does not fall in a straight line; it curves slightly depending on the speed of the belt. When the belt is moving fast, aim your tap slightly *behind* the center of the cup (towards the top of the screen). When the belt is slow or stopping, aim *ahead* (towards the bottom). Mastering this aim compensation will reduce your spillage rate by nearly 50%.
The "Three-Tap" Rhythm Method
To maintain consistency, adopt the "Three-Tap" method. Instead of holding the button, tap three times in quick succession for large cups. Pause for half a second to check the level, then tap three times again. This rhythmic input helps you maintain control and prevents the "finger drift" that happens when you hold the button too long. It forces you to consciously evaluate the fill level after every third tap.
Audio Cues and Feedback
Don't just play with your eyes; use your ears. The sound of the sand hitting the cup changes pitch when the cup is nearly full—it becomes a higher-pitched "ting" rather than a dull "thud." This audio cue is your fastest indicator that you are approaching the limit. If you hear the pitch change, release the button immediately. By the time your eyes register the visual "full" state, it is often too late.
Speed Run Shortcuts
If you are aiming for a speed run (under 45 seconds), you must ignore the Cream and Brown colors until the very last second. Focus exclusively on Red, Blue, and Magenta. Load them aggressively. The idea is to fill the background and main shapes so fast that the detail colors become the only thing left. At that point, you can pour Cream and Brown without fear of contamination because the surrounding areas are already full and won't accept the wrong sand. This "Reverse Order" strategy is high-risk but yields the fastest times.
Understanding the Algorithm
The game generates cups based on an algorithm that favors colors currently low on the canvas. If you are stuck waiting for Blue, the game might be withholding it because you have a small uncolored Blue pixel that is hard to see. Zoom in (pinch out if on mobile) to find that tiny pixel and fill it. Once the canvas shows zero availability for Blue (because it's full), the algorithm will stop generating Blue cups and start generating the colors you actually need. Keep the canvas clean to keep the cup flow efficient.