
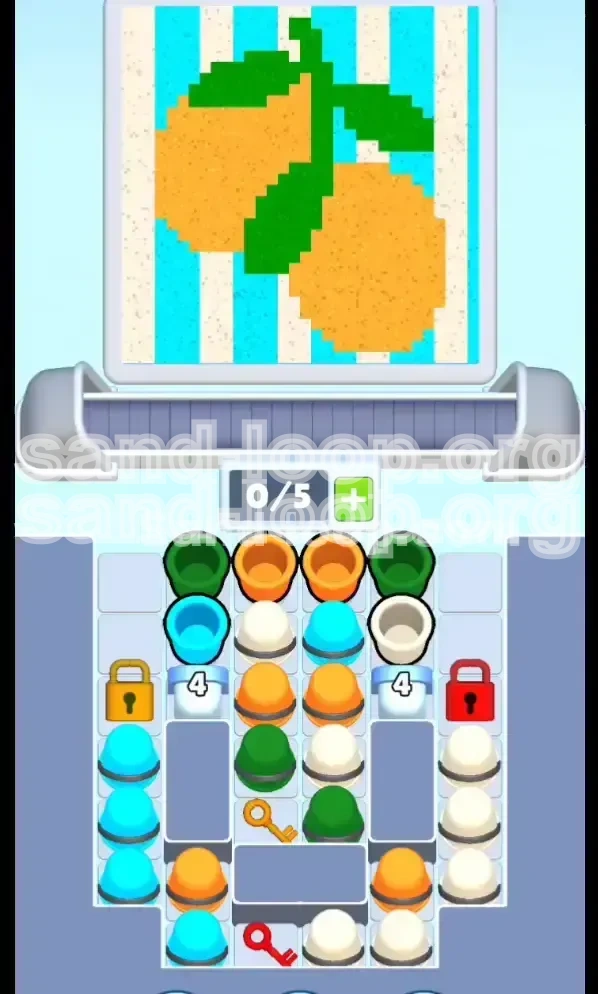
Level 78
HARDHow to solve Sand Loop level 78? Get instant solution for Sand Loop 78 with our step by step solution & video walkthrough. Sand Loop 78 tips and guide.
Play Sand Loop Now
Experience the puzzle challenge firsthand
Game Screenshots

Sand Loop Level Guides
Level 78 Comprehensive Strategy Guide: Sand Loop Mastery
1. The Core Challenge: Balancing Three Color Zones
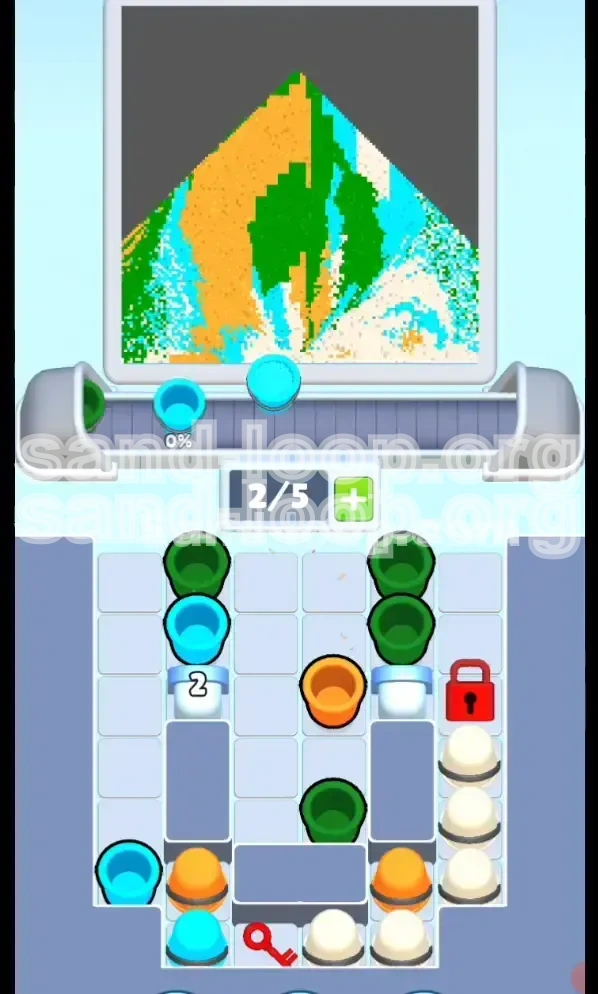
Sand Loop Level 78 presents a deceptive puzzle that tests your inventory management skills as much as your pouring accuracy. The level features a complex canvas split into three distinct color zones: a large Cyan background area, a lower Yellow/Gold region, and a central Green leaf structure. The primary difficulty lies not in the painting itself, but in the "Conveyor Economy." You are limited to 5 active slots on your conveyor belt, but your supply tray contains upwards of 8-10 cups, many of which are locked behind "Gate 4" mechanisms.
2. Critical Inventory Analysis
Before making your first move, analyze your supply tray. You will notice a bottleneck on the left side: Cyan cups are buried at the bottom of a stack, blocked by other colors. Your immediate accessible cups are usually Green and Orange/Yellow. If you blindly load all available cups onto the belt immediately, you will fill your 5 slots with the wrong colors, leaving no room to fetch the buried Cyan cups when the gates open. This "Slot Lock" is the leading cause of failure in this level.
3. The Win Condition
Victory is achieved by filling three specific progress bars to 100%: Cyan, Yellow (often represented by Orange cups), and Green. The "White" pixels must be completely eliminated. The challenge is maintaining a "Rhythm of Rotation"—continuously moving the correct cups into the pour point without causing a traffic jam on the belt. You must finish with 0 overspill and 100% coverage.
4. The "Slot Economy" Concept
In Level 78, an empty conveyor slot is a valuable asset. It represents flexibility. If your conveyor is full (5/5), you are forced to pour whatever is at the head of the line, potentially ruining your color balance. By keeping 1 or 2 slots open, you gain the ability to pull new cups from the tray as gates unlock, ensuring you can always access the color you actually need.
5. Estimated Difficulty and Time
For an intermediate player, this level typically takes between 90 and 120 seconds to complete. However, a rushed attempt can lead to restart loops that drag the time out significantly. Patience is the ultimate speedrunning strategy here. Expect to fail your first few attempts as you learn the specific unlocking sequence of the gated cups.
Step-by-Step Walkthrough: The Rotation Method
Phase 1: The Setup (0% - 25% Progress)
Objective: Unlock the Cyan stream and establish a color balance.
Start by loading only two cups onto the conveyor belt. We recommend starting with one Green cup and one Orange/Yellow cup. Do not touch the Cyan stack yet. As the belt moves, tap the pour point once for each color. This initial "splash" is crucial. While these cups are traveling towards the disposal end, you will notice the numbered gates in your tray lowering. This is your cue to pull the newly unlocked Cyan cup from the left stack. Load it immediately.
Phase 2: The Mid-Game Rotation (25% - 75% Progress)
Objective: Maintain equilibrium between the three colors.
At this stage, your progress bars should look relatively even: Cyan (~35%), Green (~35%), Yellow (~35%). If one color lags behind, prioritize loading that cup color next. The key here is the Single-Tap Pour. Never hold down the pour button. Tap, wait for the liquid to spread, and tap again. This prevents the "splashback" or overfill errors that waste liquid. Keep your conveyor load light—aim for 3 cups maximum on the belt at any time. This keeps the flow liquid and allows you to swap cups instantly if a color maxes out unexpectedly.
Phase 3: The "Gate 4" Management
Objective: Preventing inventory jams.
As you cycle through cups, the "Gate 4" indicators will disappear, freeing up the deeper cups in the tray. A common mistake is ignoring these new cups. If you have a cup cycling off the belt (being disposed), immediately replace it with a newly unlocked cup from the tray, even if you don't pour it immediately. This "refreshes" your hand. You want the options available on the belt, not stuck in the tray. Think of the conveyor as your active "hand" of cards—play the right ones, but draw the new ones constantly.
Phase 4: The Final Stretch (75% - 95% Progress)
Objective: Precision over speed.
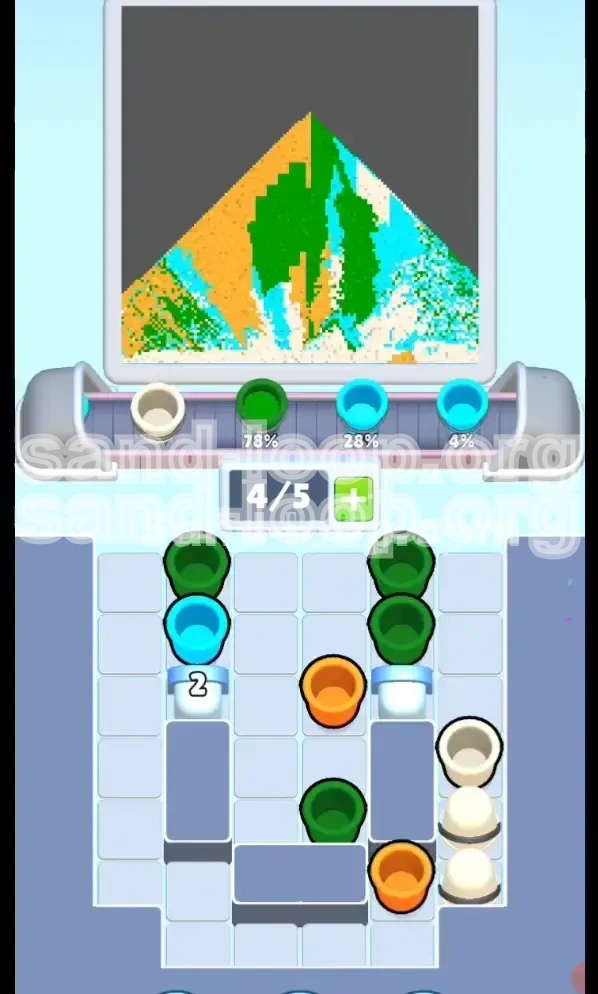
As you approach the 90% mark, the canvas will look mostly full, and the remaining white pixels will be small and scattered. This is where the "Slot Economy" saves you. You might have Yellow at 90%, Cyan at 88%, and Green at 92%. You need to cycle cups specifically to hit these targets. If a cup arrives at the pour point that you don't need (e.g., a Green cup when Green is at 95%), let it pass. Do not pour. Let it roll off the end of the conveyor to free up the slot, then load the color you actually need.
Phase 5: The Critical 1% Strategy (95% - 100%)
Objective: Avoiding the fatal overfill.
This is the most dangerous moment in Level 78. The margin for error is zero. Switch to "Micro-Pouring." If your game allows it, tap the pour button as lightly as possible, or time the taps to the exact rhythm of the belt movement. Watch the progress bar like a hawk. If Cyan is at 99% and Yellow is at 98%, load a Cyan cup. Pour one drop. Check. Pour another drop. If Cyan hits 100%, stop immediately, even if the cup is half-full. You can cycle the half-full cup off the belt to make room for the final Yellow cup.
Color Order and Processing Guide
1. The Cyan Foundation (Background)
Percentage Requirement: ~40-45% of total canvas.
Strategy: Cyan covers the vertical stripes and the open sky areas. It is your largest color zone. Because the Cyan cups are initially buried under the stack on the left, your priority in the first 10 seconds of the level must be freeing them. Do not waste your early pours on Green or Yellow. Use your first two pours to clear space in the tray, then aggressively swap to Cyan as soon as it's accessible. Cyan should be your "background noise"—always filling in the gaps while you manage the smaller colors.
2. The Yellow/Gold Zones (Lower Mass)
Percentage Requirement: ~35% of total canvas.
Strategy: The Yellow/Gold liquid (often coming from Orange cups) occupies the bottom corners. This region is large but blocky. It accepts liquid quickly but can also overfill easily if poured too fast in the corners. The shape is somewhat geometric, so you can be slightly more aggressive with your tapping here than on the Green leaf, but you must stop exactly at 100% to avoid spilling into the Cyan stripes above.
3. The Green Leaf (Centerpiece)
Percentage Requirement: ~20-25% of total canvas.
Strategy: The Green zone is the "Bottleneck." It is small, organic in shape, and surrounded by other colors. Overfilling Green is the easiest way to fail Level 78. Treat Green as a "precious resource." Only pour Green when you have a clear visual path to the white pixels. If Green reaches 90% early, stop pouring it completely. You can always come back to it with a single precise drop at the very end. Prioritize Cyan and Yellow first.
4. Processing Order Priority
Unlocking Priority: Cyan > Yellow > Green.
Pouring Priority (Mid-Game): Balance all three, keeping them within 10% of each other.
Finishing Priority: Finish the one that is easiest to isolate (usually Cyan or Yellow), then use the remaining open slot to micro-pour the final color. Avoid trying to finish two colors simultaneously in the last 2%.
5. Handling Color Contamination
If you notice a color splashing into a zone where it doesn't belong (e.g., Yellow splashing into the Green leaf), stop pouring that color immediately. Do not try to "fix" it by pouring the correct color over it immediately, as the physics engine might register the overflow. Instead, cycle the belt to clear the current cup, then carefully pour the correct color. The game usually prioritizes the "top" layer of liquid, so fixing contamination is possible but risky. Prevention is better than cure.
Key Tips for Success
1. The "One Slot Open" Rule
This is the golden rule for Level 78. Never, under any circumstances, let your conveyor belt reach 5/5 capacity unless you have a plan to empty it immediately. Always strive to keep at least one slot empty. Why? Because when a new cup unlocks in the tray, you need a slot to move it to. If the belt is full, you are stuck watching the wrong colors cycle by while your needed cup rots in the tray. An open slot is a "Get Out of Jail Free" card.
2. Mastering the "Skip" Maneuver
Many players feel compelled to pour from every cup that reaches the pour point. This is a trap. If the cup at the front is Green, but your Green zone is 98% full, do not pour. Let the cup travel to the end of the belt and be disposed. This "Skip" costs you a few seconds but saves your run. It frees up a slot for a more useful color. Get comfortable doing nothing; sometimes the best move is no move.
3. Visualize the "Gates" Early
At the start of the level, look at the numbers on the gates in the cup tray. They usually require a specific number of cups to be cycled or specific colors to be used before they pop. Understanding this mechanic helps you predict *when* the Cyan cups will become available. Don't wait until the gate opens to look for a cup; have the slot ready *before* it opens so you can snatch it the instant it's available.
4. The "Half-Pour" Technique
When you are within 5% of finishing a color, stop looking at the canvas and start looking at the Progress Bar. The canvas can be deceptive, making it look like there's more space than there actually is. The progress bar is the source of truth. Tap the pour button, wait for the bar to move, then assess. If you need 2% to finish, one short tap might be enough. Over-pouring by even 1% can trigger a failure state in strict modes.
5. Managing the "End-Game" Queue
In the final 10 seconds of the level, you might have 2 colors sitting at 99%. If you have two slots remaining, load both colors onto the belt. Cycle the first one, pour the final drop, then immediately cycle the second. This "Queueing" prevents you from having to wait for the belt to transport the final cup, which can feel like an eternity when you are so close to winning.
Common Mistakes to Avoid
1. The "Full Belt" Syndrome
This causes 80% of failed runs. Players load 4 or 5 cups immediately because they are anxious about running out of paint. This locks up their ability to manage the inventory. Remember, the conveyor is a transport mechanism, not a storage unit. Keep it moving, keep it empty.
2. Ignoring the Smallest Zone (Green)
Because Green is the smallest area, it fills up the fastest. A common mistake is pouring Green aggressively at the start because it's easily accessible, only to find yourself at 60% progress with Green at 100% and Cyan at 40%. You are then forced to cycle useless Green cups for the rest of the level, wasting massive amounts of time. Start conservatively on Green.
3. Panic Pouring
When the clock is ticking down or the belt is moving fast, the instinct is to tap faster. Resist this. Fast tapping leads to "bubbles" and overflows, where the liquid piles up on top of itself rather than spreading out. The physics engine needs a split-second to register the fill. Rhythmic, medium-speed tapping is always faster than panicked mashing because you don't have to undo mistakes.
4. Premature Gate Unlocking
Sometimes players focus so hard on unlocking the "Gate 4" cups that they neglect the actual painting. Don't cycle cups just to open a gate if it means ignoring the canvas. The gates will unlock naturally as you play to win. Prioritize the canvas progress; the inventory management should serve the canvas, not the other way around.
5. Misjudging the Corners
The Yellow/Gold zones in the lower corners often have sharp angles. Liquid can get "stuck" in the corner of the pour zone if you aren't careful, leading to a false reading on the progress bar. Ensure you are aiming the camera (if possible) or tilting the pour so the liquid flows into the corner of the canvas, not just the center of the Yellow zone.
Stuck? Here Are the Solutions
Scenario: "I'm stuck with no Cyan cups available!"
Problem: You have loaded the belt with non-Cyan cups, and the Cyan is still buried in the tray.
Solution: You must create space. Look at your belt. Is there a cup you can "Skip" (let roll through)? If yes, skip it. If no, you must pour out the current cups as quickly as possible (even if they are at 90%) to clear the slots. Once a slot is open, the game logic usually refreshes the tray, allowing you to grab the Cyan. It might cost you a bit of overfill on the other colors, but you can recover from 102% easier than you can recover from having no Cyan at all.
Scenario: "The belt is full and nothing is moving!"
Problem: A deadlock where all 5 slots are full of colors you don't need.
Solution: This is the "Tough Luck" scenario. You have to bite the bullet. Pick the cup at the very front of the line (the one closest to pouring). If it's a color you don't need, you must let it pass. Do NOT pour it. Wait for it to cycle off. This takes time. As soon as it drops off the end, load the *next* cup. Use this time to take a deep breath and reassess your color needs. One free slot is all you need to start the recovery.
Scenario: "I keep overfilling the Green zone!"
Problem: The Green leaf is small and sensitive.
Solution: Switch to a "Micro-Management" mode. Stop looking at the big picture. Focus entirely on the Green leaf. Only pour when the liquid has settled completely. If you are using a mouse or touch screen, try tapping the button as lightly as physically possible. Alternatively, if Green is at 95%+, stop pouring it entirely. Finish Cyan and Yellow to 100%, then use the wide-open space of the finished level to carefully place the final Green drops without pressure.
Scenario: "I ran out of cups!"
Problem: You have poured all available cups and are still at 95%.
Solution: This usually means you poured too fast and lost liquid to inefficiency (splashing). Look at the "Recycle" bin or where the cups go. Sometimes the game respawns cups in the tray after a certain number of cycles. Cycle the empty belt a few times. If no new cups appear, you might be in a "soft lock" state where you need to restart, as you simply wasted too much paint. It's a hard lesson in efficiency!
Speed Run Tips for the Pros
1. The "Double Tap" Start
For advanced players looking to shave seconds off the clock: At the very start, you can load two cups immediately if you know exactly where they are going. Load a Green and a Yellow. As soon as the level starts, tap the pour point twice in quick succession for each, then immediately drag a Cyan cup onto the belt. This aggressive opening bypasses the "slow start" but requires perfect execution to avoid the Slot Lock.
2. Pre-Loading the Queue
While a cup is traveling from the tray to the pour point (this takes about 2 seconds), use that time to identify your *next* cup. Don't wait for the pour to finish. Have your finger hovering over the next cup in the tray. If you minimize the "thinking time" between cycles, you can dramatically increase your throughput. The belt moves at a fixed speed; your reaction time is the only variable.
3. The "98% Dump" Strategy
If you are speedrunning, perfection is secondary to speed. If a color is at 98% and you have a full cup of it, dump the whole cup rapidly. The game's physics usually allows for a tiny bit of overflow (up to 101-102%) without triggering a failure, provided it spreads out fast enough. This is risky, but if you are going for a record time, playing it safe is too slow. Only use this if you are confident in the game's overflow tolerance.
4. Ignore the "Perfect" Pattern
Don't try to paint the stripes perfectly from left to right. In a speed run, chaos is your friend. Pour Cyan in the middle, let it spread out to the edges. Pour Yellow in the center of the zone. The liquid physics will fill the nooks and crannies for you. You only need to manually intervene when the flow stops. Trust the physics engine to do the heavy lifting.
5. Belt Memory
Memorize the order of cups in the tray. If you know that the 3rd cup in the stack is the last Cyan you need, plan your moves 3 steps ahead. Don't just react to the cup in front of you; play the cards that are coming up. This foresight allows you to avoid the "Skip" maneuvers that waste time, ensuring that every cup that hits the belt is a cup that gets poured.