
Level 80
HARDHow to solve Sand Loop level 80? Get instant solution for Sand Loop 80 with our step by step solution & video walkthrough. Sand Loop 80 tips and guide.
Play Sand Loop Now
Experience the puzzle challenge firsthand
Game Screenshots
Sand Loop Level Guides
Sand Loop Level 80 Walkthrough: Mastering the Sunset Cityscape
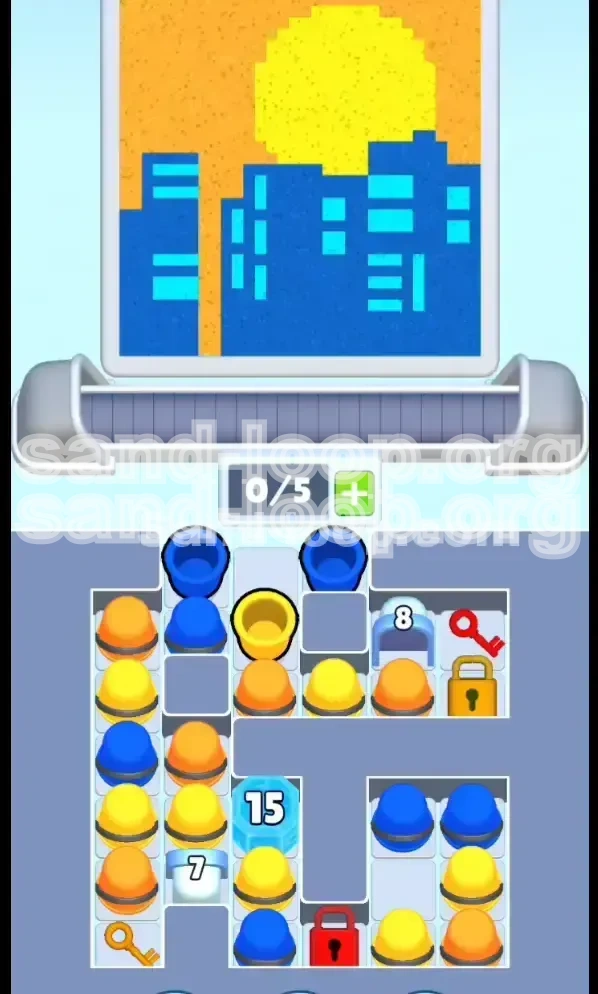
Welcome to the ultimate strategic guide for conquering Level 80 in Sand Loop. This stage represents a significant difficulty spike, moving beyond simple color matching into complex resource management and logic puzzles. The "Sunset Cityscape" is visually stunning, featuring a vibrant gradient sky and a pixel-art skyline, but do not let the aesthetics distract you. This level is a test of your ability to manage a severely limited tray capacity (Slot 0/5) while navigating a triple-lock dependency chain. One wrong move at the start can lead to an unwinnable state, requiring a complete restart. This guide will break down every mechanic, provide a step-by-step execution plan, and offer pro-tips to ensure you clear this stage on your first attempt.
Understanding the Level Architecture
Before you tap a single cup, it is vital to understand the digital geography of Level 80. The board is divided into three distinct vertical zones, each serving a different purpose in the unlock chain.
- The Left Zone (Key Origin): This area contains the Gold Key trapped behind a column of unstable cups. It is the ignition switch for the entire level.
- The Right Zone (The Ice Fortress): A heavily fortified area containing the Red Key, protected by an 8-hit Ice Block and specific color traps.
- TheThe Center Zone (The Vault): Once unlocked, this holds the bulk of your Blue and Yellow resources, guarded by the massive 15-hit Ice Block.
Core Mechanics: The Triple Lock System
Level 80 is defined by its three-layered security system. You cannot brute-force your way through; you must solve these locks in a specific sequence.
- The Gold Lock: Initially seals the Right Zone. You must ignore the tempting cups in the center initially and focus entirely on the left to release the Gold Key.
- The Red Lock: Located at the bottom center. It blocks access to the largest reservoir of paint cups. Opening this requires retrieving the Red Key from the Right Zone.
- The Ice Blocks: These act as gates requiring "hits" (cup passes) to open. The distribution is 7 hits (Left), 8 hits (Right), and 15 hits (Center).
Resource Management: The 0/5 Slot Constraint
This is the most critical constraint. Your conveyor belt can only hold 5 active cups at any time.
- The Danger of 5/5: If your belt is full, the physics engine stops functioning. New cups cannot drop, keys cannot fall, and you are effectively deadlocked.
- Rule of Thumb: Always keep at least 1 or 2 slots open on your belt unless you are executing a specific combo. Think of your empty slots not as wasted space, but as "buffer zones" that allow the level physics to animate.
Visual Analysis: The Sunset Palette
The canvas demands precision, particularly with the "Danger Zones" of the pixel art.
- Orange & Yellow (Background): These occupy the top 60% of the canvas. They are high-volume fills and generally safer to manage.
- Dark Blue (Structure): The city skyline requires solid blocks of Dark Blue. You must prevent Cyan from bleeding into these zones.
- Cyan (Detail): The windows are small, 1x1 pixel details. The game often releases Cyan in short bursts. If you aren't ready with a Dark Blue cup to follow up, the Cyan will ruin the building facades.
Phase 1: The Gold Key Protocol (Initiation)
The first 30 seconds of Level 80 are the most dangerous. Panic tapping here will fill your belt with useless cups, trapping the Gold Key on the left column. You must act with surgical precision.
Step 1: Isolate the Left Column
Ignore the center and right sides of the screen completely. Your eyes should be locked on the far-left column.
- Target: The stack containing Orange, Yellow, and Blue cups resting directly on top of the Gold Key.
- Action: Tap the top 3 cups of this stack to send them to the belt.
- Stop Condition: Do not tap more than 3 or 4 cups initially. You need the stack to drop, but you cannot afford to clog your belt with these initial colors if they don't match the current nozzle.
Step 2: The Drop Strategy
Once the top cups are on the belt, gravity takes over. The stack will collapse.
- Physics Check: Watch the Gold Key. It needs to slide down the column to the bottom pickup chute.
- Belt Management: If the cups you tapped are Yellow/Orange and the nozzle is currently pouring Blue, do not match them immediately. Let them ride the belt (loop) to keep slots open, or sacrifice them into the "wrong" color bin if necessary to clear space. The priority is getting the key, not saving the paint.
Step 3: Acquiring and Using the Gold Key
Once the Gold Key hits the bottom of the tray, it is automatically collected.
- Immediate Result: The Gold Lock on the far right dissolves.
- New Access: You now have a path to the Right Zone, where the Red Key is hiding. Do not go there yet. Finish clearing your immediate belt space first.
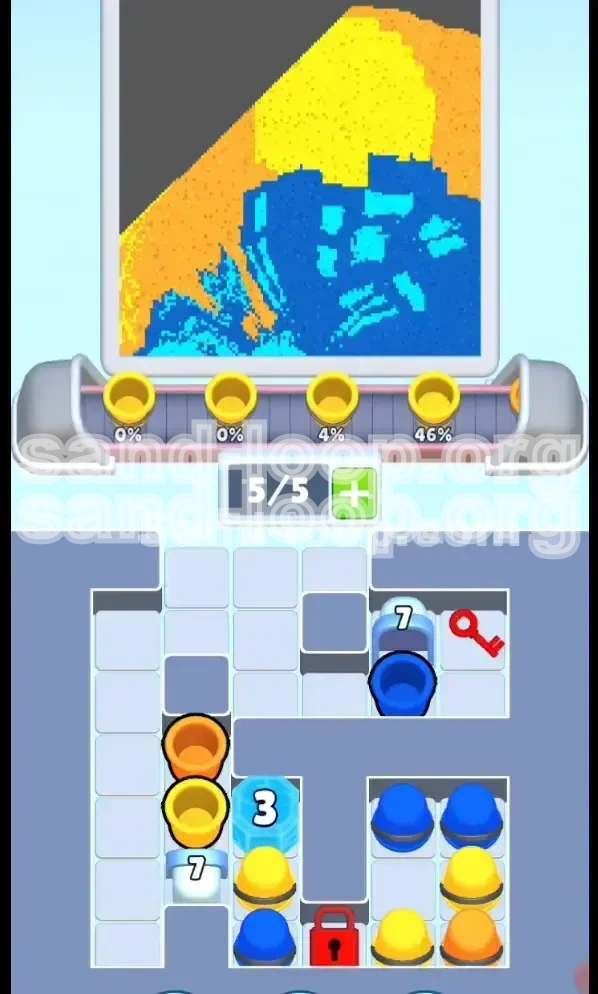
Phase 2: The Red Key Retrieval (Expansion)
With the Gold Lock gone, the board shifts. Your next objective is the Red Key, but it is guarded by an 8-hit Ice Block and a deceptive stack of cups.
Step 1: Clearing the Right Zone Chokepoint
Look at the newly opened right side. The Red Key is visible but physically blocked by cups sitting above it.
- The Cup Stack: There is likely a mix of Orange and Yellow cups sitting directly on the "lid" of the Red Key's chamber.
- Action: You must tap these to send them to the belt. Again, restraint is vital. Send 2-3 cups max. Allow the stack to drop.
- The Ice Block (8 Hits): Underneath the cups, you will see an Ice Block. You do *not* need to break this fully yet, but you need to expose it.
Step 2: Managing the Color Mismatch
During this phase, the nozzle color might be cycling through the Sunset colors (Orange/Yellow).
- Strategy: If the nozzle is Orange, and you tap a Yellow cup from the Right Zone, that Yellow cup is now "dead weight" on your belt until the nozzle switches.
- Tip: Use the loop. Let that Yellow cup circle around the back of the belt. Do not let it block the entrance of new cups from the left. You need that flow to keep the game moving.
Step 3: Securing the Red Key
As the cups above the Red Key are cleared, the key will drop down. It might slide behind the 8-hit Ice Block.
- Passive Collection: The Red Key is automatically collected when it reaches the bottom tray.
- The Unlock: The moment you grab this key, the massive Red Lock at the bottom center shatters. This is the turning point of the level. You now have access to the main reserves.
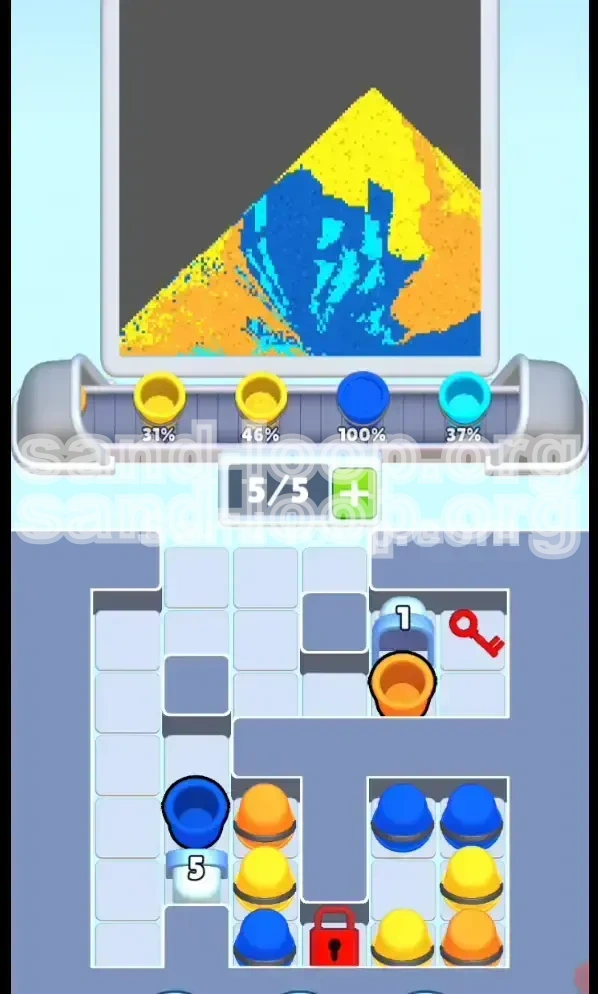
Phase 3: The Ice Block Grind & Color Theory
Now the real resource management begins. The center of the board is a fortress of ice containing the paint needed for the city skyline.
The 15-Hit Ice Block Strategy
The center block is the boss of this level. It requires 15 cups to be passed over it to break.
- Efficiency Check: Do not rely on random taps. You need a conveyor belt full of the *correct* colors to maximize your damage per second.
- Blue & Yellow Reserves: Behind this block are the bulk of your Dark Blue and Yellow cups.
- The Plan: You want the nozzle to be Yellow or Blue when you start breaking this. If the nozzle is Orange, tap minimal cups or use the loop to wait for the color switch. Breaking ice with the wrong color is a waste of potential resources.
Processing the Leftover 7-Hit Block
Don't forget the left side. That 7-hit block is still there, likely holding some Cyan or detail colors.
- Simultaneous Action: While waiting for the nozzle to cycle to Blue for the center block, tap cups from the left to damage the 7-hit block.
- Prioritization: The 15-hit block is 70% of the objective. The 7-hit block is 30%. Focus your mental energy on the center.
Advanced Tactics: The Cyan Window Challenge
This is where most players fail in the final stretch. The "Sunset Cityscape" is not complete without the Cyan windows, and they are tricky.
Timing the Cyan Bursts
Cyan paint is released in short, sporadic bursts compared to the continuous flow of Yellow or Orange.
- The Signal: Watch for the nozzle to turn Cyan. It usually happens after the main sky (Orange/Yellow) is filled.
- The Setup: You need a Dark Blue cup staged *behind* your Cyan cup on the belt.
- Execution: The Cyan paints the window. Immediately after, the nozzle will likely switch or stay Cyan for a split second. You want a Blue cup ready to paint the wall *around* the window, or vice versa, to define the edges.
Avoiding Contamination
Contamination occurs when a broad color (like Dark Blue) overwrites a detail color (like Cyan), or when the background (Orange) bleeds into the city.
- The Buffer Method: Keep 1 slot empty on your belt. If you see a Cyan cup coming up but you aren't ready, use the empty slot to let a cup pass by unpainted if necessary (though usually, you just want to match it).
- The "Save" Technique: If you accidentally have a Blue cup on the belt when the nozzle is Cyan, and the Cyan is about to paint a window, you might be forced to waste the Blue cup into a disposal bin or a safe area to save the window. Always prioritize the detail paint (Cyan) over the base paint (Blue).
Dealing with the Slot Capacity (5/5)
As you break the ice blocks, you will be flooded with cups. This is the "Oh no" moment for many players.
- Emergency Flush: If you are at 5/5 slots and the Red Key area is dumping cups, you must aggressively match colors to the nozzle to clear space, even if it means painting over a slightly "wrong" area temporarily.
- Recovery: You can fix paint errors later with the correct colors. You cannot fix a deadlock. Keeping the belt moving is the absolute highest priority.
Pro Tips & Speed Running Strategies
For those looking to achieve a high score or a three-star rating, simple survival isn't enough. You need efficiency.
Speed Run Tip: The Pre-Tap
While the game is loading the "Level 80" title screen, you can mentally plan your first three taps.
- The Move: As soon as the level starts, tap the Top-Left (Gold Key path) cup, then the Top-Center (Ice path) cup, then Top-Right. This initiates the physics cascade immediately.
- Gain: This shaves off 2-3 seconds of reaction time, which is huge in a timed run.
Score Multiplier: Combos
Sand Loop rewards consecutive matches.
- Strategy: Try to hold onto cups of the same color. If you have 3 Yellow cups on the belt, wait for the Yellow nozzle. Do not feed them into the Orange nozzle one by one. Wait for the color match to paint 3 Yellow sections in a row. This triggers a score multiplier chain.
Common Mistake Analysis
Reviewing what not to do is often the best way to learn.
- Mistake #1: Ignoring the Loop. Trying to force a square peg into a round hole. If the cup doesn't match the nozzle, let it loop. Do not force it into a different color bin.
- Mistake #2: Early Game Greed. Tapping the center ice block before getting the Red Key. This fills your belt with Blue cups you can't use yet, blocking the cups you need to get the Red Key.
- Mistake #3: Detail Neglect. Focusing only on the big sky and buildings, leaving the Cyan windows unpainted until the end. This usually leads to a deadlock where you have Cyan cups but no space to maneuver them. Paint the windows as soon as the Cyan bursts start.
Final Checkpoint Routine
When the final ice block breaks and only a few cups remain, follow this routine:
- Count remaining Cyan windows.
- Ensure you have exactly that many Cyan cups (or Blue cups to fix edges) on the belt.
- Clear all other "trash" colors by painting any remaining safe spots.
- Execute the final window fills in a smooth rhythm.