
Level 86
HARDHow to solve Sand Loop level 86? Get instant solution for Sand Loop 86 with our step by step solution & video walkthrough. Sand Loop 86 tips and guide.
Play Sand Loop Now
Experience the puzzle challenge firsthand
Game Screenshots
Sand Loop Level Guides
Level Overview: The Galloping Pony Challenge
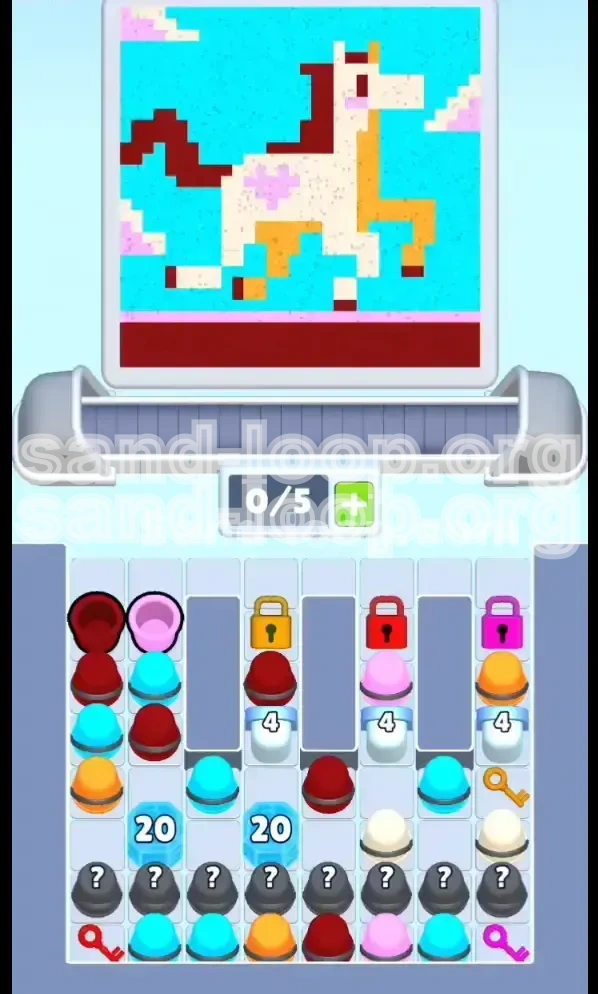
Welcome to Level 86, one of Sand Loop’s most distinct hybrid stages. This level combines the artistic satisfaction of Pixel Art creation with the logistical pressure of a limited inventory management system. The image you are tasked with recreating is a vibrant "Galloping Pony" (often interpreted as a Unicorn due to the single pink horn pixel) set against a wide, cyan sky.
Unlike standard levels where sand flows freely, Level 86 introduces a "Layered Physics" mechanic. The Pony is composed of three distinct overlapping layers (White Body, Orange/Gold Musculature, and Red Details) that sit on top of a massive Cyan background. If you process these layers in the wrong order, the background sand will bury the pony's legs, or the body details will smear into the ground.
The primary difficulty here lies not in the artistic pattern, but in the "Triple-Lock Gauntlet." Your supply of essential colors (Red, Pink, Orange) is locked behind three keys (Gold, Red, Pink) that are buried deep beneath the stacks. You have a conveyor limit of only 5 cups. This means you cannot blindly dig; every single cup you pull must either be used immediately or discarded perfectly to maintain the flow.
The Canvas Composition
Understanding the pixel density of the target image is crucial for planning your sand usage. This level is not evenly distributed.
- The Cyan Sky (40% coverage): This is the majority of the image. While tempting to fill early, it is the lowest priority layer.
- White Body (30% coverage): The main torso and neck. This requires a thick, even foundation to prevent "bleeding" from the background.
- Dark Red Details (15% coverage): The mane, tail, and hooves. This is the highest contrast layer and must be applied last to ensure sharp edges against the white and orange.
- Orange/Gold Highlights (10% coverage): The neck shadow and leg definition.
- Pink Accents (5% coverage): The cloud, the heart on the flank, and the horn. These are "finishing touches" that are easily ruined if poured too soon.
Primary Objectives
To clear Level 86 with a three-star rating, you must adhere to a strict hierarchy of goals. Do not focus on filling the canvas; focus on unlocking the logistics chain.
- Objective 1: Unlock the Supply Chain. Your immediate win condition is not the art, but retrieving the Gold, Red, and Pink keys to unlock the main supply columns.
- Objective 2: Establish the "Red Line". The bottom 10% of the image is a solid strip of Dark Red. This must be completed within the first 20 moves to secure the pony's foundation.
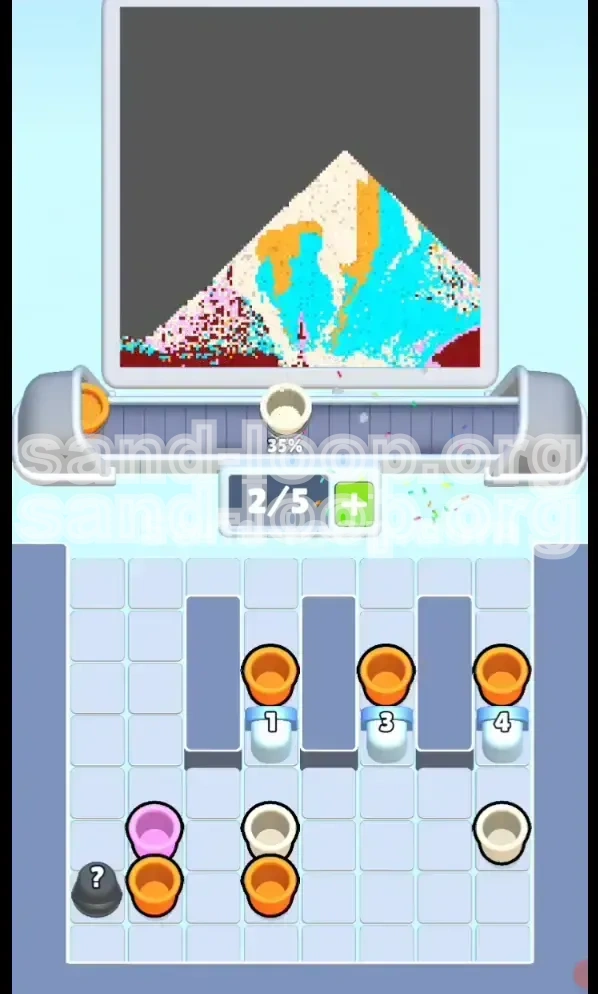
- Objective 3: Manage the "Ice 20" Obstacles. There are massive Ice Blocks labeled "20" in the center columns. These act as timers; you must clear enough adjacent cups to break them before your conveyor belt jams.
- Objective 4: Prevent Contamination. You must ensure that the high-volume Cyan sand does not spill into the Red or Orange zones during the excavation process.
Winning Strategy Overview
The "Sand Loop" philosophy for this level is Excavate -> Unlock -> Layer. Do not attempt to paint the pony until you have secured the keys.
Statistically, successful runs of Level 86 involve clearing the Left Column (Red) and the 6th Column (Gold) before pouring a single cup of White body sand. If you start painting the body before unlocking the Orange supply (via the Pink Key), you will run out of belt space when the Mystery Cups start clogging your intake.
Step-by-Step Walkthrough Guide
This section provides a chronological move-set to navigate the level efficiently. Follow these phases in order.
Phase 1: The Foundation Rush (Moves 1-10)
The beginning of the level is a race against the conveyor belt. You have zero margin for error here.
- Move 1-3: Target Column 1 (Far Left). You will see two Dark Red cups stacked at the top. Pull both immediately. Pour them into the bottom-left corner of the canvas.
- Strategic Check: By pouring these Reds, you are starting the "Ground Strip." More importantly, you are digging down Column 1 to retrieve the Red Key buried at the bottom.
- Move 4-6: Ignore Column 2. Column 2 contains Pink and Cyan cups. Do not touch them yet. Pulling Pink now clogs your belt, and pouring Cyan now buries your red foundation.
- Move 7-10: Verify Belt Space. As you pour the initial Reds, ensure your conveyor never hits 5/5 cups. If you have a full belt, you are pulling too fast. Pause and let the loop rotate.
Phase 2: The Gold Key Excavation
Once the Red Key is secured (unlocking the middle-left column), your focus shifts to the center-right columns.
- Locate the 6th Column. Count from the right. This column is the primary source of the Gold Key.
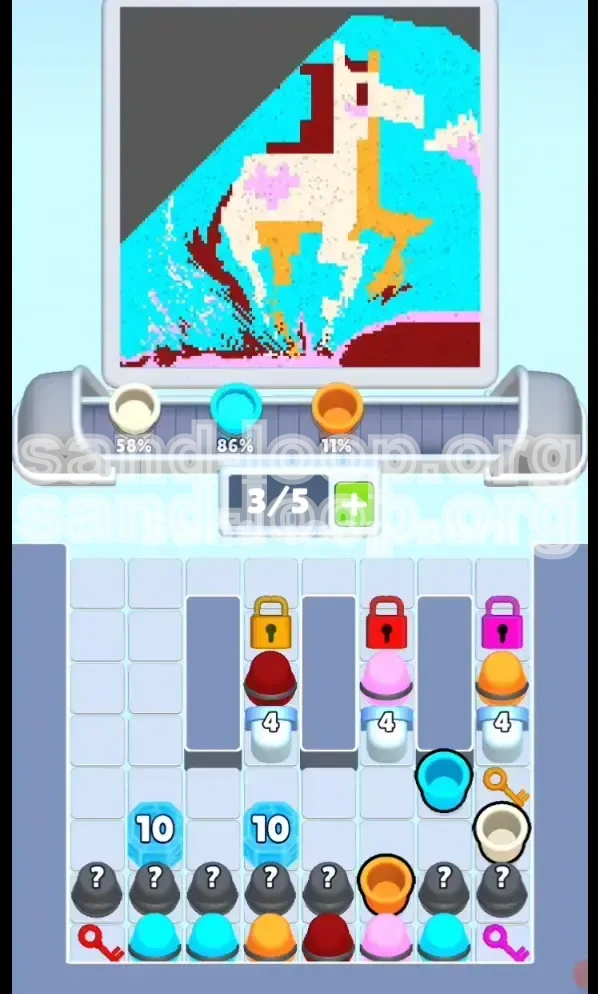
- The Obstacle: This column is capped with Cyan and White cups. You must pull and pour these to reach the key.
- Pouring Cyan: Pour the Cyan cups into the far right and left edges of the sky. Tip: Pour slowly against the wall. This creates a "container" of blue sand that will help hold the white body sand in the center later.
- Reward: Clearing this column yields the Gold Key. Use it instantly to unlock the Gold Lock (Middle Left). This releases a fresh batch of Red cups needed for the mane and tail.
Phase 3: Cracking the Ice Blocks
The "Ice 20" blocks are the game's way of forcing you to clear the board.
- Mechanic: These blocks do not break by tapping. They shatter when adjacent cups are cleared or when sand is poured next to them.
- Action: As you work on Columns 1 and 6, you will notice the Ice Blocks in the middle (Columns 3 and 4) cracking. Do not waste moves trying to break them directly.
- Benefit: Once these break, they usually reveal Mystery Cups or direct access to the inner columns. This effectively doubles your available pulling stations, relieving pressure on your conveyor belt.
Phase 4: The Pink Key and Final Unlocks
This is the mid-game crisis point. You have the Red and Gold supplies open. Now you need the Pink Key.
- Target: The Pink Key is located at the bottom of the Far Right column (Column 7 or 8 depending on layout).
- The Risk: Digging here releases Pink cups. You must not pour these yet. If you pour Pink on the ground, it will be covered by the White body sand later.
- The Hold: You have to "hold" the Pink cups in your conveyor loop slots until the Pink Key is retrieved. This requires having 2-3 empty slots before you start digging this column.
- Unlock: Retrieve the key and unlock the Far Right lock. This unlocks the Orange Cups, which are critical for the pony's neck and legs.
Phase 5: The Artistic Layering (Execution)
Now that all locks are open and your supply is steady, the "Puzzle" phase ends and the "Art" phase begins.
- Layer 1: Orange Legs. Pour the Orange to form the rear legs and neck shadow. Keep the piles low and wide.
- Layer 2: White Body. Pour the White directly on top of the Orange and the remaining Red ground. The white will spread over the orange, creating the shading effect automatically.
- Layer 3: The Mane & Tail. Use the Dark Red to trace the upper details. Since the ground is already red, you can pour aggressively here without worrying about going out of lines.
- Layer 4: Pink Details. Finish with the Pink. Pour a small line for the cloud and a single dot for the flank heart.
Color Order and Processing Logic
The physics engine in Sand Loop processes colors based on gravity and pile-height. Understanding the "Color Hierarchy" is the difference between a messy blob and a sharp pixel art pony.
The "Ground-Up" Rule
In this level, "First In, Last Seen" is the rule. Colors poured first end up on the bottom.
- Dark Red (Priority 1): Always pour this first. It acts as the "container" for the rest of the image. Because it defines the hooves and the ground strip, it must touch the bottom canvas layer directly.
- Orange (Priority 2): This must touch the Red. If you pour Orange first, the Red sand will slide off it and create jagged edges. Pouring Orange *onto* Red or *onto* the canvas right next to Red ensures it merges correctly.
- White (Priority 3): White is the most "fluid" and invasive color. It spreads easily. You must pour White *last* (or second to last) because it will bury anything underneath it.
- Pink (Priority 4): Pink has low friction. It slides right off White piles. Pour this only when the canvas is 90% full, to add the final touches on top.
- Cyan (Priority 5 - Background): This should fill the negative space. If you pour Cyan too early, it creates a "moat" that your body sand falls into, ruining the shape.
The "Bridge" Technique
There is a specific trick for connecting the Pony's head to the neck.
- The Problem: There is a gap of Cyan sky between the head and the mane in the reference image.
- The Solution: Do not try to paint the Cyan gap first. Build the neck and head with White/Orange until they touch. Then, carefully drizzle Cyan into the crack to separate them.
- Why: Trying to sandwich a thin line of Cyan between two heavy sand piles is physically difficult. It is easier to merge the piles and cut the line later.
Key Tips and Common Mistakes
Even experienced players fail Level 86 due to a few specific traps. Here is how to avoid them.
Common Mistake: The "Premature Sky" Error
The Trap: Seeing the empty canvas and immediately filling the top 50% with Cyan sky.
The Consequence: When you later pour the White or Orange for the pony's body, the sand hits the Cyan pile and slides off, creating a flat, wide "pancake" horse instead of a vertical, running one. The colors mix into a muddy blue-grey.
The Fix: Restrict Cyan pouring to the extreme corners until the pony's torso is fully formed. Treat the Cyan as a frame, not a background.
Common Mistake: Mystery Cup Mismanagement
The Trap: Pulling Grey Mystery Cups (?) when your belt has 4 or 5 items.
The Consequence: The Mystery Cup yields a color you don't need (e.g., Cyan when you need Red). Since your belt is full, you cannot pull the *next* cup to fix the problem. The unwanted cup loops around, clogging the intake, and you lose the ability to dig for keys.
The Fix: Only pull Mystery Cups when you have 3 open slots. If you get a bad color, pour it into a "Dump Zone" (an area of the canvas that is already correct) immediately to free up the slot.
Key Tip: Conveyor Rhythm
Sand Loop is a rhythm game. Do not tap frantically.
- Count 1-2-Pull. Pull a cup, watch it fill the dispense slot, wait for the conveyor to move one slot, then pull again.
- Stagger Your Pulls. Do not clear out a single column entirely before moving to the next. Alternate between Column 1 (Red) and Column 6 (Gold) to keep the input varied.
Speed Run and Advanced Strategies
For players aiming to top the leaderboards or simply finish under 60 seconds, speed requires efficiency, not just fast tapping.
The "Parallel Digging" Shortcut
Instead of finishing Column 1 completely, dig until you expose the key, then immediately switch to Column 6.
- Why it works: The game's physics engine updates the "Ice 20" blocks asynchronously. Digging in two locations triggers the ice shatter mechanic faster than digging in one.
- Result: You can unlock the Gold Lock 10-15 seconds earlier by multi-tasking your excavation.
Speed Run Tips
- Ignore Perfection (Initially): Don't worry about filling the corners of the red strip perfectly in the first pass. A 90% fill is sufficient to hold the legs. You can "patch" the holes with leftover Red cups at the very end of the level.
- Pre-Loading the Belt: Before unlocking the Pink Lock, ensure your belt has 1 Red, 1 Orange, and 1 White cup ready. As soon as the lock opens, you can pour immediately without waiting for the conveyor to cycle.
- The "Heart" Skip: If you are running out of time and the Pony is 95% complete, you can skip the Pink Heart on the flank. The game's completion percentage is generous; missing a single 5-pixel detail often still results in a 3-star clear if the rest of the image is perfect.
What To Do If You Are Stuck
If you reach a state where no moves are possible and the image isn't finished, perform these checks.
- Check for "Hidden" Cups: Sometimes a cup gets stuck behind the UI or an overlay. Tap the top of the column headers to ensure no cup is jammed in the dispenser.
- Check Ice Blocks: If you can't reach a key, look for the Ice 20 blocks. You likely missed a cup adjacent to them. Look for a column you haven't touched in a while.
- The "Reset" Point: If you realize you messed up the color order (e.g., poured White before Red), it is usually faster to restart the level than to try and fix it by digging the sand back out.