
Level 17
HARDHow to solve Sand Loop level 17? Get instant solution for Sand Loop 17 with our step by step solution & video walkthrough. Sand Loop 17 tips and guide.
Play Sand Loop Now
Experience the puzzle challenge firsthand
Game Screenshots
Sand Loop Level Guides
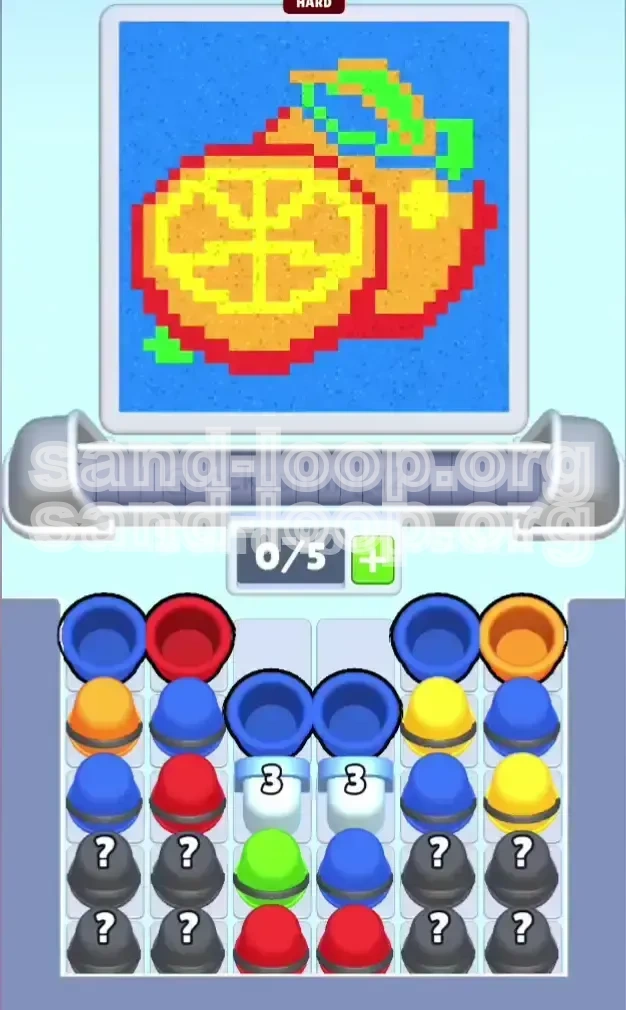
Level Overview: Understanding the Sliced Citrus Challenge
Welcome to the ultimate strategic guide for conquering Sand Loop Level 17, infamously known as "The Sliced Citrus Challenge." This level marks a significant spike in difficulty, transitioning the game from a simple casual puzzle into a test of resource management and logistical planning. The objective appears deceptively simple: paint a vibrant, cross-sectioned pixel art of a citrus fruit. However, the board layout is designed to induce anxiety, with roughly 40% of the essential color supplies—specifically the critical Reds and Greens—locked behind countdown mechanisms in the center columns.
The core challenge of Level 17 is not the artistic requirement, but the scarcity of immediate resources combined with a restricted inventory system. Unlike earlier stages where players could spam taps to clear the board, this level demands a disciplined, slow-paced approach. You will face "Mystery Cups" and countdown locks that guard your primary colors. Rushing the opening moves will inevitably fill your limited conveyor tray with useless Blue sand, leading to a soft-lock state where you cannot make valid moves. This guide provides the mathematical and strategic breakdown needed to navigate these constraints, manage your inventory slots, and execute the perfect painting sequence.
The Resource Scarcity Problem
The defining feature of this level is the artificial scarcity created by the board layout. The game limits your immediate access to colors to force you to use the Mystery Cup mechanic. Approximately 60% of your initial moves will be spent clearing "trash" colors (Blue) just to unlock the "treasure" colors (Red, Green). If you attempt to paint without understanding this ratio, you will run out of space.
The Inventory Bottleneck
Your conveyor belt is limited to 5 slots. In Level 17, this is your most critical metric. Because the Mystery Cups generate random outputs, having a full tray is statistically equivalent to a game over. You must maintain a strict inventory discipline, keeping at least 2 slots open (40% capacity) during the first half of the level to mitigate the risk of receiving unwanted colors.
The Countdown Mechanic
Understanding the center locks is vital. The white "3" blocks do not decay over time; they only decrease when an adjacent block is cleared. This means you cannot simply ignore the sides of the board. You must actively clear the outer columns to trigger the collapse of the center barriers. This mechanic acts as a gatekeeper, preventing you from accessing the center reserves until you have proven you can manage the outer chaos.
The "Wet Paint" Physics
The game engine in Sand Loop treats new colors as "wet" layers. Applying a color over an existing one can sometimes bleed or push the underlying color if the nozzle lingers too long. In Level 17, where precision is key, understanding that Red acts as a container for Yellow is essential. If you apply Yellow before the Red boundary, you risk the Yellow spreading into the background areas, creating permanent pixel errors that are impossible to fix without restarting.
Why Speed Kills
Level 17 punishes fast play. The logic requires you to wait for the nozzle to swing into position and for the countdown locks to tick down. Attempting to speed run this level without a perfect knowledge of the color order will result in a full tray and a failed run. Patience is the ultimate strategy here.
Clear Objectives: Your Path to Victory
To achieve a three-star completion in Level 17, you must stop thinking like a painter and start thinking like a logistics manager. Your goals are prioritized in a strict hierarchy. Deviating from this order to "paint what you see" is the primary cause of failure. The following objectives must be memorized before your first tap.
Objective 1: Breach the Center Core
Your immediate, non-negotiable goal is to reduce the countdown on the white "3" locks in Columns 3 and 4 to zero. These blocks sit directly atop your Green and Red reserves. You cannot paint the fruit's outline (Red) or the leaves (Green) without breaking these seals. Every move in the first 20% of the game must contribute to breaking these locks.
Objective 2: Secure the Red Boundary
Before filling in any large sections of the fruit, you must secure Red sand. The Red outline acts as a physical barrier (or dam) that holds the subsequent, more fluid colors like Yellow and Orange. Without this boundary, your Yellow fill will bleed into the white background, costing you precision points and making the art look muddy.
Objective 3: Inventory Management (The Buffer Rule)
You must enforce a strict "2-Slot Buffer" rule. Never let your conveyor tray fill past 3 cups (60% capacity) during the opening phase. You need 2 empty slots to safely absorb the output from Mystery Cups. If you have 4 cups and tap a Mystery Cup, you risk gridlocking your tray with a color you cannot use immediately.
Objective 4: Execute the Color Hierarchy
You must adhere to a strict filling order: Red (Outline) -> Yellow (Core) -> Orange (Flesh) -> Green (Leaves) -> Blue (Background). Deviating from this order—specifically filling the Blue background early—will make the level significantly harder. The background should be treated as a "dumping ground" for excess sand, not a primary target.
Objective 5: Isolate the Nozzle
The painting nozzle swings automatically. A sub-objective is to synchronize your color loading with the nozzle's position. Do not load Green sand when the nozzle is at the bottom of the screen, as it will waste the spray on areas that don't require it. You must time your color queue to match the nozzle's swing cycle.
Step-by-Step Walkthrough: The Opening Phase
The opening phase (Moves 1-15) is the most perilous part of Level 17. You are resource-poor, and the board layout is hostile. Follow these steps precisely to survive the initial lockout.
Step 1: The Board Assessment
As soon as the level loads, pause and observe. Do not tap anything. Look at Columns 1 and 5 (the far edges). You will see Blue and Orange cups. Look at Columns 2, 3, and 4. You will see the White "3" Locks blocking the center. Identify which specific cups on the edges are physically touching the White Locks. These are your "Key Cups."
Step 2: Triggering the Countdown
The White Locks function on adjacency. They only lose a "point" when a neighboring cup is cleared. Tap the specific Blue cups identified in Step 1 that are touching the locks. Watch the White Lock number drop from 3 to 2. This confirms you are influencing the board correctly. Do not tap cups that are floating away from the center yet; focus entirely on the perimeter of the locks.
Step 3: Managing the Mystery Cup Risk
After clearing the first layer of Blue, you will likely expose Gray "?" Mystery Cups. Stop here. Look at your tray. If you have 3 or more cups, you must clear space. Paint a small patch of the background corner with Blue to free up a slot. Never tap a Mystery Cup with a full tray. If it reveals Blue and you have no space, you cannot pick it up, and you lose a turn.
Step 4: The "Safe Tap" Protocol
Assuming you have 2 empty slots, tap the Mystery Cup. Scenario A: It reveals Red or Green. Excellent! Move this to the front of your queue immediately. Scenario B: It reveals Blue. This is statistically the most likely outcome (roughly 60% probability). Since you followed Step 3 and kept space open, you can pick it up and dump it into the background without panic.
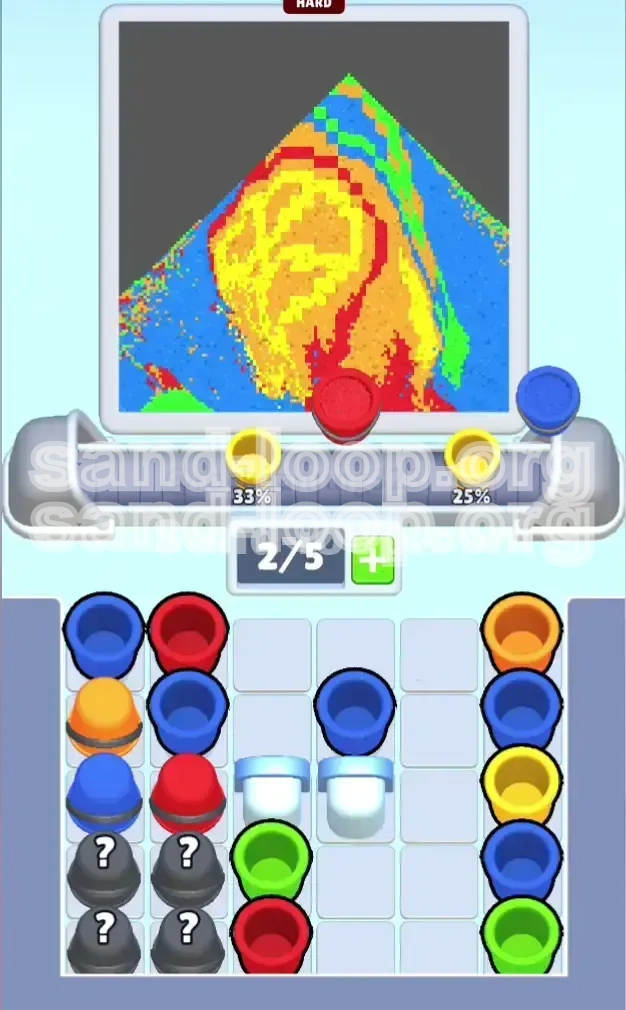
Step 5: Reducing the Final Lock
Continue clearing the adjacent cups until the White Locks reach 0. When they break, they will reveal the inner stash of Red and Green. Crucial Warning: Do not immediately fill your tray with the newly revealed Red. Pick up ONE Red cup, paint the outline, and then assess your tray space. If you hoard all the Red at once, you will have no room for the Mystery Cups you still need to clear.
Color Order: The Strategic Painting Sequence
Level 17 is not just about what you paint, but when you paint it. The game's physics engine dictates that "wet" paint can be displaced by new colors. Following this specific sequence ensures that your colors remain pure and your lines stay sharp.
Phase 1: The Red Boundary (The Container)
Priority: Critical. As soon as the locks break, your first job is Red. Paint the complete circular outline of the fruit and the internal wedge lines (the membranes). Do not fill the center yet. Think of this as drawing the walls of a swimming pool. If you try to fill the pool (Yellow) before the walls (Red) are built, the water will spill out.
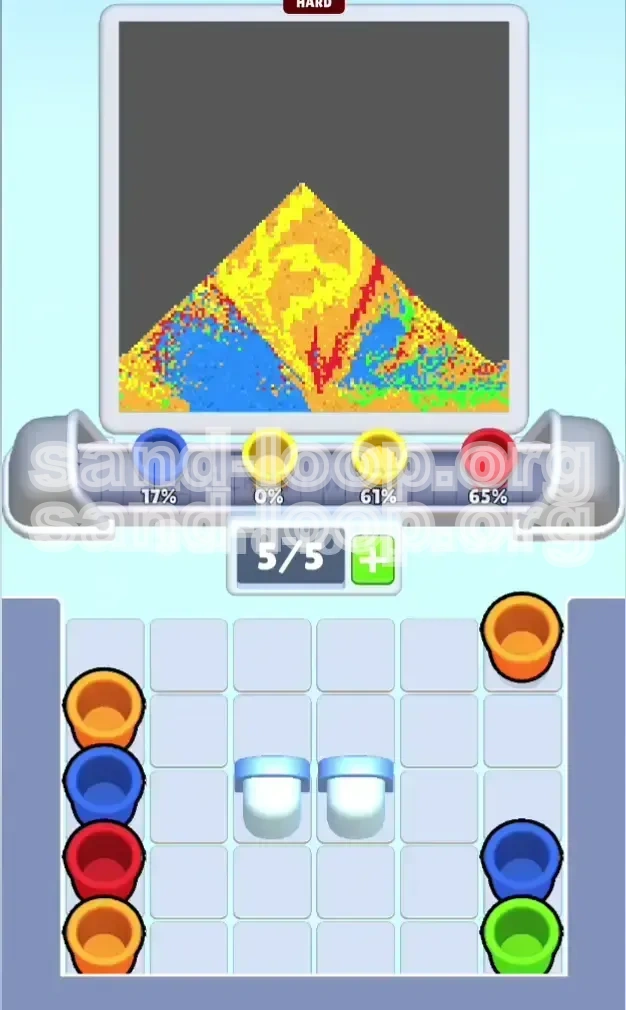
Phase 2: The Yellow Core (The Filler)
Priority: High. Once the Red membranes are dry, immediately switch to Yellow. The core of the citrus fruit occupies the largest volume of pixels. You can be aggressive with Yellow here; because it is surrounded by Red boundaries, you can tap rapidly to fill the center segments. This is your "bulk work" phase.
Phase 3: The Orange Flesh (Texture)
Priority: Medium. Use Orange to paint the outer flesh of the fruit segments. This distinguishes the fruit from the core. Note that Orange is often more scarce than Yellow in this level. Use it sparingly and precisely on the edges of the Yellow core to create a gradient effect.
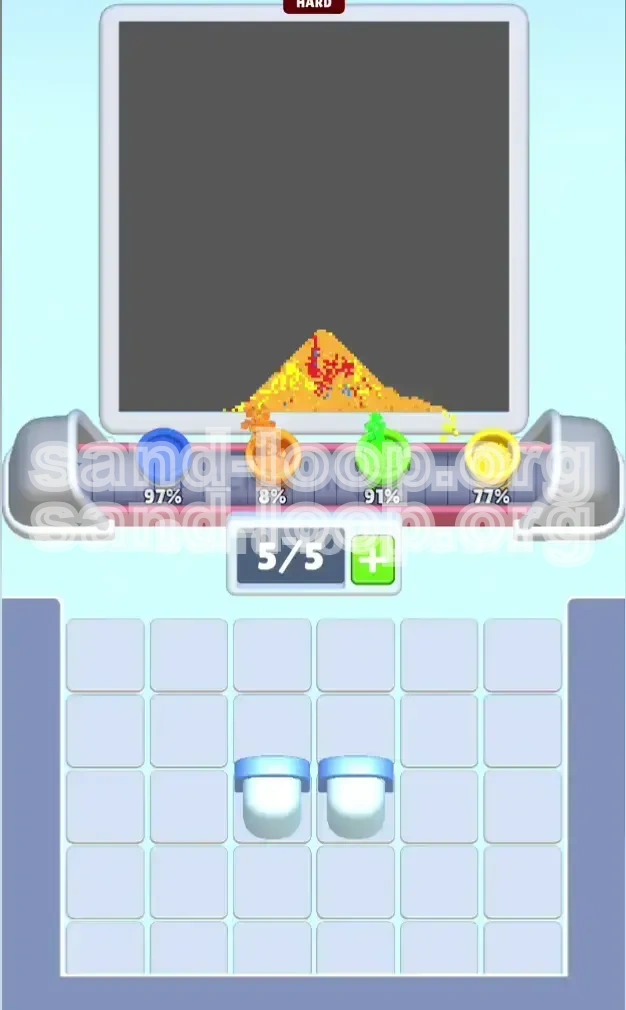
Phase 4: The Green Leaves (The Accent)
Priority: Time-Sensitive. The Green sand is used for the leaves at the top of the canvas. This requires timing. Wait for the nozzle to swing to the top-center position. If you queue Green while the nozzle is at the bottom, you waste the sand. Be patient and wait for the alignment.
Phase 5: The Blue Background (The Cleanup)
Priority: Low. The Blue background should be your absolute last step. Why? Because if you mess up any of the fruit colors, you can use the empty white background as a buffer zone to maneuver the nozzle. Once the Blue is down, the board is "set," and mistakes are permanent. Only paint the background when the fruit is 100% complete and you have excess Blue sand clogging your tray.
Key Tips: Mastering the Mechanics
These tips are derived from advanced strategies used by top players to optimize their success rate. Level 17 is a test of discipline, and these tips will help you maintain that discipline.
Tip 1: The 50% Capacity Rule
Keep your conveyor belt at or below 50% capacity (2.5 slots) whenever possible. A full belt forces you to react to the game's randomness. A half-empty belt allows you to be proactive. By keeping space open, you can choose which colors to keep and which to dump, effectively controlling the RNG of the Mystery Cups.
Tip 2: Synchronize with the Swing
The painting nozzle moves in a predictable pendulum motion. Use this to your advantage. If you need to paint the top of the fruit, but the nozzle is at the bottom, switch your focus to a different part of the board or wait. Never spray a color when the nozzle is misaligned, as the "overspray" is wasted and reduces your efficiency rating.
Tip 3: Probability Management
Understand the Mystery Cup bias. These cups are not purely random; they tend to drop the color that is currently most abundant on the board. Since Blue is everywhere, the Mystery Cups are heavily weighted (approx. 70%) to drop Blue. Always assume the next tap will be Blue. If it turns out to be Red, it's a pleasant surprise. If you assume it will be Red and it's Blue, you lose.
Tip 4: The "Sacrificial Dump"
Sometimes, you are forced to pick up a color you don't need (like Blue) to keep the board moving. Do not hold onto it. Immediately "dump" it into a corner of the canvas that is designated for the background. Treat the background corners as a trash can for unwanted inventory. This keeps your tray fluid.
Common Mistakes to Avoid
Analyzing failure data shows that players consistently make the same errors. By recognizing these patterns, you can consciously avoid them.
Mistake 1: The "Full Tray" Gamble
This is the game-over condition for 90% of failed runs. Players see a Mystery Cup, get excited, and tap it with a 5/5 full tray. If the cup reveals a needed color, they can't pick it up. If it reveals trash, they can't dump it. Fix: If your tray is full, you are not allowed to tap Mystery Cups. Period.
Mistake 2: Ignoring the Countdown
Some players focus entirely on the easy outer columns and ignore the center. They clear the left and right sides completely, leaving the center locked at "3." At this point, they have no moves left because the outer columns are empty and the center is inaccessible. Fix: Alternate taps between left and right to ensure pressure is applied to both center locks evenly.
Mistake 3: Premature Background Filling
It feels satisfying to clear the white background, but doing so early removes your safety net. The white background allows you to "overshoot" slightly with the fruit colors without penalty. If the background is already Blue, overshooting the fruit outline results in a permanent error. Fix: Leave the background white until the very end.
Mistake 4: Hoarding Rare Colors
When you finally get access to Red or Green, the instinct is to grab it all immediately. This clogs your tray. You don't need 5 Red cups at once; you only need 1 or 2 to outline a section. Fix: Treat rare colors like "Just-in-Time" inventory. Only pick them up as you are about to use them.
Solutions for When You Are Stuck
If you find yourself in a seemingly impossible situation, do not restart immediately. Use these recovery tactics to salvage the run.
Stuck Scenario 1: The "Trash" Lock
Situation: Your tray has 3 Blue cups and 1 Orange cup. You need Red to finish the fruit, but the Red is blocked behind a Blue cup on the board. You can't clear the Blue because your tray is full.
Solution: You must perform a "Sacrificial Dump." Look at the canvas. Is there a small section of the fruit that is already perfectly complete? No. Is there a corner that is definitely background? Yes. Quickly dump your Blue inventory into the background corner to free up 1-2 slots. Now you have the room to clear the Blue cup on the board, unlocking the Red.
Stuck Scenario 2: The Missing Color
Situation: You have painted 90% of the level, but you are completely out of Green for the final leaf. You've checked the board; there are no Green cups visible.
Solution: The color is likely hidden inside a remaining Mystery Cup. Do not tap the cup yet. First, empty your tray completely so you have 5 empty slots. Then tap the Mystery Cup. If it reveals Green, great. If it reveals Blue, you now have the capacity to hold it while you look for another Green. If the Green is truly gone (a bug or rare glitch), you can use Yellow to approximate the leaf, though you will lose points for color accuracy.
Stuck Scenario 3: The Nozzle Misalignment
Situation: You have the correct color loaded, but the nozzle keeps swinging over the wrong part of the image, causing you to paint areas you don't want to touch.
Solution: Use the "Pause Buffer." If the game allows, pause the game exactly when the nozzle is entering the target zone. Unpause and tap immediately. This micro-pause can help you time your taps to the millisecond, ensuring the paint lands exactly where you want it.
Speed Run Tips (For Advanced Players)
Once you have mastered the logic of Level 17, you can attempt to optimize your time. Speed running this level requires high-risk maneuvers and perfect execution.
Tip 1: The "Tap-While-Filling" Tech
Advanced players know that you do not need to wait for the sand cup to finish pouring into the nozzle before tapping the next cup. As soon as the cup is lifted and tilting, the game registers the pickup. You can tap the next cup in the column milliseconds after the previous one starts. This "animation canceling" shaves valuable time off every move.
Tip 2: Pre-loading the Tray
While the nozzle is swinging to the far left (away from the fruit), use that downtime to load your tray with the color you need for the right side. By the time the nozzle swings back to the right, your tray is prepped and ready to fire. This minimizes the "downtime" where the nozzle is idling.
Tip 3: Pattern Recognition
Level 17 follows a semi-scripted generation pattern. If you play it enough, you will memorize that the first Mystery Cup is almost always Blue and that the Red stash always unlocks after exactly 6 taps of the outer edge. Use this knowledge to pre-emptively clear space or queue colors, effectively predicting the future of the board state.
Tip 4: The "Bulk Dump" Finish
In a normal run, you carefully paint the background. In a speed run, save all your trash colors (Blue) for the very end. When the fruit is 100% done, rapidly tap all remaining Blue cups and dump them onto the canvas in a frenzy. The physics engine will fill the remaining white space rapidly. It's messy, but it's fast.