Level 147 Comprehensive Overview: The Chameleon Canvas
Visual Breakdown and Layout
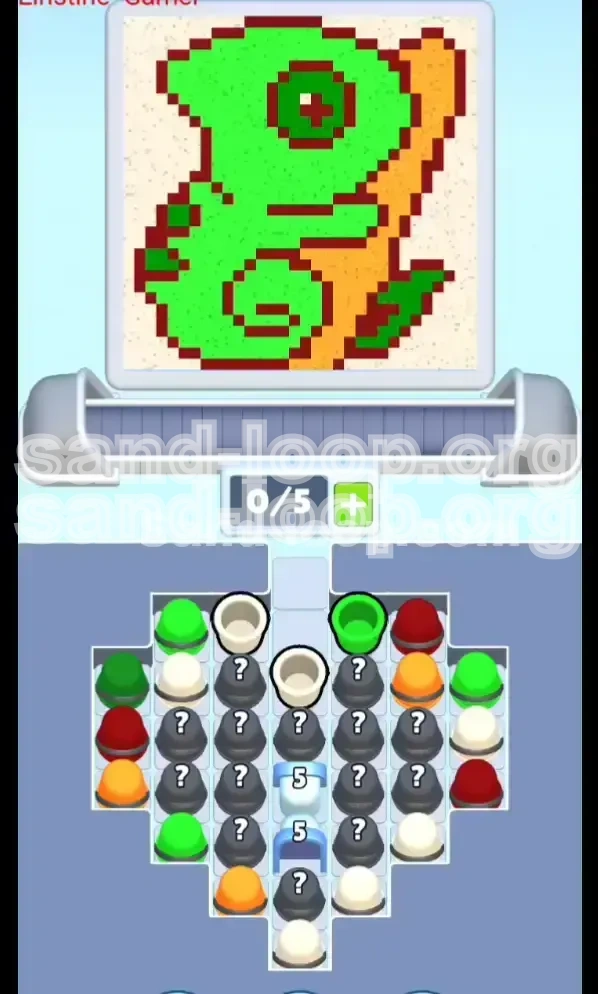
Sand Loop Level 147 presents a complex illustration of a chameleon. Unlike previous levels that focused on simple gradients, this level demands character design precision. The canvas is dominated by a vibrant lime green base, covering approximately 65% of the image area. You will face a significant challenge with the dark maroon color, which frames the edges and defines facial features, accounting for roughly 25% of the canvas. The remaining 10% is a striking golden-yellow stripe running down the right side, along with a tiny, critical white highlight in the eye. The uneven distribution of these colors means you cannot treat them equally; green is your filler, while maroon and yellow are your structural details.
Core Mechanics and Slot Economy
You begin with a standard 0/5 slot conveyor belt, meaning you have five empty slots to manage. The key mechanical challenge in Level 147 is "Slot Economy." You must maintain a balance between keeping the belt moving to avoid bottlenecks and keeping enough slots open (ideally 1 or 2) to react to the changing color requirements. The tray setup introduces blockers—specifically, the maroon and yellow cups are initially buried behind question-mark blocks in the center, while green and cream cups are exposed on the periphery. Mismanaging your slots early by loading the easily accessible cream cups will lead to a deadlock before you can access the critical maroon color.
The Progression Bottleneck
The primary difficulty in Level 147 is the disparity in access vs. requirement. You have immediate access to green but require maroon to define the borders. If you follow the instinct to fill the background first, you will likely hit 90% green completion before maroon is even unblocked. This creates a spatial crisis where you have no room to pour the maroon details without contaminating the green base. The level forces you to play a defensive game: unblocking maroon takes priority over rapidly filling green, despite green being the dominant color.
Win Condition Explained
Victory is achieved by filling the chameleon illustration to 100% completion across all color zones without causing an overflow or contaminating the white eye highlight. You must complete three main color phases: the Green Base (Body/Head), the Maroon Outline (Border/Features), and the Yellow Accent (Stripe). Crucially, you must finish with a score multiplier intact, which means minimizing wasted pours and avoiding the "contamination" penalty that occurs when you bleed one color into another's territory.
Psychological Preparation
Approach this level with patience, not speed. Level 147 is a rhythm puzzle disguised as an action game. Many players fail because they treat the conveyor belt like a loading dock, rushing to fill slots. Instead, view the belt as a timer. Every cup you load represents a future commitment you cannot easily undo. You need to suppress the urge to "clear" the tray immediately and focus on the specific pour order required to unblock the center section.
Strategic Objectives and Color Prioritization
Phase 1: The Unblocking Protocol
Your first objective is not to paint, but to clear the path. The maroon cups are trapped in the center stack behind generic blockers. Your priority in the first 10% of the game is to clear these blockers to free up the maroon flow. Do not focus on filling the green meter past 30% until maroon is accessible. Failing to unblock maroon early is the number one cause of level restarts.
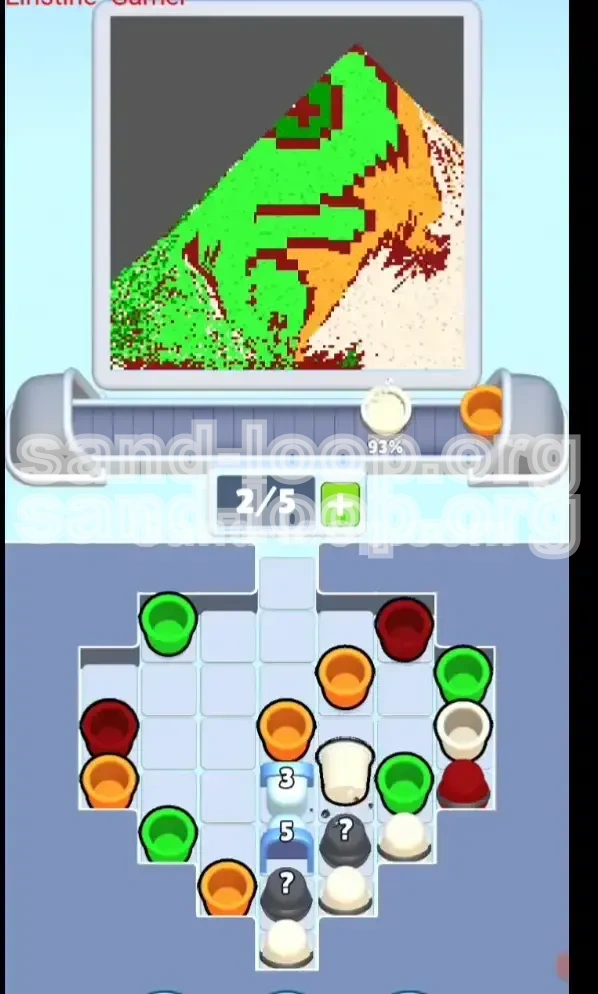
Phase 2: Establishing the Green Foundation
Once maroon is accessible, your goal shifts to building the "base" of the chameleon. You want to aim for roughly 50-60% green completion before moving into detailed work. However, this must be done using the "stagger method" (explained below) to ensure you don't accidentally overshoot while dealing with the maroon mechanics. The green foundation must be solid but leave room for edge definition.
Phase 3: Precision Border Work
With the base laid, you must pivot to the maroon borders. The objective here is precision over volume. You need to trace the dark edges without spilling into the lime green body. This phase requires you to slow the belt down mentally, ensuring every pour counts. You are aiming to bring maroon up to parity with green, reaching roughly 70-80% completion on both before introducing the final accent color.
Phase 4: The Golden Stripe and Eye Safety
The yellow stripe is small but visually impactful. It requires very little volume—usually only 2-3 well-timed pours. The final objective is to place this yellow stripe without bleeding into the white eye highlight. This phase is about risk management; one wrong move here can spoil an otherwise perfect run.
Step-by-Step Walkthrough Instructions
Step 1: The "Green-One" Opening
Start the level immediately by loading exactly one Green cup from the left side of the tray onto the conveyor. Do not load a second green yet. As the first green travels toward the pouring mechanism, use the travel time to scan the tray. Identify the specific stack of cups that contains the blocked Maroon colors (usually the center stack). Watching the first cup pour will give you a baseline for the game's speed and timing.
Step 2: The Strategic Gap
After the first Green cup is loaded, intentionally leave the next slot on the conveyor belt empty. Let the belt cycle one click with nothing in it. This "gap" is a crucial buffer that prevents the belt from clogging later. While the belt is cycling this empty slot, tap the center stack containing the blocked Maroon cups. This action starts the unblocking process. You are now actively managing the queue: Green (pouring) -> Empty Slot -> Unblocking Action.
Step 3: The Maroon Cascade
Once the blockers clear and a Maroon cup becomes available, load it immediately. Your sequence should now be: Green (loaded), Empty (passed), Maroon (loaded). At this point, you have established a rhythm. Continue to alternate: load a Green, let it travel, load a Maroon. Avoid the temptation to chain two Greens in a row. This alternating pattern ensures that both colors progress in tandem, preventing the "90% Green / 0% Maroon" deadlock scenario.
Step 4: Mid-Game Yellow Injection
When your progress bars show Green at approximately 50% and Maroon at roughly 40%, it is time to introduce Yellow. Do not load it earlier, or you risk running out of slot space. Load one Yellow cup. Pour it carefully onto the designated stripe area on the right. After this pour, immediately switch back to the Green-Maroon alternation. You want the Yellow to be a supporting actor, not the main focus.
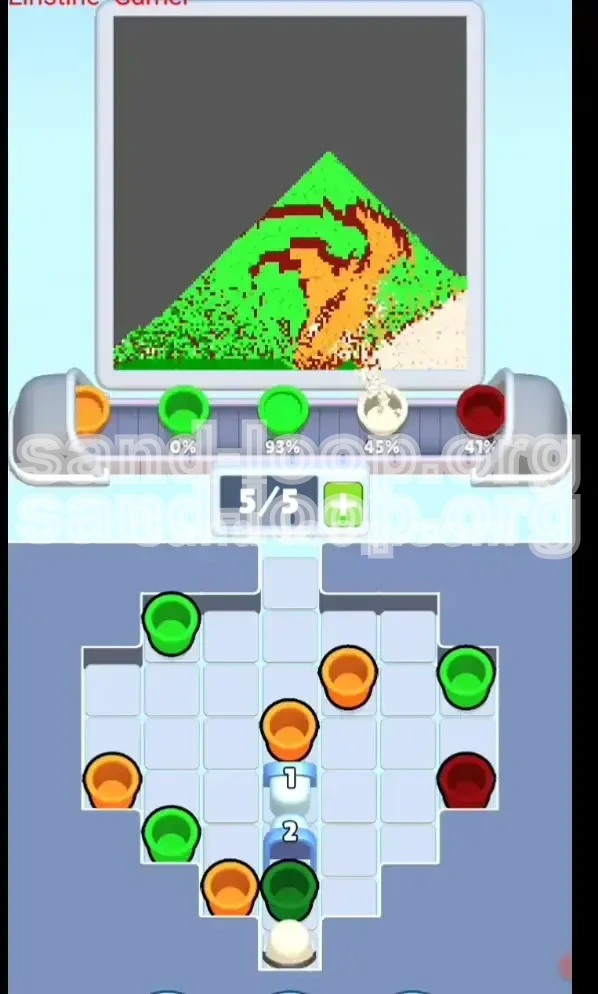
Step 5: The Final 20% Triage
Enter the end-game when all three primary colors are above 70%. Stop loading cups based on instinct and start looking strictly at the numbers. If Green is at 85%, do not load another Green, even if it feels like the right thing to do. Load only the color that is lagging behind. If Maroon is at 75% and Green is at 90%, load two Maroons in a row to balance them out. Use your remaining slot capacity to make micro-adjustments rather than broad strokes.
Color Order and Processing Logic
The Golden Ratio of Level 147
To succeed, you need to visualize the color ratio as 6:3:1. For every 6 units of Green you pour, you need 3 units of Maroon and 1 unit of Yellow. If you deviate from this ratio—for example, pouring 10 units of Green for every 1 unit of Maroon—the canvas will run out of space for the dark details. Keep a mental tally of your pours. If you feel you have poured three Greens in a short window, force yourself to pour a Maroon next, even if it feels slightly inefficient.
Processing Speed vs. Precision
Green is a "fast" color—it fills large areas quickly and forgives minor misplacements. Maroon is a "slow" color—it requires precision and fills thin lines. Adjust your processing speed accordingly. When handling Maroon, slow down your tapping rhythm. When handling Green, you can speed up slightly, but never exceed the speed of the conveyor belt's exit point.
The Late-Game Color Correction
In the final 10% of the level, the strict order dissolves into "Damage Control." You will likely have one color stuck at 95% while another is at 90%. At this point, the order is determined by whichever color is *lowest* on the progress meter. If Yellow is dragging behind, prioritize it to secure the completion bonus, even if it means pausing the Green flow entirely for a few seconds.
Key Tips for Flawless Execution
Tip 1: The "Eye Highlight" Safety Zone
The chameleon has a small white dot in its eye. This is not a painting target; it is a hazard. Avoid pouring anywhere near the eye socket until the very end of the level. If you accidentally splash Green or Maroon into the white highlight, you lose the precision bonus. Treat the eye area as a "no-fly zone" until you are filling in the final pixels.
Tip 2: Managing the Cream Cups
You will notice Cream-colored cups on the tray. These are essentially "junk" items or filler for this specific level. They do not contribute significantly to the chameleon's color palette. Loading them wastes a valuable slot. Unless you are in a dire emergency and need a cup to pass through to unblock a jam, avoid loading Cream entirely. They are a trap for inexperienced players who think every cup needs to be used.
Tip 3: Visualizing the Pour Arc
The pouring mechanism in Level 147 has a specific arc or delay. When you tap a cup, the sand doesn't hit the canvas instantly. Learn to anticipate this delay. If you are trying to hit a specific edge with Maroon, tap slightly *before* the pouring spout aligns with the target area. This "leading" of the target is essential for the intricate border work in the second half of the level.
Tip 4: The Slot Buffer Rule
Never let your conveyor belt fill up to 5/5 slots. Always keep at least one slot empty. This empty slot acts as a shock absorber. If you make a mistake and need to quickly load a different color to correct it, that empty slot gives you the freedom to do so. A full belt is a death sentence in Level 147 because it forces you to pour whatever is at the front, removing your agency.
Tip 5: Listening to the Audio Cues
The game provides audio feedback when a color section is completed (a distinct chime or sound effect). Do not ignore these sounds. If you hear the "Green Complete" chime but your Green meter reads 98%, you know you have a tiny bit of leeway left. However, if you hear the chime and the meter is at 100%, stop pouring Green immediately to avoid overflow penalties.
Common Mistakes and How to Avoid Them
Mistake 1: The "Green Flood" Panic
Many players see the large Lime Green area and panic, thinking they need to fill it instantly. They load three Green cups in a row. This leads to a rapid saturation of the canvas, leaving no room for the Maroon details that are still blocked. How to Avoid: Limit yourself to one Green cup for every two other color cups. Force this discipline until Maroon is unblocked.
Mistake 2: Ignoring the Question Mark Blocks
It is easy to focus on the pouring and forget about the tray management. If you ignore the question mark blocks in the center, Maroon will remain trapped until the very end. How to Avoid: Make unblocking the center stack your primary action during the first 15 seconds of the level, even if it means pausing your pouring rhythm for a moment.
Mistake 3: Premature Yellow Usage
Yellow is vibrant and tempting to use early, but its target area is very small. Pouring Yellow in the first half of the level usually results in spillover into the Green or Maroon zones. How to Avoid: Treat the Yellow cup like a rare resource. Do not load it until the Green and Maroon bases are clearly established and visible on the canvas.
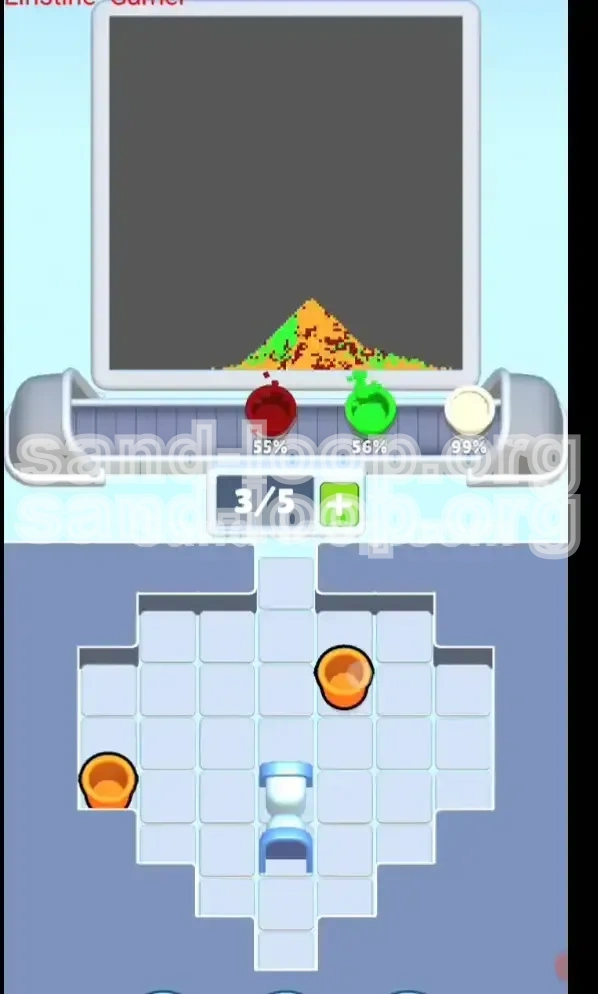
Mistake 4: Chasing the Last Percent
In the final moments, players often get frustrated trying to fill the last 1% of a color and start spamming pours. This usually leads to overflow. How to Avoid: If a color is stuck at 99%, look for the smallest, most specific pixel of that color on the canvas and target it precisely. If you can't find it, switch to another color; sometimes the game's math requires balancing the other colors to trigger the final fill.
Mistake 5: Misjudging the Belt Speed
The belt speed in Level 147 is constant, but your perception of it changes when you are stressed. Players often load a cup, forget about it, and load another, only to realize both are arriving at the pour point simultaneously. How to Avoid: Keep your eyes on the lead cup. Do not load the next cup until the current one has passed the halfway mark of the belt.
Solutions for When You Are Stuck
Scenario 1: The Belt Deadlock
The Problem: You have 5 cups loaded, none are the color you need, and the Maroon is still blocked.
The Fix: You cannot recover instantly. You must wait for the cups to cycle through the pour point. Do not tap anything. As soon as one cup pours and exits, you will have a slot. Immediately tap the blocked stack to unblock Maroon. You may lose a few seconds of time, but preserving the slot economy is the only way to survive.
Scenario 2: Green Contamination
The Problem: You accidentally poured Green into the Maroon border area. The border looks muddy.
The Fix: You can clean this, but it costs volume. Immediately switch to Maroon and pour directly over the contaminated area. Maroon is a darker, more dominant pigment in this game engine. Pouring enough Maroon (2-3 cups worth) over the Green spill can "overwrite" the color and restore the border integrity, though it is a costly waste of resources.
Scenario 3: Trapped at 98%
The Problem: All colors are at 98-99%, but the level won't end.
The Fix: This is usually a pixel-perfect issue. Look closely at the Chameleon's tail tip or the feet. These are often the smallest areas and are easily missed. If the tail is Maroon and you are out of Maroon, you may need to use a "free" cup or a generic filler if the game allows, or simply wait for the belt to deliver the specific color you need. Do not force a wrong color just to end the level.
Scenario 4: Running Out of a Specific Color
The Problem: You are at 90% Maroon, but there are no more Maroon cups visible on the tray.
The Fix: They are likely hidden behind the Question Marks again, or you simply missed them in the chaos. Stop pouring. Scan the entire tray slowly. If they are genuinely gone, you may have to rely on the game's "overflow" mechanic to squeeze the last percentage out of the existing paint, or restart the level if you are playing for a high score.
Speed Run and Efficiency Strategies
The "Slot Pre-load" Technique
For advanced players looking to shave seconds off their time: As soon as the level starts, load the first Green. While it is traveling, tap the unblock target for Maroon. As soon as the Green pours, immediately load the Maroon. While the Maroon travels, look for the next Green. This "anticipatory loading"—where you are constantly queuing the next action while the current one is in motion—is the key to breaking speed records.
Optimizing the Unblocking Phase
Don't just tap the question mark blocks randomly. They often have a specific logic (e.g., tap left, then right). Learning the specific unblocking sequence for Level 147 allows you to free the Maroon in the first 5 seconds rather than fumbling around. Memorizing the tray layout is faster than reacting to it.
Bulk Pouring Strategy
Once you have established the base (around 40% progress), you can slightly alter the ratio to speed up. You can safely pour two Greens in a row *if* you have two Maroons immediately queued behind them. This "bulk" approach keeps the belt full and maximizes throughput without risking the color balance, provided you have the queue discipline to back it up.
Ignoring the Eye Highlight
For a pure speed run, ignore the white eye highlight completely. It is faster to fill the rest of the level and let the game auto-complete the tiny white pixel at the very end (if the game logic permits) or to simply leave it until the last second where a quick micro-tap can fix it. Don't waste precision time on it during the main flow.
Using the Reset to Your Advantage
If you mess up the first 10 seconds (e.g., wrong color loaded), do not try to recover. It is faster to force-close and restart immediately than to play through a compromised level. Level 147 is won or lost in the setup; a bad opening cannot be recovered fast enough for a speed run.