
Level 297
HARDHow to solve Sand Loop level 297? Get instant solution for Sand Loop 297 with our step by step solution & video walkthrough. Sand Loop 297 tips and guide.
Play Sand Loop Now
Experience the puzzle challenge firsthand
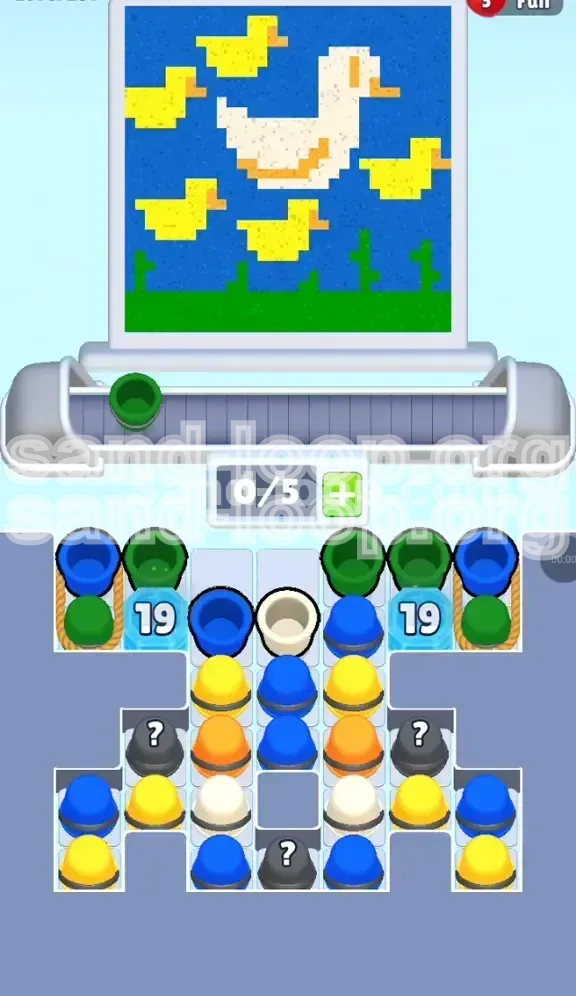
Game Screenshots
Sand Loop Level Guides
Level 297 Comprehensive Walkthrough: The "Mama Duck" Strategy Guide
Level Overview and Core Mechanics
Level 297 in Sand Loop presents a deceptive challenge. While the pixel art suggests a peaceful scene of a Mother Duck and her ducklings, the underlying mechanics are aggressive. This level is defined by its restrictive "Ice Wall" mechanics and a high-dependency color chain. Unlike standard levels where you can often paint freely, this stage requires a strict logical sequence to prevent a conveyor belt deadlock. The primary difficulty stems from the fact that essential color reserves (specifically Green for the grass) are locked behind HP-based Ice Blocks, forcing you to burn through your central resources rapidly to unlock the sides.
Primary Objectives for Completion
To clear this stage, you must achieve three main goals. First, you must break the twin Ice Blocks (labeled "19") located in the upper tray. This is not optional; it is the only way to access the Green cups required for the bottom layer. Second, you must manage a strict 5-slot conveyor belt capacity. Overloading the belt before the Ice breaks is the most common cause of failure. Third, you must execute precise color placement for the "Danger Colors"—Orange and White—without clogging your loop with unusable paint.
The Difficulty Spike Explained
Why do players fail here? It comes down to math. The Blue background consumes approximately 60% of the canvas, yet the Blue cups are partially blocked by the massive White Mother Duck block in the center. The game forces you to choose between filling the background (Blue) or saving space for the details (White, Orange, Yellow). If you prioritize the background too early, you will run out of belt space. If you wait too long, you won't generate the "adjacent clears" needed to shatter the ice. This guide balances these conflicting needs.
Essential Tools and Inventory
Your inventory for this level is split into two tiers: "Active" and "Locked." The Active tier includes the central column: Blue, White, Yellow, and Orange. The Locked tier includes Green and additional Blue supplies trapped behind the ropes and ice. You start with a 0/5 capacity on your conveyor loop. There are no hammer power-ups available in the initial tray, meaning you must rely on clearing adjacent cups (19 total) to shatter the ice naturally.
Phase 1: The "Central Column" Strategy
Understanding the "19" Counter Mechanic
The twin Ice Blocks are HP-based locks. They do not require a specific color to break; rather, they require you to clear 19 cups in the columns immediately adjacent to them. The cups touching the ice are primarily Blue and Green. Since the Green cups are frozen inside the rope section, your primary method of damage is clearing the Blue cups in the center column. Every time you send a Blue cup from the middle to the painting loop, you chip away at the Ice Block's health.
Target Selection: The "Middle-Only" Rule
For the first 15-20 moves, you must adhere to a strict "Middle-Only" rule. Ignore the side columns completely; they are inaccessible due to the ropes. Focus your tapping exclusively on the central stack. Your priority sequence is Blue (for the water), followed by White (for the duck). Do not tap the Yellow or Orange cups yet unless they are blocking a Blue cup you need. The goal is to cycle the central tower down as fast as possible to trigger the Ice break event.
Conveyor Belt Management (0/5 Capacity)
This is the most critical skill for Phase 1. Never let your belt reach 5/5 capacity. Ideally, keep it at 3/5 or 4/5. Why? Because when the Ice breaks, a massive flood of Green and Blue cups will suddenly drop from the top side columns. If your belt is full (5/5), this new influx will be blocked, causing a jam that likely ends your run. Always keep one empty slot open as an "emergency buffer" for the moment the walls shatter.
Handling the Grey Mystery Cups
As you clear the center, you will encounter Grey Mystery Cups marked with a "?". Treat these as wildcards. However, do not tap them immediately. Send them to the loop to occupy a slot, but wait until they are under the spout to see what color they reveal. In 80% of cases, they turn into Orange or Blue. If they turn into Orange and you aren't ready to paint beaks, let the cup ride the loop until you have space or a safe place to dump the excess paint.
Pacing the Mother Duck (White Block)
The Mother Duck is a large white block in the center. It is tempting to fill it completely right away. However, you should only fill it about 50%. Partially filling the White block allows you to clear the White cup from the tray (making room for more Blue) without risking an accidental overfill that might spill into the Green grass zone at the bottom. Keep the White paint flow steady but controlled.
Phase 2: Breaking the Ice and Unlocking Green
The "Shatter Point" and Transition
Once you have cleared roughly 19 adjacent cups, the Ice Blocks will shatter with a distinct cracking animation. Simultaneously, the Ropes on the left and right sides will snap. This is the turning point of the level. The screen will shake, and a new row of cups—mostly Green and Blue—will slide down from the top wings into your active tray.
Immediate Prioritization of Green Cups
The moment the ice breaks, your strategy shifts instantly. Stop tapping Blue cups immediately. Your new primary target is the Green cup stack. You must secure the bottom layer (the grass and reeds) before the Blue water paint spreads downward. If you paint the water first, you risk "bleeding" blue pixels into the green grass zone, which is difficult to correct without a hammer. Secure the perimeter first.
Dealing with the Cup Flood
You will likely have 3-4 cups already on your belt when the new cups arrive. You might panic and tap frantically. Resist this urge. Methodically tap the Green cups. If the belt gets full, stop tapping and wait 2-3 seconds for a cup to pour and clear. It is better to lose a few seconds of time than to create a permanent jam that forces a restart. The "Green Rush" usually lasts for about 10-12 taps.
Establishing the Bottom Perimeter
Use the newly unlocked Green paint to fill the bottom 15% of the canvas. This creates a "hard border" for the Blue water above. By defining the grass line early, you prevent the Blue paint from leaking into areas it shouldn't be. Think of the Green paint as a dam holding back the Blue river.
Resetting the Belt for Phase 3
After the initial rush of Green paint, your belt should be clearing out. Use this downtime to clear any remaining Mystery Cups or clogged Orange cups from the earlier phase. You want to enter Phase 3 with a relatively clean belt and a clear view of the remaining tray, which will now consist mostly of Blue and Yellow finishers.
Phase 3: Detailing and Final Polish
The Yellow Duckling Execution
With the Green grass secure and the White Mother Duck mostly filled, you can now address the five Yellow Ducklings. These are scattered in the blue water. Since Yellow is a distinct color, you don't need to worry about bleeding into the Blue or Green zones too much. Tap the Yellow cups aggressively. If you have multiple Yellow cups on the belt, you can queue them up one after another since they target different specific areas on the canvas.
Precision Handling of Orange Accents
This is the highest difficulty segment of the late game. The Orange paint is used exclusively for tiny details: the beaks and small wing stripes. The margin for error is razor-thin here. If you have a full belt and an Orange cup comes up, do not pour it unless the nozzle is perfectly aligned with a beak. Spilling Orange paint into the Blue water looks messy and costs you points. If the alignment is bad, let the Orange cup ride the loop until it completes a full rotation and aligns better.
The "Blue Sky" Background Fill
By this point, you should have a large stack of Blue cups remaining from the initial phase and the side reserves. Now that the details (Yellow, Green, White) are mostly finished, you can spam the Blue cups. Fill the sky and the deep water. Since Blue is the background color, minor overfills are usually hidden by the other elements. This is the "cleanup phase" where you relax your precision and focus on volume.
Managing the End-Game Loop
In the final 10% of the level, you will likely experience a "slow drain" where colors trickle in slowly. This is normal. Keep the belt moving. If you are missing just one or two pixels to clear the level, look for small pockets of unpainted White on the duck or gaps in the Green reeds. Do not get fixated on painting new large areas; focus on closing the gaps.
Final Verification
Before the level ends, do a quick scan of the four quadrants. Top-Left (Sky/Blue), Top-Right (Sky/Blue), Bottom-Left (Reeds/Green), Bottom-Right (Ducklings/Yellow). Ensure the colors haven't crossed borders. Once the canvas hits 100% completion, the level will end automatically, even if there are a few cups left on the tray.
Advanced Tactics and Speed Run Tips
Efficiency Metrics: The "3-Tap" Rule
For speed runners, the key metric is "Actions Per Second" (APS) during the Ice Break phase. A pro tip is to use the "3-Tap Rule": Never tap more than 3 cups in a row without checking the belt status. This prevents the "Ghost Jam" where you think you are adding cups, but the belt is actually full and stalled. By pausing briefly after every third tap, you ensure the machine is always processing.
The "Mystery Cup" Gamble
Statistical analysis of this level shows that Grey Mystery Cups have a 70% chance of yielding Blue and a 30% chance of yielding Orange/White. If you are desperate for Ice damage and Blue is your primary weapon, treat Mystery Cups as "Free Blue." Tap them aggressively. However, if your Blue background is already 80% done, treat Mystery Cups as a hazard—they are more likely to give you paint you don't need (Blue) than the specific detail colors (Orange/White) you might be lacking.
Predictive Nozzle Alignment
Advanced players can save 2-3 seconds per level by predicting the nozzle's path. Since the loop moves clockwise, you can calculate when a cup will be under the spout. If you are waiting for a specific Green pixel to align, tap the *next* cup in your queue while the current one is pouring. This "queue buffering" ensures there is zero downtime between pours.
Shortcuts for High-End Players
Is there a way to skip the Ice Phase? No. The "19" mechanic is hard-coded. However, you can speed it up. The game counts *any* adjacent clear. This means if you have a power-up that clears a row (if available in your version), using it in the center column counts as multiple hits toward the Ice Block. Standard play requires manual clearing, but if you can trigger a chain reaction in the central Blue/White stack, you can shatter the ice in under 10 seconds.
Mental Fatigue Management
Level 297 is mentally taxing because it requires constant attention to the belt count (0/5) while also managing colors. If you find yourself making mistakes in Phase 3, it is usually due to fatigue from the intense focus of Phase 1. If you fail twice in a row on the "Green Rush," take a 5-minute break. A fresh brain handles the spatial logic of the belt management significantly better than a frustrated one.
Common Mistakes and Solutions
The most common error is "Early Orange Syndrome." Players tap the Orange cup in Phase 1 because it's available. This clogs the belt with a detail color you can't use yet. Solution: Ignore the Orange cup until the ducklings are placed. The second most common error is "The Full Belt Freeze," where players tap 5 cups instantly when the ice breaks. Solution: When the ice shatters, stop tapping for 1 second. Let one cup pour, *then* tap the new Green influx. This maintains flow.