
Level 384
HARDHow to solve Sand Loop level 384? Get instant solution for Sand Loop 384 with our step by step solution & video walkthrough. Sand Loop 384 tips and guide.
Play Sand Loop Now
Experience the puzzle challenge firsthand
Game Screenshots
Sand Loop Level Guides
Level Overview: The Happy House Challenge
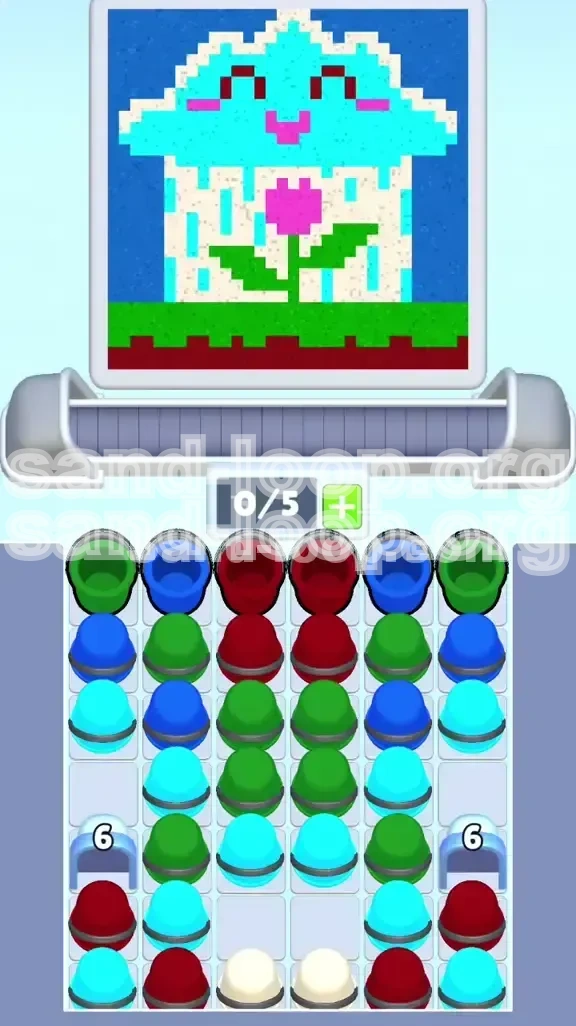
Welcome to the deceptive calm of Level 384, affectionately titled "The Happy House." At first glance, this level appears to be a simple, cheerful pixel art scene featuring a cute blue cottage with a smiling face and a vibrant garden. However, do not let the charming aesthetics fool you. Underneath this innocent exterior lies a logistical nightmare of vertical stacking and color management.
This level is fundamentally a test of your ability to manage vertical dependencies. Unlike previous stages where you could chip away at the edges, Level 384 forces you to confront the "Color Pyramid." The most abundant colors (Cyan and Green) sit atop the most critical, yet scarcest, resources (White and Pink). Your primary bottleneck will be the physical tray space; the game will actively fight your attempts to keep slots open for the essential colors buried at the bottom.
The "Happy House" image is deceptive regarding layering. You are not painting a 2D flat image; you are excavating a 3D mineshaft. The sky (Dark Blue) is easy, but the walls (White) are locked behind the roof (Cyan), and the roof is locked behind the garden (Green). Success in this level comes not from speed, but from strict adherence to a specific digging order.
The Pixel Art Structure
Understanding the artwork is crucial for prioritization. The image is divided into three distinct vertical zones, each presenting a unique challenge:
Top Zone: The Sky and Soil
This layer consists of Dark Blue (Sky) and Maroon (Soil). These are your "garbage" colors for the first half of the level. They are plentiful and mostly block access to the center stack. You must clear these rapidly to prevent slot clogging, but you cannot finish the Soil layer until the end because the Soil cups are buried deeper than the House walls.
Middle Zone: The Roof and Garden
This is the "meat" of the level. A massive block of Cyan (Roof) and Green (Garden/Grass) sits directly on top of the White cups. This is the tallest hurdle. You will spend roughly 60% of your time just clearing this block to reach the floor.
Bottom Zone: The Walls and Details
This is the "Golden Zone." It contains the White (Walls), Pink (Flowers/Cheeks), and the rest of the Maroon. Accessing this zone requires clearing almost everything above it. The efficiency with which you transition from the Middle Zone to the Bottom Zone determines your victory.
Level Objectives and Core Strategy
To conquer Level 384, you must shift your mindset from "painting" to "excavating." Your objective is not just to fill the canvas, but to artificially manage the queue of cups coming down the belt. If you focus only on the canvas, you will fill your tray with Cyan and Green, and when the White cups finally arrive, you will have nowhere to put them.
The Excavation Objective
Your primary goal is to clear a vertical shaft down the center columns of the tray to reach the White cups. The White cups are the keystone of this level; without them, you cannot complete the house structure, and the level becomes mathematically impossible to finish because the overflowing cups will trigger a game-over state.
The Slot Management Objective
You must maintain at least 2 to 3 empty slots in your tray at all times during the first 50% of the level. This "Buffer Zone" is critical. If you have 0 empty slots when a color gate opens or a new layer is revealed, you lose the ability to swap cups, leading to a deadlock.
The Gate Unlocking Objective
The level features Count Gates (Number 6) in the bottom corners. A secondary objective is to clear the top-layer cups in the left and right columns to decrement these counters from 6 to 0. Ignoring the gates until the center is clear is a common mistake; you must chip away at the gates simultaneously with the center excavation.
The Color Sequencing Objective
You must process colors in a specific macro-order: Dark Blue/Green -> Cyan -> White/Pink -> Maroon. Attempting to finish the Maroon soil before the White walls will result in failure because the Maroon cups are physically positioned above the White cups in the tray's reserve.
Step-by-Step Walkthrough
This section breaks down the level into actionable phases. Follow this sequence precisely to avoid the common bottlenecks.
Phase 1: The "Sky High" Clear (Start - 15% Completion)
At the start, your tray will be populated with Dark Blue (Sky), Green (Grass), and the tops of the Maroon (Soil) stacks.
- Step 1: Immediately locate the Dark Blue cups. These are safe to pour. Fill the top background of the sky. Since the sky area is large, you can pour these continuously without worrying about running out of space on the canvas.
- Step 2: Identify the Green cups. Pour them into the grass area at the bottom of the canvas. Crucial: Do not overfill the grass. Leave about 10-15% of the grass unfinished. You need this buffer to handle incoming Green cups later while you are digging for White.
- Step 3: Ignore the Maroon cups for now. If they are in the top row of the tray, move them to the side columns if possible, but do not pour them unless you have absolutely no other moves. Pouring Maroon too early fills the bottom of the canvas, making it harder to visualize where the White walls need to go.
Phase 2: The Great Cyan Dig (15% - 50% Completion)
This is the most dangerous phase. You will encounter a massive wall of Cyan (Roof) and Green cups.
- Step 4: Switch your focus to the Cyan cups. The roof of the house requires a lot of sand, so you can pour these aggressively. However, stop pouring when the roof is roughly 80% complete. You need to reserve some roof space for later in case you get flooded with Cyan.
- Step 5: Monitor your tray capacity. As you clear Cyan, you will expose more Green and potentially the top of the White stack. Keep an eye on the left and right columns.
- Step 6: Begin "Side Chipping." While pouring Cyan/Green in the center, look at the left and right stacks. If you see Dark Blue or Green cups sitting directly above the Count Gates (the numbers 6), prioritize clearing them. Every cup you clear above the gate drops the counter by 1.
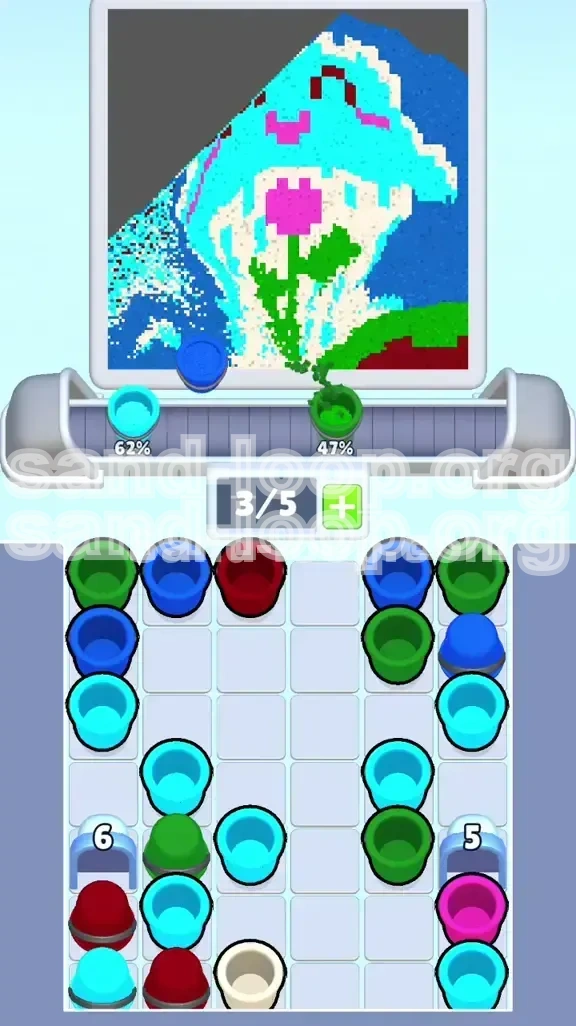
Phase 3: Unlocking the Reserves (50% - 70% Completion)
By now, the Count Gates should be dropping, or the center stack is getting low.
- Step 7: Focus heavily on the columns above the Gates. If the gate counter is at 2 or 1, clear the trigger cups immediately. Opening the gates is vital because they often hold Pink cups or additional White reserves that are blocked by the gate mechanic.
- Step 8: Once a gate opens, a burst of cups (usually Pink or Maroon) will become available. If it is Pink, pour it immediately into the flower petals or the house cheeks. Pink is a rare color in this level and should never sit in your tray taking up space.
- Step 9: If the gate reveals Maroon, assess your tray. If you have space, move them to the side. If your tray is full, you might be forced to pour Maroon (Soil) to finish the ground level.
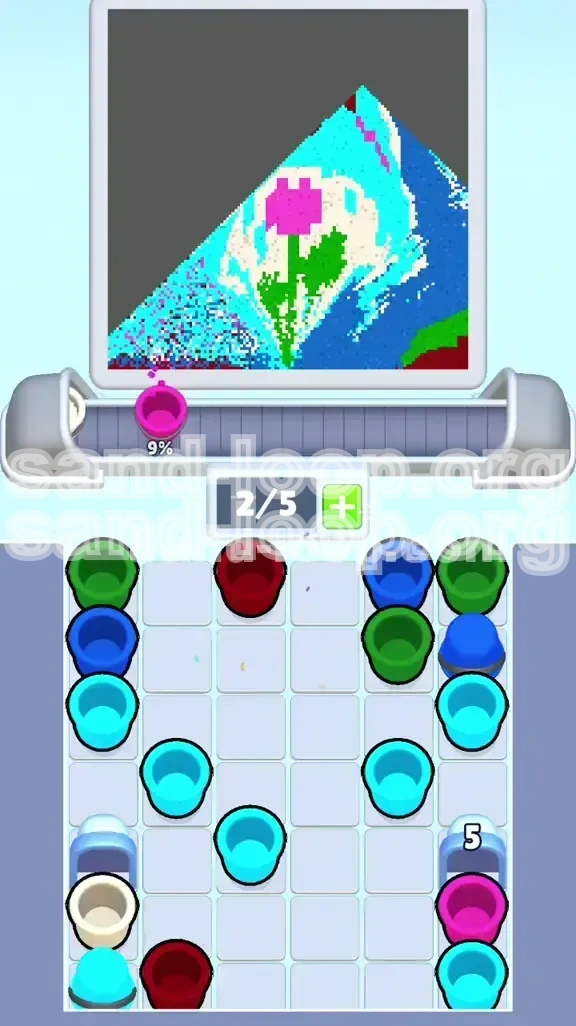
Phase 4: The White Wall Breakthrough (70% - 90% Completion)
This is the turning point. You have cleared enough Cyan and Green that the White cups at the bottom of the center stack are now accessible.
- Step 10: Aggressive White Pouring: Now that the White cups are free, your priority shifts 100% to them. Pour White into the house walls. The walls are a large area, so this will take many cups.
- Step 11: Finishing touches. As you pour White, you will likely be clearing the last of the Cyan and Green from the top of the tray. Finish the Roof and Grass completely now.
- Step 12: Clean up the Pink. Ensure the flower and face details are fully pink. Do not leave 99% completion on Pink; find those last few pixels.
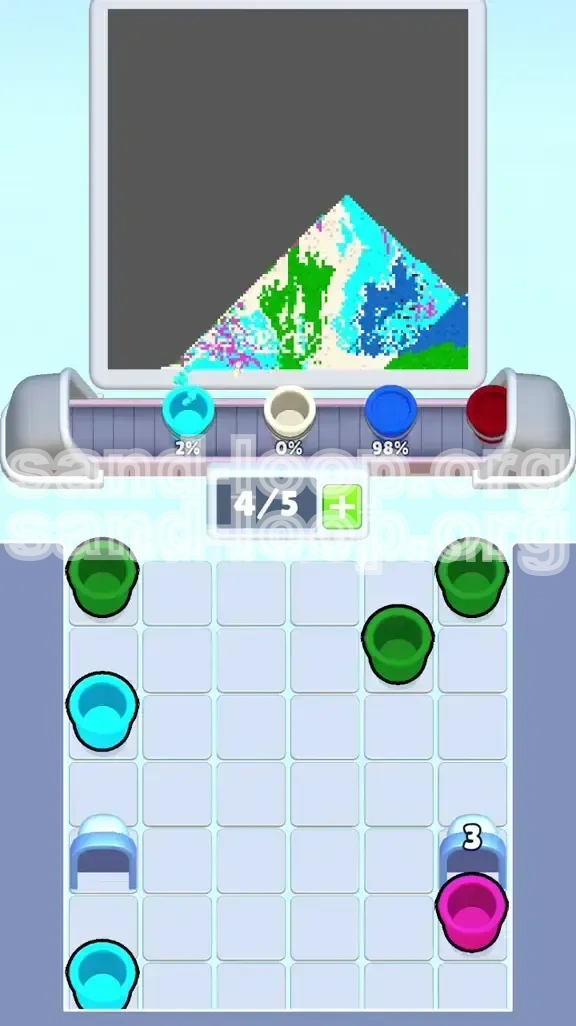
Phase 5: The Final Mop-Up (90% - 100% Completion)
The end game is about clearing the tray.
- Step 13: Finish the Maroon Soil. With the White and Pink done, pour the remaining Maroon cups to complete the ground/soil layer.
- Step 14: Check for "stray" cups. Sometimes a single Green or Cyan cup gets trapped behind a stack. Scan your tray. If you have one Green cup left but the grass is full, look for a pixel in the grass that isn't fully saturated or use it to fix a jagged edge.
Optimal Color Order and Logic
The specific order in which you process colors is the single most important factor in Level 384. Here is the hierarchy of operations, ranked from most important to least.
Tier 1: The Access Colors (Dark Blue, Cyan)
Why this order? These colors are physically located at the top of the tray stacks. You have to deal with them first to reveal what is underneath. Dark Blue is low risk, so it goes first. Cyan is high volume but necessary to clear to reach the White cups buried beneath.
Tier 2: The Critical Colors (White, Pink)
Why this order? These are the scarcest resources. White is buried at the bottom of the main stack. Pink is locked behind gates or buried under side stacks. You cannot start these until you have cleared the Tier 1 colors. However, once they are available, they jump to the front of the queue because running out of tray space while holding a White cup is the primary cause of failure.
Tier 3: The Fillers (Green, Maroon)
Why this order? Green is abundant and clogs the tray. It is used mostly for the grass. You pour it only when you have excess space or when it is blocking access to other cups. Maroon is last because it represents the bottom layer of the image (the soil) and is often at the bottom of the stacks, meaning it naturally appears last in the excavation process.
The "Sandwich" Technique
The best strategy for this level is to sandwich your work. Do a layer of Sky (Blue), then dig for Roof (Cyan), then dig for Walls (White), then finish the Grass (Green), and finally the Soil (Maroon). This follows the vertical stacking order of the physical cups in the tray.
Key Tips and Notes for Mastery
These tips are designed to help you manage the chaos of the mid-game.
The "Slot 5" Rule
Always try to keep your 5th slot (the far right or left) empty if possible. This "Buffer Slot" allows you to pick up a cup from a full stack, swap it, and place it down without getting stuck. If you play with 5/5 slots full for too long, a single wrong color from the belt will end your run.
Visualizing the Hidden Layers
When you look at the tray, don't just see the top cup. Visualize that a Green cup is sitting on a White cup, which is sitting on a Maroon cup. If you need White, you must mentally calculate: "I need to move this Green, then this Cyan, to get that White." This mental simulation prevents you from making useless moves that just shuffle cups around without progress.
Using the "Cyan Overflow"
Sometimes, you will have too much Cyan and the roof is full. Look at the sky. If the Dark Blue and Cyan are similar shades (or if the art style allows), you can sometimes blend Cyan into the upper sky background to buy yourself more tray space. While technically "incorrect" color matching, in a pinch, it prevents a game over. (Use this only as a last resort!)
Gate Trigger Awareness
The Count Gates are not just obstacles; they are timers. If you see a gate counter at "1" and you have a move that clears that specific cup, do it immediately, even if it interrupts your current color combo. Opening the gate releases pressure from the side columns and often grants you the specific color (Pink) you are desperate for.
Don't Fear the "Undo"
If you make a move that results in a color being buried behind an immovable stack, hit Undo immediately. In Level 384, burying a White cup behind a column of Maroon is a fatal error that usually cannot be fixed until the very end, causing a traffic jam in your tray.
Common Mistakes to Avoid
Learn from the failures of others. Here are the most common ways players fail Level 384.
Mistake 1: The Early Soil Pour
Many players see the Maroon cups at the top of the level and pour them immediately to "get them out of the way." This is wrong. The soil is at the bottom of the picture. By pouring it early, you lose your safety net. Later, when you are trying to fit White cups into the tray, you won't be able to dump them anywhere because the bottom of the screen is already finished.
Mistake 2: Ignoring the Side Columns
Focusing 100% on the center stack is a trap. While the center holds the White walls, the side columns hold the gates. If you ignore the sides, you reach the bottom of the center with a full tray, only to realize the Pink for the flower is still locked behind a gate you haven't opened. You are now stuck.
Mistake 3: Over-filling the Roof
The roof (Cyan) is large. Players often fill it 100% before touching the walls. This leaves them with no place to put the excess Cyan cups that inevitably continue to come down the belt. Always stop pouring a color at 90% completion. Leave that 10% buffer for emergency tray management.
Mistake 4: Hoarding Pink
Because Pink is rare, players often save it, thinking they need to be careful. This leads to the Pink cups occupying valuable tray real estate for minutes at a time. As soon as you see Pink, pour it. It is a high-priority color that needs to be expelled from the tray instantly to make room for the digging work.
Solutions for When You Are Stuck
Feeling trapped? Here are specific scenarios and how to escape them.
Scenario 1: The "Full Tray" Lock
Situation: Your tray is full (5/5), and the belt is bringing a color you don't need (e.g., Green), but you are waiting for White to finish the house.
Solution: You must sacrifice progress. Find a color on the canvas that is "over-full" or slightly imperfect. Scrape a little bit of Cyan or Green off the canvas to free up a partial cup slot, then use that space to shuffle the incoming Green cup into a better position. If you are truly stuck, you may need to temporarily pour Green onto the Grass (even if it's already full) to force a match and clear the slot.
Scenario 2: The "Buried White" Crisis
Situation: You can see the White cups at the bottom of the stack, but they are covered by a single Cyan cup, and you have no room to move the Cyan.
Solution: Look at the Roof on the canvas. Is there any pixel that isn't perfectly Cyan? Maybe a jagged edge or a corner? Pour that single Cyan cup there. If the roof is truly 100% done, you might have to pour it onto the Sky (Dark Blue) if the shades are close enough, or bite the bullet and undo moves until you have a slot to store the Cyan temporarily.
Scenario 3: The Gate Won't Open
Situation: The gate counter is at 1, but you don't see any cups directly above it.
Solution: The trigger cup might be one layer back or obscured by the perspective. Look closely at the columns immediately adjacent to the gate. Clear the top cup of those columns. Often, the game logic considers the "column" as the trigger area, not just the pixel directly above the gate number.
Speed Run Tips and Shortcuts
Once you understand the level, you can optimize your time. These tips are for players aiming for 3-star efficiency.
The "Combo" Start
Don't pour cups one by one. Pick up a Dark Blue, pour, pick up the next Dark Blue, pour. Try to chain identical colors. While Level 384 doesn't have a time limit in the traditional sense, keeping the flow fast prevents you from overthinking and making logic errors.
Pre-Gate Clearing
In the first 10 seconds, scan the tray. Identify which side columns are feeding the gates. Prioritize clearing the top 2 cups of both left and right columns immediately. This gets the gate counters ticking down to 4 or 5 early, so by the time you are ready for Pink, the gates are already close to opening.
Macro-Movement
Stop looking at individual pixels. Look at "Percentage Complete." If the grass is 50% done, you can safely ignore Green cups for a while. If the roof is 50% done, stop pouring Cyan. This macro-view allows you to make decisions in milliseconds rather than seconds.
The "Finish Line" Dash
When you reach the bottom 10% of the tray (the Maroon layer), speed up. At this point, the level is won. You have no more digging to do. Just rapidly pour the remaining Maroon and any leftovers into their spots. Don't try to be neat; just fill the meter to 100% to secure the win.