
Level 96
HARDHow to solve Sand Loop level 96? Get instant solution for Sand Loop 96 with our step by step solution & video walkthrough. Sand Loop 96 tips and guide.
Play Sand Loop Now
Experience the puzzle challenge firsthand
Game Screenshots
Sand Loop Level Guides
Sand Loop Level 96: The Pixel Frog - Complete Strategy Guide
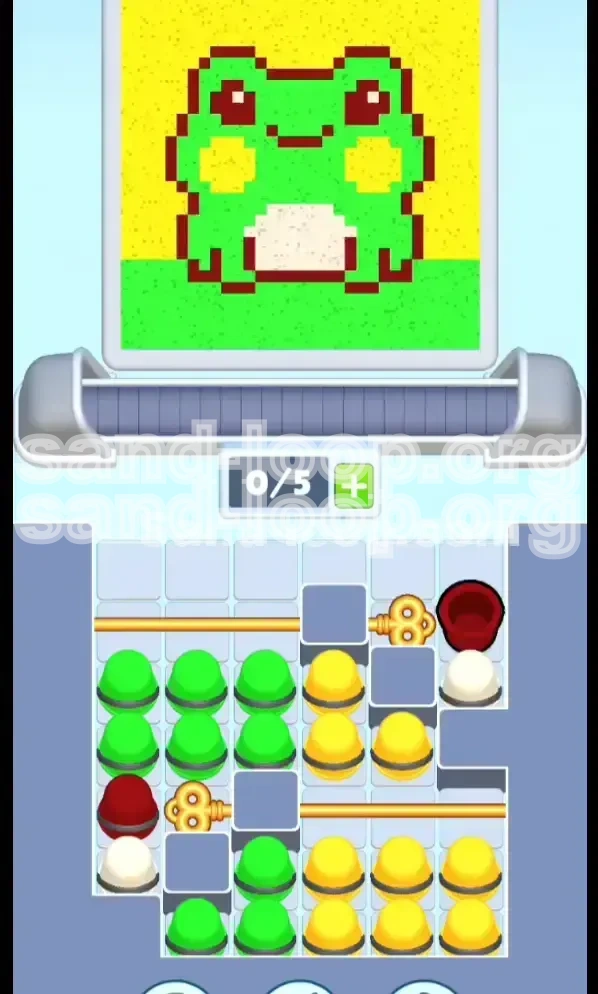
Welcome to Level 96 of Sand Loop. This stage is a significant shift from the standard ice-breaking or speed-fill levels you may have encountered earlier. Level 96 is a pure logic puzzle disguised as a cute art project. You are tasked with painting a Pixel Frog, but the game restricts your ability to do so through a complex locking mechanism.
This guide will break down the mechanics of the "Pixel Frog" challenge. We will analyze the limited slot capacity (only 5 active cups), the dual-gate locking system, and the precise color order required to achieve 100% completion without getting stuck. By understanding the dependency chain between the Dark Red outline and the bulk fill colors, you can turn this frustrating level into a satisfying logic win.
Level Mechanics: The Lock and Key System
The core challenge of Level 96 is not the painting itself, but accessing the paint. The level utilizes a "Double Gold Key Lock" system.
- Slot Limitation: Your conveyor belt has a maximum capacity of 5 cups. Once full, you cannot select new cups until ones are processed.
- The Gates: There are two physical barriers blocking your paint supplies. You cannot access the main bulk of Green or Yellow paint until these are removed.
- The Keys: The keys are not items you pick up; they are sitting on top of specific Dark Red cups. You must process these specific cups to trigger the unlock animation.
Color Palette Analysis
Understanding the volume and function of each color is crucial for planning your queue.
- Dark Red (High Priority / Low Volume): Approximately 10-15% of the image. This is used for the frog's outline and eyes. Crucially, the cups holding the Gold Keys are Dark Red. This makes Red your "Unlock Color"—you cannot start the bulk of the level without addressing this first.
- Bright Green (Medium Priority / High Volume): Approximately 40% of the image. Used for the frog's body and the grass. These cups are locked behind the Bottom Gate initially. Over-queuing Green is the most common cause of failure.
- Yellow (Medium Priority / High Volume): Approximately 40% of the image. Used for the sky and cheek blushes. Locked behind the Top Gate. These cups are plentiful on the right side of the tray.
- White (Low Priority / Low Volume): About 5-10% of the image. Used strictly for the belly. It is easy to forget this color in the chaos of unlocking gates.
Visualizing the Canvas
The final image is a 2D Pixel Frog sitting on grass.
- Background: Solid Yellow sky.
- Mid-ground: Green frog body with a White belly patch.
- Details: Dark Red outlines defining the shape, eyes, and mouth.
Because the outline (Dark Red) sits on top of the background and body layers visually, the game physics require you to be careful with the order. If you flood the canvas with Green or Yellow too early, you might not be able to place the precise Red lines later without "dirtying" the pixels. However, the game generally allows outline colors to overlay flat colors, provided there is space.
Winning Conditions
To secure the three-star rating on Level 96, you must meet the following conditions:
- 100% Fill Rate: Every pixel must be colored. Leaving the background partially transparent or missing a spot in the grass will result in failure.
- No Overflow: Do not overfill sections. Pouring Green into the Yellow sky will lower your accuracy percentage.
- Efficiency: While not a strict timer level, keeping the conveyor belt moving without stopping to wait for cups is the key to a high score.
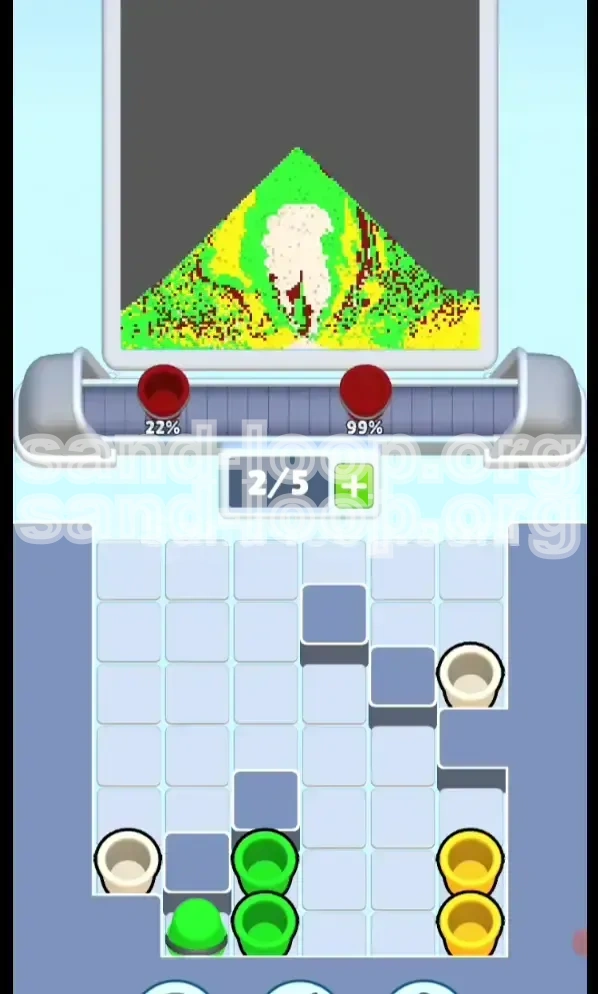
Step-by-Step Walkthrough: Phase 1 - The Unlock
The first phase of Level 96 is purely mechanical. You cannot paint the frog yet. Your sole objective is to clear the physical gates that are blocking your paint supplies. This phase tests your ability to manage the 5-slot queue effectively.
Step 1: Prioritize the Top-Right Dark Red Cup
As the level starts, scan the top-right sector of your cup tray. You will see a Dark Red cup with a Gold Key icon resting on top of it.
- Action: Immediately tap this cup to send it to the dispenser.
- Result: The dispenser will process this cup. It will paint the initial red outlines and, more importantly, trigger the key mechanism.
- Effect: The Top Gate slides open. This grants you access to the stack of Yellow cups and the White cup located in the top-right quadrant.
Step 2: Clear the Queue for the Bottom Key
Do not spam taps on the newly available Yellow cups yet. You need to maintain 1 or 2 empty slots in your conveyor belt for the next critical move.
- Scanning: Look at the bottom-left sector of the tray. You will see another Dark Red cup holding the second Gold Key.
- Constraint: You cannot reach this cup if your 5-slot belt is full of garbage cups you don't need yet.
- Tip: If your belt is full, you must wait for the first Red cup to dispense before tapping the next key. Patience here prevents a deadlock.
Step 3: Execute the Bottom-Left Unlock
Once you have a slot available, immediately target the bottom-left key.
- Action: Tap the Dark Red cup holding the Gold Key in the bottom-left corner.
- Result: The dispenser processes this second red cup.
- Effect: The Bottom Gate slides open. This unlocks the massive supply of Green cups needed for the frog's body and the grass.
Step 4: The White Belly Setup
With both gates open, the tray layout shifts. You should now see the White cup accessible (usually located near the top or center, previously blocked).
- Action: Tap the White cup immediately after the second Red cup.
- Reasoning: The White cup needs to land on the frog's belly. It is safer to dispense this while the Red outline is still fresh or just finishing. The belly is a "protected" zone, so getting the White paint down early ensures you don't accidentally cover it with Green later.
Step 5: Assess Your Conveyor Status
At this point, you should have 2-3 cups in your queue: the two Dark Reds and the White.
- Check: Are both locks open?
- Check: Is the White cup queued?
- Preparation: Ensure you have at least 2 empty slots before moving to Phase 2. You will need them for the bulk Green/Yellow flood.
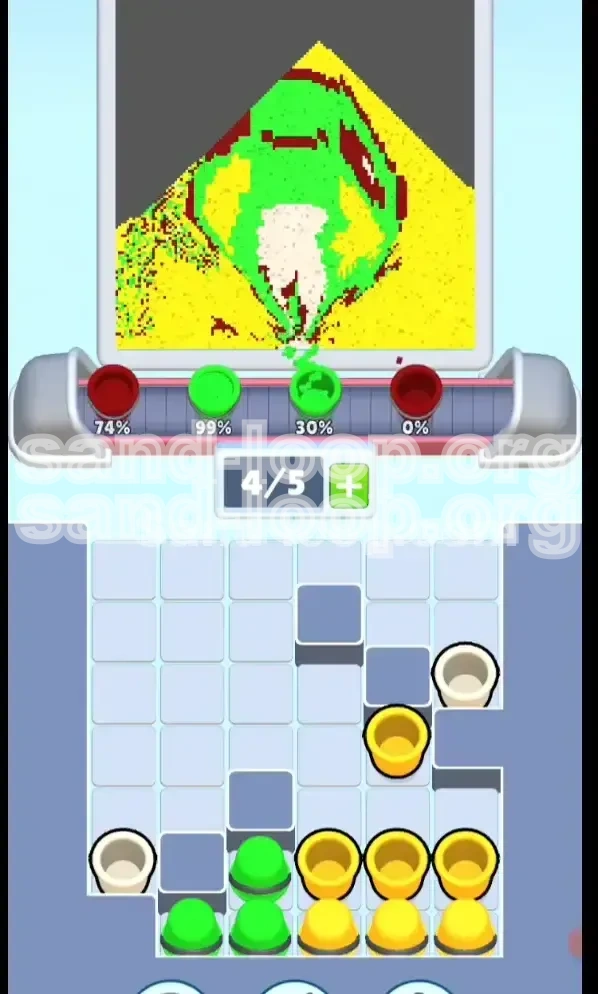
Step-by-Step Walkthrough: Phase 2 - The Fill
Now that the board is unlocked, the puzzle transforms into a resource management game. You have access to unlimited Green and Yellow, but limited slot space. The goal is to fill the background and body without clogging the machine.
Step 6: The Green Burst (Body and Grass)
Focus your attention on the left side of the tray where the Green cups are stacked.
- Action: Tap two Green cups in quick succession.
- Strategy: Do not tap 5 Greens at once. If you queue 5 Greens, you cannot fix any mistakes or add other colors for a long time. A "burst" of 2 or 3 allows the paint to hit the grass and body, filling about 20-30% of the image, while keeping your queue flexible.
- Visual Cue: Watch the canvas. As the green hits the frog's back and the ground, wait for the liquid to settle.
Step 7: The Yellow Sky (Background)
While the Green is processing, shift your eyes to the right side of the tray.
- Action: Tap two Yellow cups.
- **Reasoning:** The Yellow sky covers the top 40% of the canvas. By alternating between tapping Green and tapping Yellow, you keep the fill rate even.
- Danger Zone: Ensure the dispenser nozzle moves to the top section of the canvas for the sky. If it is still hovering over the grass, your Yellow paint will spill into the green zone, creating a muddy brown.
Step 8: Alternating and Layering
This step is an iterative process. You are essentially "knitting" the image together.
- Pattern: Green-Green-Pause. Yellow-Yellow-Pause.
- Monitoring: Keep an eye on the percentage counter.
- Adjustment: If you see the frog's body is full but the grass is patchy, focus purely on Green taps until the grass is solid. Conversely, if the body is done but the sky is empty, switch to Yellow.
Step 9: Managing the Cheeks
The Pixel Frog has yellow cheeks. This is a specific detail that often confuses players.
- Mechanic: The game is programmed to apply Yellow to the cheeks when the background is being filled.
- Tip: You do not need a special tool for this. Simply ensuring the Yellow background reaches 100% coverage will automatically trigger the cheek fill. Don't stop pouring Yellow just because the sky looks blue-ish or done; keep going until the counter confirms the yellow section is complete.
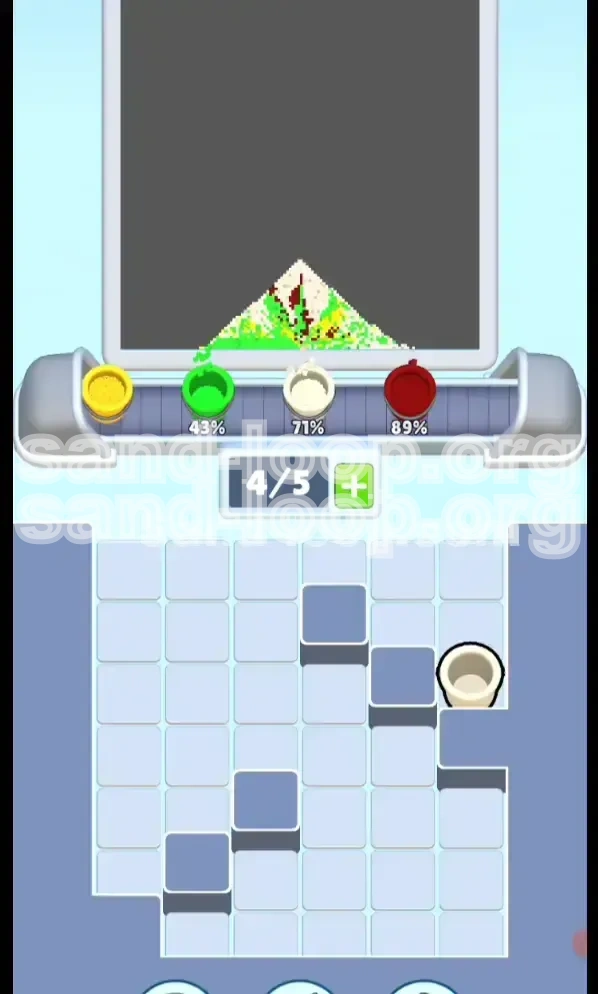
Step 10: Final Color Sweep
As you approach the 90% mark, you might notice small gaps.
- Action: Check your tray for any remaining Dark Red or White cups.
- Usage: Use these to patch up the outline or the belly if the initial fills weren't perfect.
- Warning: Do not use a Dark Red cup if the eyes are already filled. Adding more red to a finished eye can cause "overfill" errors in some game physics engines, lowering your score.
Pro Tips: Avoiding Common Pitfalls
Level 96 is designed to trick you into rushing. The sheer number of Green and Yellow cups can tempt you into spamming taps. This section details the specific errors that lead to failure.
The "Slot Deadlock" Mistake
This is the #1 reason players fail Level 96.
- The Scenario: You tap 5 Green cups immediately when the gate opens. Suddenly, the game dispenses a White cup that you critically need for the belly, but your queue is full. You have to wait for all 5 Greens to process (which takes forever) before you can grab that White cup.
- The Fix: Never fill your queue to 5/5 unless you are 100% certain of the next 5 moves. Keep it at 3/5 or 4/5 to allow for dynamic adjustments.
Color Bleeding
The physics engine in Sand Loop simulates liquid flow.
- The Risk: If you pour Green while the dispenser nozzle is still positioned over the Yellow sky area (due to a previous pour), the Green will bleed into the sky.
- The Fix: Watch the nozzle/spout animation. Wait for it to center over the grass before tapping Green. Wait for it to move up before tapping Yellow.
Ignoring the Dark Red Outline
Some players try to fill the entire background with Yellow/Green first, thinking the outline can be added last.
- The Consequence: While you can usually overlay outline colors, doing it at the very end (95% completion) is risky. If the canvas is "full," adding a new layer of Red might push the liquid physics to overflow or push other colors out of bounds.
- Best Practice: Trust the Phase 1 unlock. Getting the Red down early establishes the "container" for the other colors.
Forgotten White Belly
The White cup is scarce. There are usually only one or two in the entire level.
- The Mistake: Leaving the White cup until the very end. If you accidentally cover the belly area with Green (because you missed the spot), the White cup won't fix it—it will just sit on top or fail to fill the gap.
- The Fix: Dispatch the White cup in Step 4, as outlined above. It is the anchor of your painting.
Advanced Strategy: Speed Running
Once you have beaten Level 96 and understand the logic, you might want to optimize your time. A speed run requires breaking some of the "safe" rules mentioned earlier.
Pre-loading the Queue
Speed runners utilize the delay between the tap and the dispenser.
- Tactic: While the first Dark Red cup is unlocking the top gate, visually scan for the second Dark Red cup.
- Execution: Tap the second Dark Red cup before the first one has even finished dispensing. This keeps the machine running at 100% efficiency with zero downtime.
Bulk Tapping
If you are confident in your nozzle control, you can increase the batch size.
- Tactic: Instead of tapping 2 Greens, tap 4 Greens.
- Risk/Reward: This fills the screen incredibly fast, but if the nozzle drifts, you fail. Only attempt this if you have memorized the nozzle movement pattern.
Ignoring Perfect Overlap
For a 3-star score, you usually need pixel perfection. For a pure "clear" time, you can be sloppier.
- Tactic: Don't worry about a few pixels of Green bleeding into the Yellow. As long as the percentage counter hits 100%, the game will register a win. Stop trying to "fix" minor bleeds and just focus on keeping the queue full of the correct dominant color.
Summary and Checklist
Level 96, the Pixel Frog, is a test of patience and queue management. It forces you to respect the unlock mechanics before rewarding you with the satisfying fill phase.
Pre-Game Checklist
- Identify Keys: Locate the two Dark Red cups with Gold Keys before tapping anything.
- Plan the Route: Top-Right Red -> Bottom-Left Red -> White -> Green/Yellow Split.
- Mind the Belt: Keep 2 slots open for the first 10 seconds of the level.
Execution Checklist
- Unlock: Did both gates slide open?
- Base: Is the White belly secured?
- Fill: Are you alternating Green and Yellow to prevent nozzle drift?
- Final: Did you check for leftover outline cups?
Follow this guide, and the Pixel Frog will go from a nightmare of locked gates to a routine victory in your Sand Loop journey. Good luck!